Showing posts with label resin buildings. Show all posts

Wednesday, 11 March 2026

Lots of buildings - click the picture and scroll down

 Well, I've finally finished these off, all ten of them. Scroll down to see the lot;


All of these buildings are in 15mm scale and are resin casts from Hovels. The mounted figures are for scale and are officers from the Lurkio Nine Years' War range, now sold by Gripping Beast.


I am pretty happy with these. I think that they'll be good for everything from the late-17th century right up to WW2. Some clearly suit the Netherlands/Belgium more than elsewhere and a few really need to be used together to make up an urban setting, but others might be OK for Normandy (at a pinch). In any case, I think that these models have a certain charm that you don't get from MDF buildings and I deliberately set out to paint them in a kind of impressionistic way rather than going for a totally realistic appearance.

The backdrop is, once again from a Jon Hodgson Handiwork Games book.


Monday, 6 April 2020

A few quick scenic resin pieces.

I've had all these 15mm resin odds and ends on my painting table while I've also been painting other things. I always like to have something that I can work on while I'm waiting for the paint to dry. There is quite a lot here, so you'll need to scroll down to see everything. I'm really pleased with the last thing here.

These were all finished on Saturday, so I was able to use them for my games at the weekend. First some hedges and a gate, from, I think Coritani; The house, from Hovels, and the figures, Essex ones from my 18th century imagi-nations Syldavian army, are just for scale.


You'll notice that the gate is damaged. This was because there was a big blob of resin that I was unable to remove without making a hole, so I decided to make the hole a feature. I think that it works OK.


I was going to flock the hedges but they look OK just painted. I also did some walls. I can't remember who makes these. The figure is, once again just for scale.


These can be used to make a complete enclosure, unfortunately without a gate. I shall have to investigate options to correct this problem.


Next, a couple of gun emplacements and lengths of earthworks. I bought these at the club's annual tabletop sale a couple of years ago. No idea what make they are. I didn't use these at the weekend but they are perfect for the black powder era and also for more modern games. The cannon is a 15mm Peter Pig one from my ACW Union army.


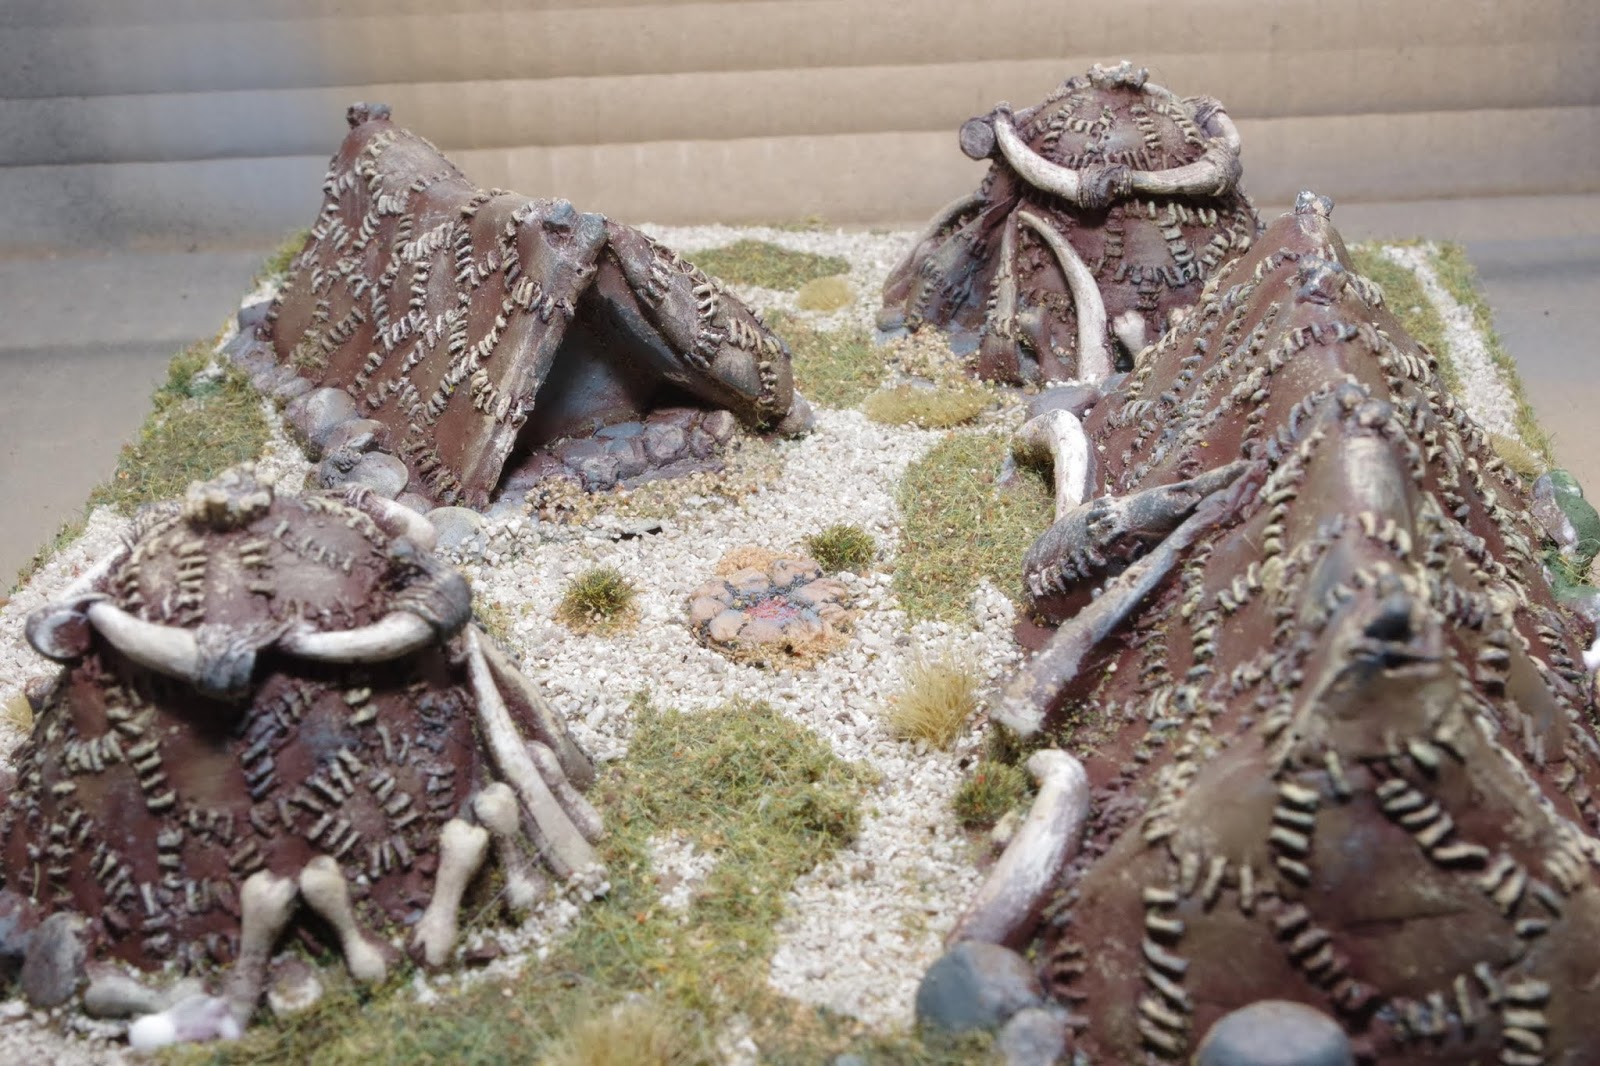
Finally, my pièce de résistance; a fantasy barbarian encampment. I spent a lot of time on this, because I wanted it to look like something worth defending in a battle. The figure is again there for scale. She is one of my Copplestone 15mm Barbarica magic users for my Sword and Spear Fantasy Hyborian horde.


Note the campfire, which I made from ballast and tiny stones, glued to a 1cm circular MDF base, which I glued into an indentation I cut into the basing material, a rectangle of corrugated cardboard.


I really like these tents with their embellishments made from mammoth tusks. I bought them from a club member who had them on a Bring and Buy table back at the end of last year when we were running our Alien Squad Leader tournament.


Friday, 24 January 2020

More resin scenic stuff

I am always looking for more 15mm scenic items, especially for IABSM and Chain of Command WW2, and I've bought some nice pieces from Ironclad Miniatures before. So, at the club's latest Reveille show, back in November last year, I bought a few more odds and ends which will fit in with the overall collection. 

First, a couple of burnt down wooden buildings, with just their brick chimneys still standing. Perfect for the Eastern Front, but also with possibilities for games set elsewhere;


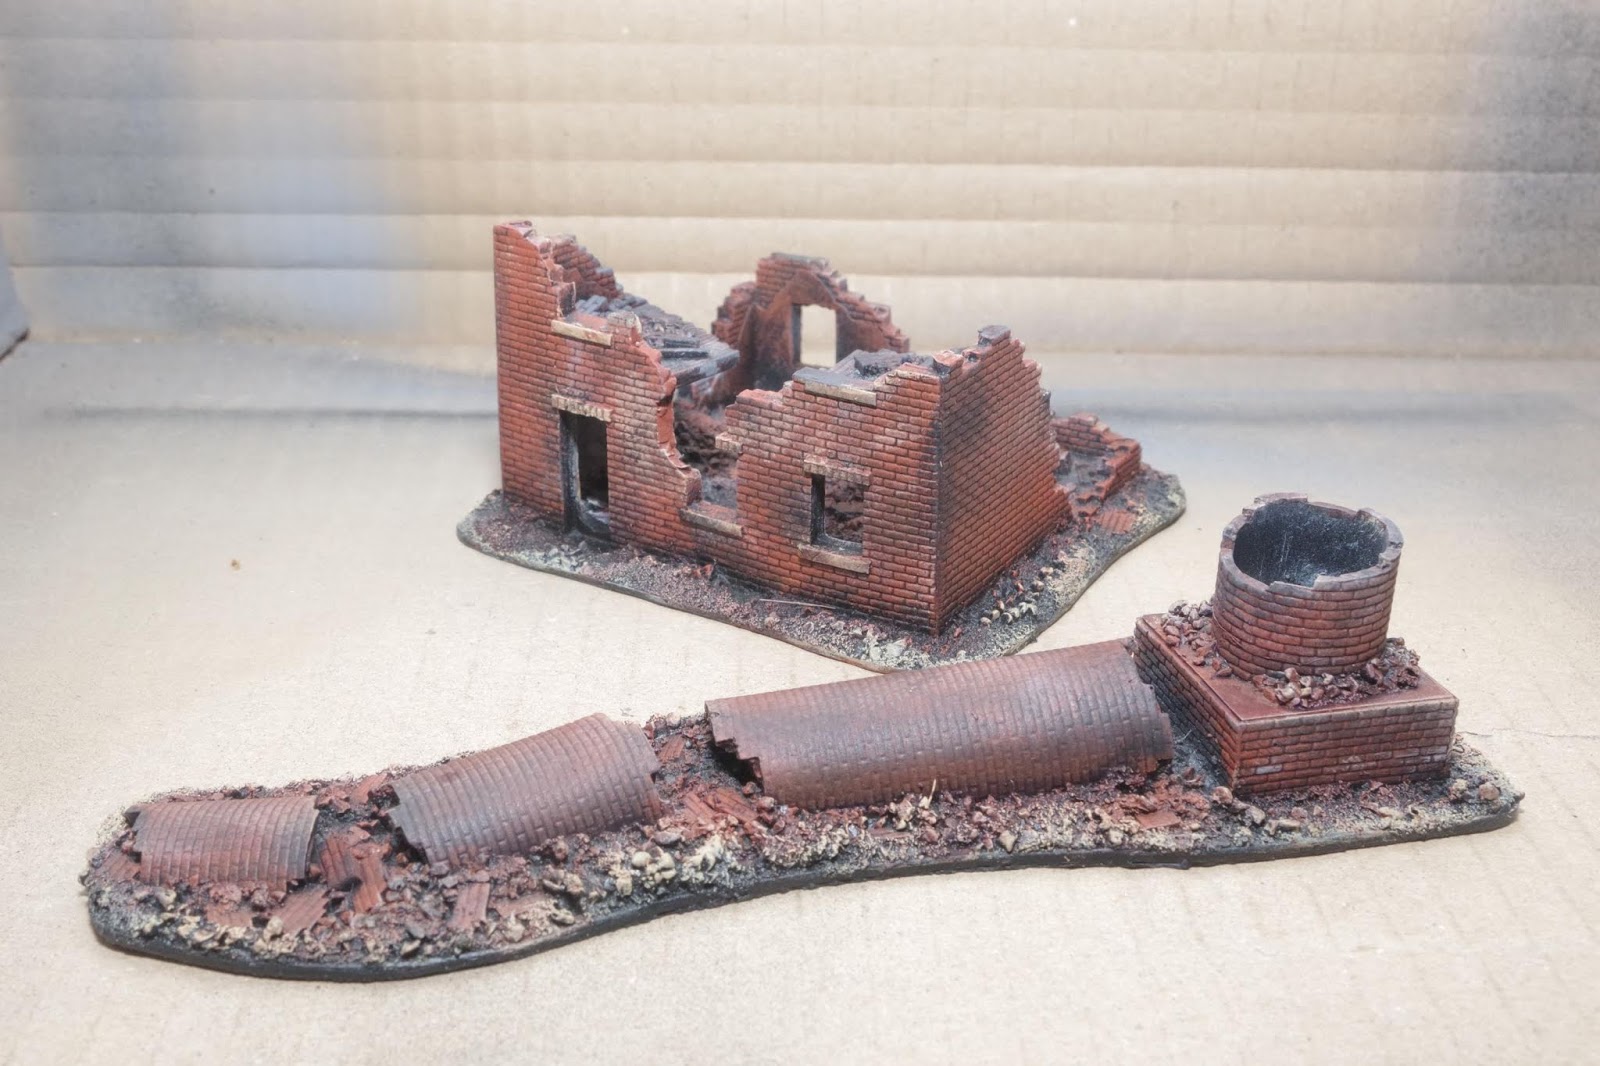
Next, another ruined house and a fallen tall chimney which will be perfect with the bombed factory I bought the year previously.


As with all the resin pieces I've bought from Ironclad, the models are really crisp and cast using high quality resin. They are a joy to paint and look excellent on the table.

The 15mm range is quite large and there are a few nice buildings that are designed for games set in Normandy, which I really should buy sometime.

In addition to these buildings, I also got round to painting up a few resin buildings from The Square, who still don't seem to have a website, but they do have a Facebook page. The Square seem to have a presence at most wargames shows, and I always have a browse of their stuff because there is generally something I see and think would be useful. The latest things from that that I've pained are some wooden thatched houses and sheds, which I think will be perfect for the Eastern Front in WW2.


I could see these popping up in earlier periods too, most likely in my 18th century Imagi-nations Sharp Practice games 

Monday, 9 December 2019

Seize the crossroads - a 15mm ACW AAR

Here is another Sharp Practice game played at the club yesterday.

I took the job of commanding the Confederate forces against Kev's Union troops. Both of us were using 15mm Peter Pig figures. The buildings were my Peter Pig resin ones and all the scenery was the club's, apart from my 15mm snake fences. Here is the table from the Union side. I would be entering from the road on the upper edge of the table.


To add visual interest, I placed various civilians around the hamlet, together with some livestock.


Kev had a strong force from th54th Regiment Massachusetts Volunteer Infantry, an Afro-American unit, while I fielded a larger, but less well-trained force from the imaginary Hazzard County Volunteers and Militia, commanded (of course) by Major J.D. Hogg.

Both forces were soon advancing across the table towards the strategically-important crossroads. 


The main body of Rebel infantry moved towards the large farm, while the Militia, under Sgt. Roscoe P. Coltrane marched along the road towards the crossroads. If they could get there first, the idea was that they could resist the Union advance, even though they were only equipped with smoothbore muskets. Both sides deployed skirmish troops, with the Union side proving to be better shots.


The 54th Massachusetts got into the hamlet in good time, with all their infantry taking up a commanding position pretty quickly. This would prove decisive.


The Hazzard County Militia, a poorly-trained bunch, came under sustained fire from the well-drilled Union troops, who were firing controlled volleys to good effect. The Confederate skirmishers on the left also took casualties, limiting their usefulness.


Although Rebel fire was causing some damage to the Union infantry, the superior musket drill of the Union side took a heavy toll on the hapless militia, forcing them to withdraw with many casualties and a lot of shock. Before long their formation would break and the group led by Sgt. Coltrane would flee the field. This cause a rapid fall in Rebel morale.


Maj. Hogg managed to get the main body of Hazzard County Volunteers into a firing line and musketry was exchanged with the Union troops. The local civilian population was by now fleeing in panic from the battle (they were activated whenever a blank chip was drawn from the bag, moving in the direction indicated by a scatter dice, with distance being decided by rolling 1D6)


With depleted ranks, it was only a matter of time before the Confederate defenders were defeated. The only question of whether they would be forced to flee or their morale would drop to nothing.

In the end, the battle was decided by morale. Maj. Hogg was struck by a Union ball and on the roll of 1, he was killed. 

So, a pretty comfortable victory for Kev's Union Infantry, a clearly superior force, which even though it was outnumbered by the Rebels was better drilled and capable of sustained accurate musketry. The Militia were unable to make any impact, being subjected to volley after volley before they were even able to fire a shot. It was their loss which really decided the outcome. 


Monday, 2 September 2019

Encounter at Maggie's Farm - Sharp Practice in the ACW

Yesterday at the club was another opportunity to Spread The Lard again. This time it was the turn of a different player called John and the rules were Sharp Practice. The setting was the early period in the American Civil War, when most troops were rated as Conscripts and Volunteers and some on the Confederate side were still equipped with smooth bore muskets. All the figures and buildings are mine, from Peter Pig. The snake fencing is also mine, from 4Ground and the mat and scenery belong to the club.

The scenario was two small forces who were both aiming to capture the small community known as Maggie's Farm. The table looked like this, with Maggie's actual farm on the left, the community chapel on the hill and a smaller farm further away behind a wooded hill;


The Rebels, commanded by John would enter from the middle of the right-hand side of the table and my Union troops would deploy from directly opposite.

The Rebel troops consisted of;

3 groups of 8 Georgia State Volunteer infantry (rifled muskets), led by Captain Roscoe P. Coltrane (status III), with a musician, a mule train and a status I sergeant.
2 groups of 10 Hazzard County militia (muskets), led by Maj J.D. Hogg (status II) and a status I sergeant
1 Group of 6 Davenport's Zouaves skirmishers (rifled muskets), led by Sgt Enos Strate (status I)

The Union forces were;

3 groups of 8 infantry from the 3rd Miskatonic Volunteers (rifled muskets), led by Captain Randolph Carter (status III), with a musician, a mule train and a status I sergeant.
2 groups of 8 infantry from the 3rd Miskatonic Volunteers (rifled muskets), led by Lt. Charles Dexter Ward (status II) and a status I sergeant
1 Group of 6 Innsmouth Sharpshooters skirmishers (rifled muskets), led by Sgt Upton Pickman (status I)


Capt. Coltrane's troops were soon in action, firing a Controlled Volley with First Fire at long range, with devastating effect on the two group formation led by Lt. Ward.


Major Hogg's militia were soon deployed up against the fencing, firing uncontrolled at Ward's Miskatonic infantry. You can see the Rebel skirmishers just behind them, with a point of shock from some inconclusive fire from the green-coated Innsmouth Zouaves.


The main body of Georgia Volunteers maintained position on the hill overlooking Maggie's Farm, waiting for the appearance of more Union troops, while also firing at the target in front of them.


Repeated volleys of musketry from both the Georgia Volunteers and the Hazzard County Militia wreaked further havoc on the Miskatonic Volunteers, who were now much reduced, with their firing further hampered by damp powder (signified by the red marker).


The delayed arrival of the rest of the Miskatonic Volunteers saw them advancing in open column towards the small community chapel on the hill. Capt. Carter was attempting to outflank the main body of Rebels on the hill.


On the Confederate left, the militia and Davenport's Zouaves had pretty much eliminated the generally ineffective Innsmouth Sharpshooters.


Capt. Coltrane managed to bring his command under control and began to manoeuvre his troops to defend their position against the advancing Union column in the distance.


Looking across the fields towards Maggie's Farm, the weakness of the Union position is apparent. Would Major Hogg (an honorary rank only, he is actually the local Mayor)  advance his militia or let them continue to fire uncontrolled? Well, probably showing his lack of military experience, he chose to let them carry on firing. They would eventually force Lt. Ward to withdraw after suffering more losses. 


Meanwhile, the Union column had deployed into formation along the fence line around the farm on the Rebel right flank. However, Davenport's Zouaves had moved from their earlier position acroos the field towards the main Union force by the chapel, firing into its flank, causing casualties and double shock. Even more unfortunately, accurate musketry from the Rebels on the hill was whittling the Miskatonic Volunteers down even more, forcing one group to break from the formation, all of this before the Union troops had even delivered their first volley.


Capt. Coltrane dispatched a group of troops under his sergeant to move around the far side of the farmhouse.


By this point, the Confederates clearly had the upper hand. Even though the Miskatonic Volunteers had managed to get off a Controlled Volley, mainly hitting the smaller group of Confederates and wounding the sergeant, Union morale was falling and the number of casualties meant that Maggie's Farm would remain a Confederate stronghold for the foreseeable future.

Monday, 20 May 2019

Blow the Bridge - another game using this scenario for CoC

I wrote a scenario for Coc last year called Blow the Bridge. I wasn't completely happy with the scenario as written, so I tweaked it a bit to try and rebalance the odds.

Here is the scenario;
It is 1944, the Allies have broken out of France and are advancing towards Germany. The British are advancing across the relatively flat and open countryside of the Netherlands. A reconnaissance group  has been sent in front of a tank squadron to probe the German defences along a canal which is an obstacle to any further advance. Their objective is to capture a bridge over the canal, which will allow armoured units to cross and outflank the main German defensive line.

The British force consists of;

1 rifle platoon (HQ plus three sections)
1 recce section (3 Universal carriers, 1 with a PIAT team and a junior leader and 2 with Bren teams)
1 Cromwell Mk IV tank with a 75mm gun (this will only deploy on the 4th British phase, representing the advance guard of an armoured squadron)

The defending German force is;

1 standard rifle Zug (HQ plus three sections)
1 tripod-mounted MG42

1 4-man engineer section, carried in a half-track without weapons. Their role is to plant charges, not fight. If fired upon, they count as being in light cover. They will initially deploy from the table edge as a team without a leader and once deployed can only be activated by the German senior leader or on a command dice rolling a 1.

The Germans also have two lengths of barbed wire and two small prepared defensive earthworks. These will be placed after the Patrol Phase.

 The Germans can also call on support from a single SdKfz 250/9 with a 2cm auto cannon and a co-axial MG34 in an open turret. This can only be deployed by using a CoC dice and will enter from the German table edge.

The British objective is to attack the bridge and secure it before the Germans can destroy it.

To win the scenario, the British must have neutralised the engineers, driven back the defenders and have at least one section on the bridge itself.

In the patrol phase the Germans will use three patrol markers and the British will use four (because they are attacking). The British will also have two free patrol moves before the patrol phase properly commences.

The game will be play across the width of the table. The canal will be down the centre of the table, with the bridge placed in the central third of the table. The canal can only be crossed by using the bridge.

The British will start the patrol phase from either the left corner or the right. (roll 1d6 1-3 left, 4-6 right)


The Germans side of the table will be in three sections left, centre and right To see where the Germans will start the patrol phase roll 1d6 (1-2 left, 3-4 centre, 5-6 right)

So, this time the British force is somewhat stronger, having some armour appearing during the game. The Germans have also been slightly strengthened by the addition of the SdKfz 250/9.

In this game, Brian was the defending German leader, while I was commanding the British.

The table was laid out like this. Clearly the RAF has been doing some bombing and there are craters and gutted buildings near the canal. You can see how the Patrol Phase ended in these pictures.


Our Force Morale rolls favoured the Germans, who had a FM of 11, with the British being somewhat less motivated at FM 8. The Germans wasted no time in deploying a section right on the edge of the canal, protected by an earthwork.


Access to the bridge was made difficult by two sections of barbed wire. The engineers began to drive towards the bridge, protected by a tripod-mounted MG42 behind an earthwork in front of the walled farm.


The recce carrier section was the first British unit to appear. The idea was to dash forwards to seize the bridge.


I also deployed a rifle section in the ruins close to the bridge, placing them on Overwatch. I had a JOP placed just behind the ruins, which I hoped would let me get troops forward quickly.


I got another section on the table, moving them tactically in support of the carriers towards the bridge.


The Germans by the canal began to open fire on the section I had stationed in the ruined buildings, causing both shock and casualties. Over time, this would be a real problem for me.


The second section closed on the bridge, but was unable to cross because of the wire. The carrier teams dismounted, leaving the drivers in the vehicles. The rifle section on Overwatch fired at the engineer half-track, causing enough shock to make it withdraw.  Unhappily, this drew a lot of fire from the Germans in response, inflicting both shock and casualties.


The Germans were also deploying across the canal, with a section in the trees near the walled farm. My rifle section in the ruins was having big problems from accurate fire from two directions, with the MG42s causing many casualties, finally causing the few survivors to flee. This caused my FM to drop to 6. Luckily, by this point, a tank from the lead troop of the advancing squadron made an appearance. I hoped that this would turn the fight to my advantage. So far, the engineers hadn't managed to start working. I had also deployed my remaining rifle section, close to where the other one had fled, but out of sight of the Germans. The appearance of the tank led to the withdrawal of the German engineer section. 


To the right of the bridge, the tripod MG42 was hitting the recce section, with extra fire coming from a German section in the trees closer to the bridge. Luckily, my Senior Leader had also arrived with the platoon 2" mortar. Smoke time!


The smoke enabled the recce sections to get back on board their carriers and they drove forward over the wire obstacles (shown here by them being removed from the road). The Cromwell was also firing HE at the Germans, with a liberal dose of co-axial MG fire too. This was beginning to weaken the defenders, but I was worried about Panzerfausts and the even more nasty Panzerschreck. The armour of the carriers proved to be an impermeable barrier to the MG42, which was firing at the recce section now holding the bridge.


The SdKfz 250/9 now appeared. This was more of a problem, as its 2cm autocannon was capable of defeating the weak carrier armour. Luckily the Cromwell's commander was able to direct fire at the half-track and drive it off with shock and a wounded commander.


Another cross-canal firefight developed and my rifle section took up station in the ruined buildings. Combined with HE and MG fire from the Cromwell, this section was much more successful and the Germans were suffering losses now, with shock building up too.


Things were now looking pretty impossible for the defenders. The British had the recce carriers on the bridge, with a rifle section just behind and a Cromwell tank ready to blast anything that might appear from the walled farm, especially the half-track full of engineers, so the Germans pulled back, leaving the British in control of the bridge.

Well, this time the scenario delivered a British win, mainly because of the armour.

I am still not fully happy with the scenario. The tweaks I've made seem to have shifted the balance towards the attackers, but possibly too much so. I have thought about this again, and perhaps the answer might be to give the Germans a second tripod MG42 or maybe a second Panzerschreck? 

Alternately, perhaps the answer might be to leave the forces the same but play the game along the length of the table, with the canal closer to the German end, leaving the British with more ground to cover? In that scenario, the Germans could deploy in depth, forcing the British to fight along a longer approach to the bridge, with more opportunities to delay them until the engineers could place charges and blow the bridge. Currently, I like this idea better.