Thursday 27 June 2019

Another CoC AAR

A few weeks ago, the club had an all day session. In the morning I played Saga: AoM, as reported here. In the afternoon, I played a game of CoC, using my Peter Pig troops and PSC vehicles against Nigel. I wrote a scenario in advance and here are the briefings for the two sides;
British briefing

The British are pushing forwards from the town of Lambeek along the road toward the important rail junction at the town of Grolschbeek, some 5km distant. The countryside is flat and wooded with no buildings, except for a bombed sugar beet factory complex. The factory is in the centre of the table. Until now, resistance has been slight but aerial photographs have revealed a build-up of German forces in this area. The make-up of the German troop concentration is not known, so patrols are being sent forwards to test the defences.

As the British wish to push an armoured force along this road to capture the Grolschbeek junction, it is essential that better intelligence about the enemy defences is gathered. To this end, a platoon of Rifles has been sent to probe the ruined factory. Supporting the infantry is a recce section of three carriers and one M5 light tank, accompanied by an Intelligence Corps officer in a carrier

The force is;

Rifle platoon (dismounted from trucks which are off table) as described in the rulebook, i.e. HQ plus 3 sections

Recce section: 3 Universal carriers, 2 Bren teams, 1 2” mortar team, 1 junior leader

1 M5 Stuart light tank, 1 junior leader
Intelligence Corps observer (in a carrier). This officer activates as a junior leader on a 3 on a command dice. He must enter the factory area and remain there.

The British will have four patrol markers and may place three JOPs.

Objective:


Advance as far as the factory and neutralise any opposition. You are escorting an Intelligence Corps officer in a fourth carrier. He should be protected and allowed investigate the region. To simulate this, his carrier must enter the factory complex and remain there until the end of the game.

German briefing

Since being pushed out of Lambeek by British forces, Intelligence reports suspect that the next move will be to assault and capture the Grolschbeek railway junction. As reinforcements have been delayed by Allied air attacks, it is essential that British patrols do not discover that the town is currently only lightly-defended. Therefore, a number of forward defensive locations have been identified. One of these is the ruined sugarbeet processing factory on the Grolschbeek to Lambeek road. An augmented Zug of Grenadiers, supported by a machine gun section has been sent to occupy and hold the factory. The troops are carried in trucks but have dismounted short of the objective.

The force is;

Grenadier Zug as listed in the rulebook, except that each section leader has two Panzerfausts

One extra Grenadier section, led by a junior leader without any Panzerfausts

MMG section: two tripod-mounted MG42 MMGs (each carried in one unarmed SDKfz 251 halftrack) with a junior leader. This must deploy from the German table edge.

The Germans will have three patrol markers and may place three JOPs.

Objective:

Occupy and hold the sugar beet factory and prevent British patrols from advancing towards Grolschbeek.  

We rolled dice to see who would play which side. Nigel chose the British and I played as the Germans. Here is the table before the Patrol Phase. The Germans would enter from the far edge and the British from the nearer one.


A good Patrol Phase saw the Germans establishing a JOP just behind the bombed factory, from where troops were soon advancing to seize control if the buildings. 


More Germans deployed in the fields behind the factory. For me, getting boots on the ground quickly was essential to achieving my objective. 


However, the British were soon advancing tactically behind a 2" mortar smoke screen. 


I was worried about the speedy Carrier Recce Section and soon got my Panzerschreck team peppering it to good effect. The last thing I wanted were trigger-happy Bren teams driving around.


I got more troops into the factory complex, including my most important assets, the two tripod-mounted MG42s. They were my one big hope for keeping the British at bay.


However, the Brittish squaddies were getting close. I  used a CoC dice to end the turn and lift the smoke. Would this be enough to stop them getting any closer?


My section across the road continued to fire at the British in the big field surrounded by hedges, causing both shock and casualties, including the section leader. 


The British infantry in the smaller building were getting too close. Time to unleash the firepower.


First, I brewed up another carrier with my Panzerschreck.


Then I got the MG section targeting the infantry. I was gaining the upper hand. The British advanced into hand-to-hand combat, with predictable results. 


The remnants of the British section fled, leaving a dead section leader behind. British Force Morale was falling dangerously low. The Stuart light tank wasn't contributing anything. I decided to ignore it until it came closer.


Further exchanges of fire saw more British casualties, as I tightened my grip on the factory buildings. When British FM fell to 1, we called it a day. It was a win for the Germans.


I think that this could have gone either way, but a good patrol phase, plus a few double phases gave the Germans an early advantage from which they never really faltered. 

I think that I'd like to do a follow-up scenario, with the factory at one end of the table, with a similar German forces dug-in (without the extra rifle section (to account for casualties in this game) and defending, possibly with an anti-tank gun of some kind, and with the British attacking with some useful supports, probably a couple of decent tanks and maybe a Vickers MMG attached to the platoon HQ. I will have to work on this a bit. Victory conditions might be driving German FM down to zero, getting them out of the buildings or getting a tank off the table at the defending end.


Wednesday 26 June 2019

Frostgrave - the long scenario reaches its penultimate stage

People who follow my blog must be aware that we have been playing out a series of linked games around the theme of finding the whereabouts of the treasure of a dreaded but long-presumed vanquished Necromancer. This started in December last year, and will finish in August, once various holidays are out of the way.

This game, together with the preceding two represent three concurrent parts of a single quest to find three Vorpal blades, which can only be handled by spellcasters, and which will play a role in the forthcoming denouement.

This time around, Owen provided the Wizard, I brought along an Apprentice and Richard a Captain, plus assorted warband members for support. Andy, once again ran the game and Nick took charge of the evil creatures.

Here is the initial table. The eagle-eyed might recognise the provenance of the central obelisk.


Everyone had to enter and leave this underground chamber via the portal on the right-hand side.


Bad things began to happen immediately. My hapless Thug was soon killed off by a snake-like guardian.


Vengeance was swift, however, as my Traesure Hunter, Warhound and conjured Zombie triumphed.


Elsewhere, more serpentine evil appeared. People may recognise many of these figures as well.


Daunting though these enemies appeared, we soon managed to see most of them off.


Obviously, the Serpent Wizard was protecting something, so we advanced across the chamber.


My Apprentice cast Wall, to prevent this Hydra, summoned from somewhere by the portal obelisk from easily attacking.


Elsewhere, Richard's Captain took on the Serpent Wizard's Bodyguard.


More nastiness appeared to attach a hapless crossbowman.


The brave Captain fought through to attack the Serpent Wizard, killing it but being killed himself by a Wraith Knight who was holding the Vorpal Blade (no photos, sorry). 


The fearsome Mouth On Legs creature was killed.


The Hydra was much more of a problem.


A Gorgon appeared. By this point, Owen's Wizard was out of the game. To win, I had to keep my Apprentice alive.


But to stay alive, we had to vanquish the Hydra. My Treasure Hunter managed to slay the Beast.


Ans she went on to kill the Gorgon, too. What a star!


Again without pictures, we combined to kill the Wraith Knight and my Apprentice took control of the Vorpal Blade. Time to get out of this chamber.


We fought out way back to the exit, seeing off more Serpent Guardians en route.


So, now, the Wizards, equipped with Vorpal Blades must confront the Evil Necromancer to triumph. 

Monday 17 June 2019

Saga: Age of Magic - my Otherworld army gets a run out

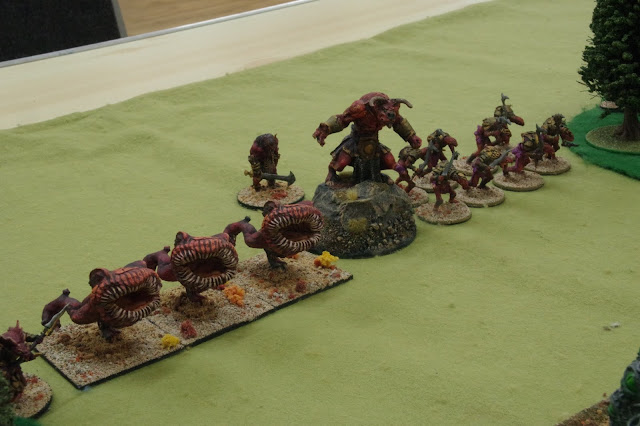
Yesterday at the club, we had one of our occasional all-day sessions. This was a great opportunity to get my daemonic Otherworld warband (made mainly from Frostgrave figures, with Alternative Armies Creatures) on the table for some Saga: Age of Magic. This was going to be a learning experience as I'n not played with this faction before. I fell into the trap of thinking of this as an impact army which did me no good against my first opponents, Clive's Undead.


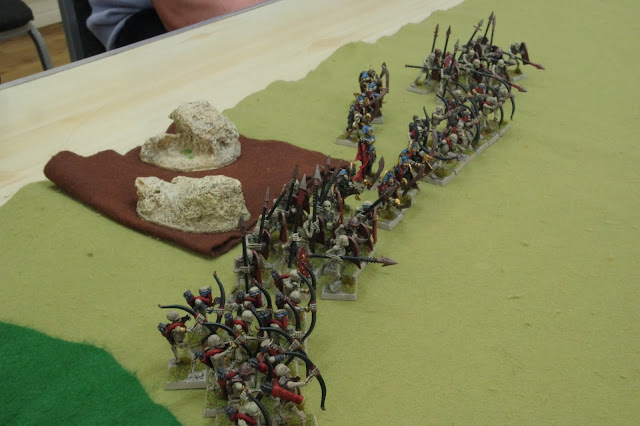
These Undead are a terrific-looking army, with an Ancient Egyptian theme.


Unfortunately, for me anyway, they are also a very shooty army, with lots of bow-equipped warriors.

I plunged ahead, trying to get my best killy units into combat, with the Hunters leading the way. They didn't last long, succumbing to a lot of accurate shooting. Still, I had high hopes for my Creatures.


I used Portal to get my Hearthguard into a position to charge. Two powerful units ready to bust the Undead line apart. What could possibly go wrong?


Ha! What could go wrong was getting shot at. My Behemoth and the Creatures were targeted first.


By the time the Creatures had taken a lot of Fatigue, they were easy meat for some Undead Warriors.


My Behemoth and Warlord were the next targets to suffer.


Also, the sad failure of my Hearthguard, who despite gaining Resilience via Astral Bond and were still unable to take out the Undead archers.


With the Behemoth gone, again due to shooting, my Warlord was the next one to fall.


We called time on the game. I had virtually no Saga dice left.  We set up a second game. This time I was opposed by Clive's High Elf Great Kingdom army, led by Matt, who was new to the game, with assistance from Clive.

I learnt from my mistakes and set up with all my troops in the cover of woods.


I waited to see how things would develop. Not only did the Elves have bows, they also had a Dragon and a Hero on a Pegasus.


The Elven Hearthguard was in two groups of four. My Sorcerer soon managed to get one group reduced to two figures, using a combination of Rift and the Bolt and Drain Life spells.


My Hunters were getting shot at by Elven bow Levies. So, I charged them, with predictable results. 


One Hunter left. I advanced some Warrior Cultists through the woods.


I used Portal to move my Creatures behind the Elven line, threatening the weak Hearthguard unit.


Elsewhere, the other Hearthguard led the Warlord and Sorcerer into the attack. My Warriors in the woods were having success with Abyssal Breath to shoot at the bow levies.


After some manoeuvres, Matt managed to move his weakened Hearthguard out of charge range, so I used Portal again to bring my Creatures back across the table. The green jewels indicate that they are sheltering behind the Elemental Barrier spell.


I'd given up worrying about the Dragon marooned out on my left, but I really needed to charge those bow Levies with my Creatures.


With clever use of the board, the Levies moved out of the way, and the Elven Lion Creatures charged my Creatures, utterly obliterating them.


Things went from bad to worse and eventually, I threw everything into a reckless attack, which was spectacularly unsuccessful. Another loss for the Otherworldly Daemons.


However, it wasn't all bad. My Sorcerer was really effective, using Drain Life with a fair amount of success, but, more importantly to use the spell to remove fatigue. I think, also, that I am beginning to learn how to play with this faction. More games are required.