Friday 29 September 2017

Some 28mm figures for Congo

I've had some figures for Congo for a while now, but painting them has been a slow activity. I made a start a while ago, but then bought a load more figures at Colours in Newbury the other week.

Still, the first elevn figures are now complete. They are all Wargames Foundry 28mm figures from their Darkest Africa range, some of which I bought as a Congo "White Man's Expedition" box set, and the rest in a blister pack at Colours, described as "Deadlier Than The Male".


These are three Stout Chaps, ready to brave the perils of the Dark Continent.


And not to be outdone by the men, here are three Liberated Ladies, to accompany the chaps and make sure they stick to the task in hand. I am not sure about the fourth figure. She clearly went to the Wrong Sort Of School and appears to have gone native.

Finally, here are four more Ladies, who will no doubt feature in all sorts of games. I can see the young woman with the book perhaps being some kind of investigator of suspicious supernatural goings-on. The one with the pistol clearly isn't going to put up with any funny business and the fashionable lady-about-town with her prim elderly companion may well end up in the jungle in some capacity.


Unhappily, after I'd photographed them, I noticed that there were a few bits of extraneous fibre stuck randomly to a couple of the figures. This has now been removed, but I couldn't be bothered with photographing them again.

These could also be used in some Sharp Practice scenarios set in a slightly later period than the current rules.

I have a whole load more Foundry minis to paint now; Askaris, Ruga-Ruga, tribal warriors with assegais and shields, Zanzibaris, Baluchis, a few British infantry and a few French freebooters who look like deserters from La Légion Étrangère, who will be perfect as soldiers in an expedition of some kind. This is beginning to look like an excellent project.

Monday 25 September 2017

Breakthrough in Normandy - an IABM AAR

I played a game of IABSM at the club yesterday against a potential new member, Steve who contacted me via the IABSM Facebook group. I created a scenario based upon Scenario No. 5,  Breakthrough in the IABSM rulebook.

The British need to advance along the only road towards the village of Ste Madeleine-sur-Fleuve. To do this, the main force has sent a relatively strong mobile scouting group down the road to probe the German defences and hopefully force a breakthrough. This forces consists of two troops of tanks (each with 3 x Cromwells and 1 x Sherman Vc and L2 BM), one section of carriers equipped with Vickers MMGs (L3 BM) and two rifle platoons (one in 4 half-tracks and one carried as tank riders, L2 BM). The HQ (L3 BM, L2 BM) for this force has an attached platoon of 4 x 3” mortars carried in 4 Loyd carriers and is carried in a half-track. Each rifle platoon has one member designated as a sniper.

Chips

British Armour 1
British Armour 2
British Platoon 1
British Platoon 2
British Support 1 (MG carriers)
British Support 2 (mortars)
British Sniper
British Big Men 1-7
Armoured Bonus

There is a German defence screen ahead of the village which has been ordered to stop the British advance, to allow time for the Germans to complete their  withdrawal towards the major town of Falaise to the south.

The German force consists of two Zugs of Panzergrenadiers (each with L2 BM), supported by 2 SdKfz 251 Stummel half-tracks with short 75mm howitzers (L2 BM) and two Marder III Ausf. M with 75mm Pak 40 a/t guns (L2BM) and a Zug of 3 x Panther tanks (L2 BM). The HQ  (L3 BM) for this force has a section of 3 x Panzerschrecks and 2 x MG42 teams. The Germans are dug-in behind some hastily-built field defences.

Chips

German Armour 1
German Platoon 1
German Platoon 2
German Anti-tank 1 (Marder IIIs)
German Support 1 (short 75mm halftracks)
German Support 2 (Panzerschrecks)
German Support 3 (separate MG42s)
German Big Men 1-6

Note that neither side has a chip for the HQ. This is because any HQ-attached elements have their own chips. In addition to the Tea Break chip, the bag contains two blank chips which act as a countdown. Once the blank has been drawn 12 times, the game ends.

We rolled a D6 to see who would be the British and who would be the Germans. I rolled higher and chose to play as the German commander.

The terrain is relatively flat with some hedges breaking up the ground, a couple of lines of bocage (marking the German deployment area) and a small wooded area from which the British troops will emerge. There is a small reservoir by the road and a walled potager at the German end of the table. The ploughed fields on the side of the road are designated as soft going (-1" on each movement dice). The temporary German field defences can be seen to the left of the reservoir and the right of the road.


The British advanced under blinds but two units were soon spotted by the defenders. These were one of the tank troops and the carriers armed with Vickers MMGs. These could fire on the move.


Most of the German defenders were hidden in the deployment area but there were a few units under blinds. One was spotted by the carriers and was exposed as a pair of Marders.


The British tanks opened fire, and one Marder was immediately knocked out by the troop Sherman Vc with the 17-pdr gun.


The second Marder would soon follow, leaving the road almost open for the British to drive hell-for-leather towards Ste Madeleine-sur-Fleuve


The Germans began to emerge from under their blinds, with the main threat being the weakened Zug of three Panthers.


The Panthers were soon in action and two Cromwells were hit, causing them to brew up. One was the tank with the troop commander.


One Panther was knocked out by the Sherman Vc in the tank troop as the 2" mortar with the platoon which had been riding on the tanks laying down smoke to obscure the British advance.


Realising the the British intended to use speed to get past the German defences, which had been across the table in the bocage, the first Panzergrenadier Zug began to advance across the open ground, secure in the knowledge that the British infantry in the ploughed field were pinned by 75mm howitzer fire from the Stummels. Elsewhere, the Panzerschrecks had destroyed two of the carriers, and damaged a third as the British continued their thrust along the road. There were two British units still under blinds. The Armour Bonus chip was helping the British move quickly.


The  rear tank troop engaged with the Panthers at short range, but without any luck. The Germans were more accurate and the remaining two British tanks were soon taken out by the long 75mm guns on the Panthers.


The Panzergrenadiers advanced on the British platoon pinned in the field and wiped them out. A Panzerfaust managed to damage one of the Cromwells in the other troop but couldn't prevent the Rifle platoon in the half-tracks (under a blind), the remaining two carriers and the tank troop from getting off the table, with the Panzerfaust and MG42 teams being wiped out by Vickers fire. However, the victory conditions were that four units with at least 50% of their original strength remaining should exit the table and this was no longer possible, so this game ended up as a victory for the German defenders.

This was an interesting game, not least because I had expected the British to advance on a wide front and deployed my two infantry Zugs in a line across the table. Steve, however had other ideas and went for a mad dash along the road. The only unit held back was the mortar platoon, who stayed unused under a blind at the back of the table. Steve was never able to use the firepower of the 3" mortars to suppress the German defence. 

What really mattered here was whose firepower was best and it turned out that the three Panthers were more than a match for the British tanks, excepting the destructive power of the 17-pdrs on the Shermans.

A couple of notes about the way I planned the scenario. 

First, I rolled a dice to see who would be attacking and who would defend. 1,2 or 3 was a German defence and 4,5 or 6 was a British defence. I rolled a 2, so the Germans were the defenders.

Then, I used a dice to select which tanks would be available for the Germans.

1-3 Panzer IV
4-5 Panther
6 Tiger I

Then I rolled again to see how strong the Zug would be. A full-strength Zug is five vehicles. The roll would be as follows;

1 or 2 - full strength
3 or 4 - one vehicle under strength
5 or 6 - two vehicles under strength

I then rolled a D6 to see if the anti-tank unit would be Stug IIIs, Marders or Pak 40-equipped SdKfz 251 half-tracks. I'd already decided that only two would be available. Clearly, Stugs would be the best choice here, but it wasn't to be.

Thursday 21 September 2017

British Airborne platoon for Chain of Command

A few days ago I realised that I never posted a picture of my British Airborne platoon that I'd painted months ago for Chain of Command. So, here it is;


These are all Peter Pig 15mm figures, once again with the Leaders on 2cm bases and the other ranks on 1.5cm bases, plus snipers, PIAT team and the 2" mortar on 3cm bases. The platoon consists of an HQ, with a lieutenant, a platoon sergeant, a 2" mortar team, a sniper team and a PIAT team, two sections of 10 men, split into a Bren team and a rifle team and led by a sergeant and a third team, again led by a sergeant, with two Bren teams with one man equipped with a Sten, plus a sniper team. The rifle teams also have one man with a Sten. There is a lot of firepower in this platoon.

To add some colour, some of the figures are wearing Airborne berets and the whole platoon is, of course wearing Denison smocks.

Monday 18 September 2017

Securing the redoubts - an American Civil War Sharp Practice AAR

I've not played Sharp Practice with my ACW forces for quite a while, so this game at the club was a chance to get the armies out again. The figures and buildings are all Peter Pig and the redoubts/earthworks are by Ironclad Miniatures.
I originally planned to play against Nick, but Andy needed a game, so I umpired, which made a bit of a change. The scenario was as follows;

This is an early war scenario where both sides are made up of conscripts and volunteers. All infantry are equipped with rifled muskets. Following an indecisive battle, both armies have retreated to lick their wounds and regroup. 

However, the Confederates wish to reoccupy some earthworks from which they withdrew in the battle, because these earthworks will allow them to place artillery to deter the Union army from advancing along the valley which they overlook. 

The Union commander is keen to take the earthworks to prevent the Rebels from siting guns in them. 

On the Union side, the ground contains a farm, surrounded by fencing and a smaller farm building. The Union deployment point will be represented by a group of tents which was used as a dressing station in the previous battle. The Union force also has a secondary deployment point which will be represented by a signpost. There is a small coppice of trees in the centre of the table. The Confederates will deploy from around a small church which is behind a hill which contains one of the three redoubts. A second redoubt is on the hill opposite the farm and the third one is in the valley between the two hills.


The terrain is basically open fields with little or no cover, as can be seen below;


The two small forces were;


Union

3 groups of 8 infantry (conscripts and volunteers) with a Status 3 Leader
2 groups of 8 infantry (conscripts and volunteers) with a Status 2 Leader
2 groups of 6 skirmishers (conscripts and volunteers) with a Status 1 Leader

Additional: 1 Status 1 Leader, 1 Musician and 1 Colour Party

Confederates

3 groups of 8 infantry (conscripts and volunteers) with a Status 3 Leader
2 groups of 8 infantry (conscripts and volunteers) with a Status 2 Leader
1 group of 6 skirmishers (conscripts and volunteers) with a Status 1 Leader
1 medium cannon with 5 crew and a Status 1 Leader

Additional: 1 Musician 1 and 3 sections of earthworks

Ideally, the Union forces would have deployed from around the farm but the dice roll placed their deployment point at the same end of the table as the Confederate one.

The Confederate side deployed first, swiftly getting troops on the hill in front of the church and sending the rest of the infantry and skirmishers to occupy the other sets of earthworks.


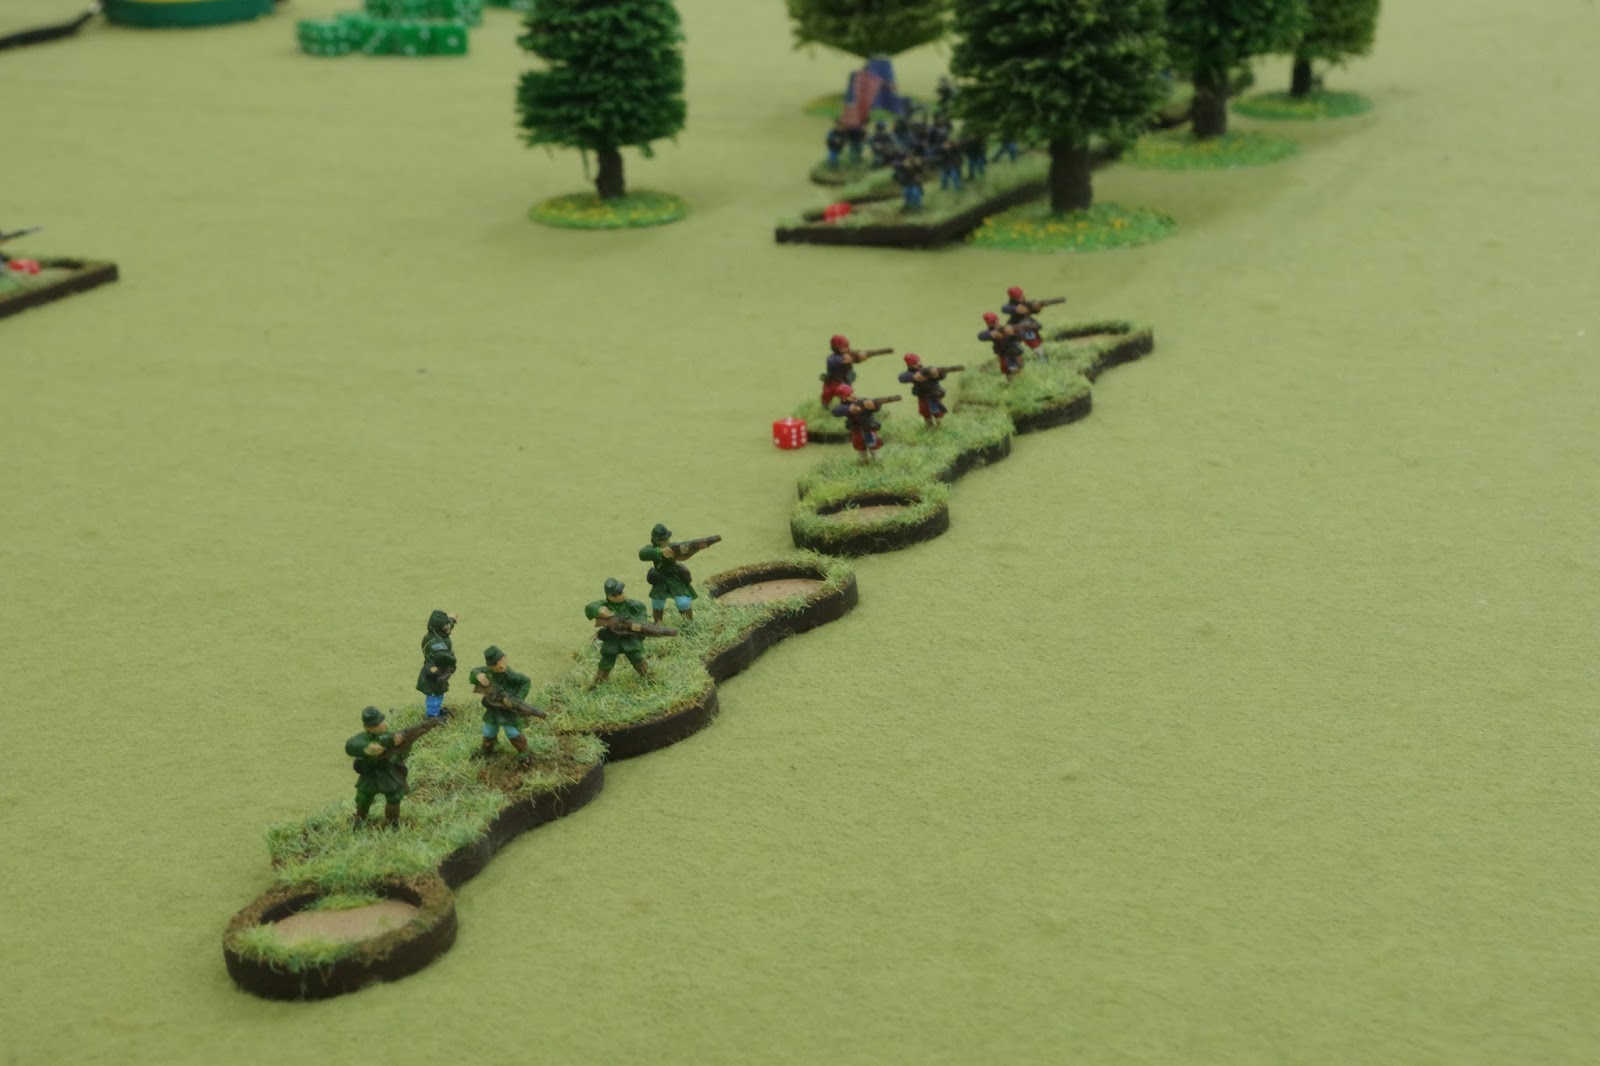
The Union troops were slower to arrive but started to cross the open fields, with the larger group moving to take up a firing position in the trees.

This initial deployment pretty much defined the shape of the battle ahead. The two groups of Union skirmishers arrived a bit later, with some Berdan's Sharpshooters deploying first, followed by some Zouaves.


This central redoubt would come under sustained fire from the larger group of Union infantry before long, taking many casualties and finally forcing the formation to withdraw. The redoubt on the Confederate right provided cover for the skirmishers to pepper the treeline with fire, preventing the Union troops from taking advantage of the retreating Confederate infantry.

The Union skirmishers opened fire on the main objective, the redoubt on the hill in front of the church, causing shock and casualties, and wounding the commander, leaving him knocked out for a few rounds. The Confederates here could only be activated by using command cards until he came round and resumed command.


The Berdan's Sharpshooters took casualties from the hill but their accurate fire was causing problems for the Confederate side. However, the artillery finally arrived and the cannon fire proved to be pretty worrying for the Union troops in the open fields.

Disaster struck the Union side when the force commander was killed by the Confederate skirmishers. They also suffered on the random events table by becoming inflicted with the curse of wet powder, which reduced their firing dice by half.

The Union skirmishers also fared less well, as their numbers began to fall.


A roll on the random firing event table caused the church to burst into flames. It must have been a stray spark from the Confederate cannon.

The battle was developing into a stalemate. The Union troops were unable to cross the open fields without losing men to the Confederate musketry and therefore were unable to occupy the objective. The battle was clearly a victory for the Confederate force.

I think that this was an interesting game, because the terrain really didn't suit the attacking side at all, because the deployment points were out in the open. However, the superior skills of the skirmishers did keep the Confederate occupied for most of the battle.

There was a moment of light relief when the sergeant commanding the group of Berdan's Sharpshooters rolled on the movement random events table and was found to have slipped in some dog poo. We decided that he would have to return to the tents to find water to clean his boots, which took them out of the firing line for a couple of turns.

I think that I'd like to play this scenario again in the future, but probably with a slightly different set of forces. It would be interesting to add a group of cavalry, who are basically dragoons/mounted infantry to the Union side and give the Confederates another group of infantry, maybe militia or perhaps a second group of skirmishers. It might also be a good idea to provide a bit more cover in the open fields.

Wednesday 13 September 2017

An ASQL AAR - Alien Imperials vs Human Colonials

On Sunday my Alien Imperial forces made their debut against a Human Colonial army last Sunday at the club. The Human commander was Alex Self, the author of the Alien Squad Leader rules.

We played a 200pt game with the chosen scenario being Envelopment. As the defender, Alex had two objectives to defend and, as the attacker, I had a second deployment zone, which I decided would be behind the jungle area at the bottom of the first photo.


Alex deployed first, with the bulk of his troops in the two built-up areas which represented the objectives he would be defending. He also had two groups of civilian refugees to escort from the field of battle. He had two defence turrets in the objective areas and these worried me a fair bit.


I decided that I would have to place a threat on my right flank to tie down his tanks while assaulting the lefthand objective with waves of tribal auxiliaries, supported by droids from my flanking deployment area. The bulk of my alien infantry, supported by heavy weapons were on the right;


and I had two lines of Tribals on the left. The Beasts would be able to advance rapidly. so long as the commander and sub-commander on this flank could motivate them to advance. The second alien wave also had some Shooters.


Before long, the scary Beasts started to close in on the objective.


The droids began to deploy behind the cover of the jungle as the Beasts prepared to assault the gallant Human defenders.


This combat would go on for a number of rounds and prove to be decisive.


The Tribals and Beasts took casualties, but they also caused a lot of damage, gradually whittling down the defenders.


Elsewhere, Human Colonial Police and Defence Troops escorted the civilians away from the fighting. I ignored these. My aim was the two objectives, with most of the fighting going on around the buildings on my left. Fire support from my heavy droids kept the Human artillery pinned and this allowed the Beasts to assault them.


Finally, the breakthrough came and Aliens were inside the built-up zone. Over on my right, which was pretty much a stalemate for a long while, my heavy weapons managed to destroy the defensive turret and cause some damage to Alex's tanks. 

Below, you can see the Human Floating Platforms (with heavy weapons) advancing into firing range. These managed to cause casualties to my Alien Infantry and Elite power-armoured troops who I had deployed to threaten the Human rear.


Finally, my Tribals and Beasts destroyed the Human heavy weapons and defensive turret, which enabled me to unleash my droids without fear of being knocked out. Slowly but inexorably, the Aliens wore down the Human resistance. First, the lefthand objective fell to my forces and I ordered my right flank to advance on the righthand built-up area. Below, you can see the Humans deploy more infantry from an APC (which would later get shot to pieces by my droids).


The Alien troops closed in on the righthand objective. As I had already managed to destroy enough Human stands to take them to break point, all I needed to do was outnumber the Human defenders in the second objective to win the game.


And, after a few delays, this happened when my robot infantry won a combat against the Human defenders and I advanced a heavy droid into the built-up zone, together with some infantry who had managed to destroy a tank in combat..


So, as a first game with this new army, I was well-pleased with the outcome. My plan worked pretty well and the Alien Beasts proved to be amazingly effective at the task I'd set them, which was to draw fire and get into hand-to-hand combat quickly. When I started to use my Alien Infantry, they proved to be a real shooting threat with their superior energy weapons (which allows them to roll three D6 and discard the lowest scoring one). I think that using droid troops is also a good idea, as it lets you use your command stands to keep the Tribals moving forwards as much as possible.

Wednesday 6 September 2017

More Alien Imperials

I've been working on getting my new Alien Imperial army finished so that I can get it into action ASAP. The thing about this army is that you have to take a mandatory five stands of Primitive troops for each 100pts in the army. That means a whopping 10 stands of Primitives in a 200pt army. When you add in the mandatory 3 stands of Alien Soldiers per 100 pts, this is a pretty large forces compared with some of the other choices in the rules.

Anyway, it is finally finished. My source for miniatures is, as usual, Ground Zero Games; Crusties for the actual Imperials and a mixture of others for the Tribal Auxiliaries, who are classed a Primitives in ASQL, i.e. members of a low technology subject race.

First, here are some GZG Xenomorphs who will represent "Trained Creatures", beasts with no shooting capabilities but who gain a +1 in hand-to-hand combat. These are clearly inspired by the creatures in a classic sci fi film series.


Next up are three stands of Imperial Soldiers plus three stands of Tribal Auxiliary Shooters (including one sub-commander stand), who are obviously nothing whatsoever to do with one of the troop types produced by a well-known company with its own set of rules, even if they are green. Any resemblance is clearly coincidental.


Here are three more stands of Imperial Soldiers, with a round character stand, representing a First Commander, plus two Imperial Soldier command stands (the ones with four minis on).


And some Imperial Heavy Weapons stands.


I'm interested in seeing how this army performs. The Imperial troops and Droids have Superior Energy Weapons and the Elites also have energy shields, so they should be pretty tough. However, that is balanced by the large number of Primitives, who are best considered as a disposable mass of irritants to get in the way while the better troops get into a strong position. The option of having a sub-commander stand means that there is always someone to command the Primitives if the other commanders are busy elsewhere. Lacking true long range primary weapons, this army is going to need to get close to make best use of those superior energy weapons. The Primitives will act as a set of non-human shields. Well that's the plan.

Anyway, however things turn out, it should be fun playing with them. I shall find out on Sunday.