Showing posts with label Confederate army. Show all posts

Monday, 9 December 2019

Seize the crossroads - a 15mm ACW AAR

Here is another Sharp Practice game played at the club yesterday.

I took the job of commanding the Confederate forces against Kev's Union troops. Both of us were using 15mm Peter Pig figures. The buildings were my Peter Pig resin ones and all the scenery was the club's, apart from my 15mm snake fences. Here is the table from the Union side. I would be entering from the road on the upper edge of the table.


To add visual interest, I placed various civilians around the hamlet, together with some livestock.


Kev had a strong force from th54th Regiment Massachusetts Volunteer Infantry, an Afro-American unit, while I fielded a larger, but less well-trained force from the imaginary Hazzard County Volunteers and Militia, commanded (of course) by Major J.D. Hogg.

Both forces were soon advancing across the table towards the strategically-important crossroads. 


The main body of Rebel infantry moved towards the large farm, while the Militia, under Sgt. Roscoe P. Coltrane marched along the road towards the crossroads. If they could get there first, the idea was that they could resist the Union advance, even though they were only equipped with smoothbore muskets. Both sides deployed skirmish troops, with the Union side proving to be better shots.


The 54th Massachusetts got into the hamlet in good time, with all their infantry taking up a commanding position pretty quickly. This would prove decisive.


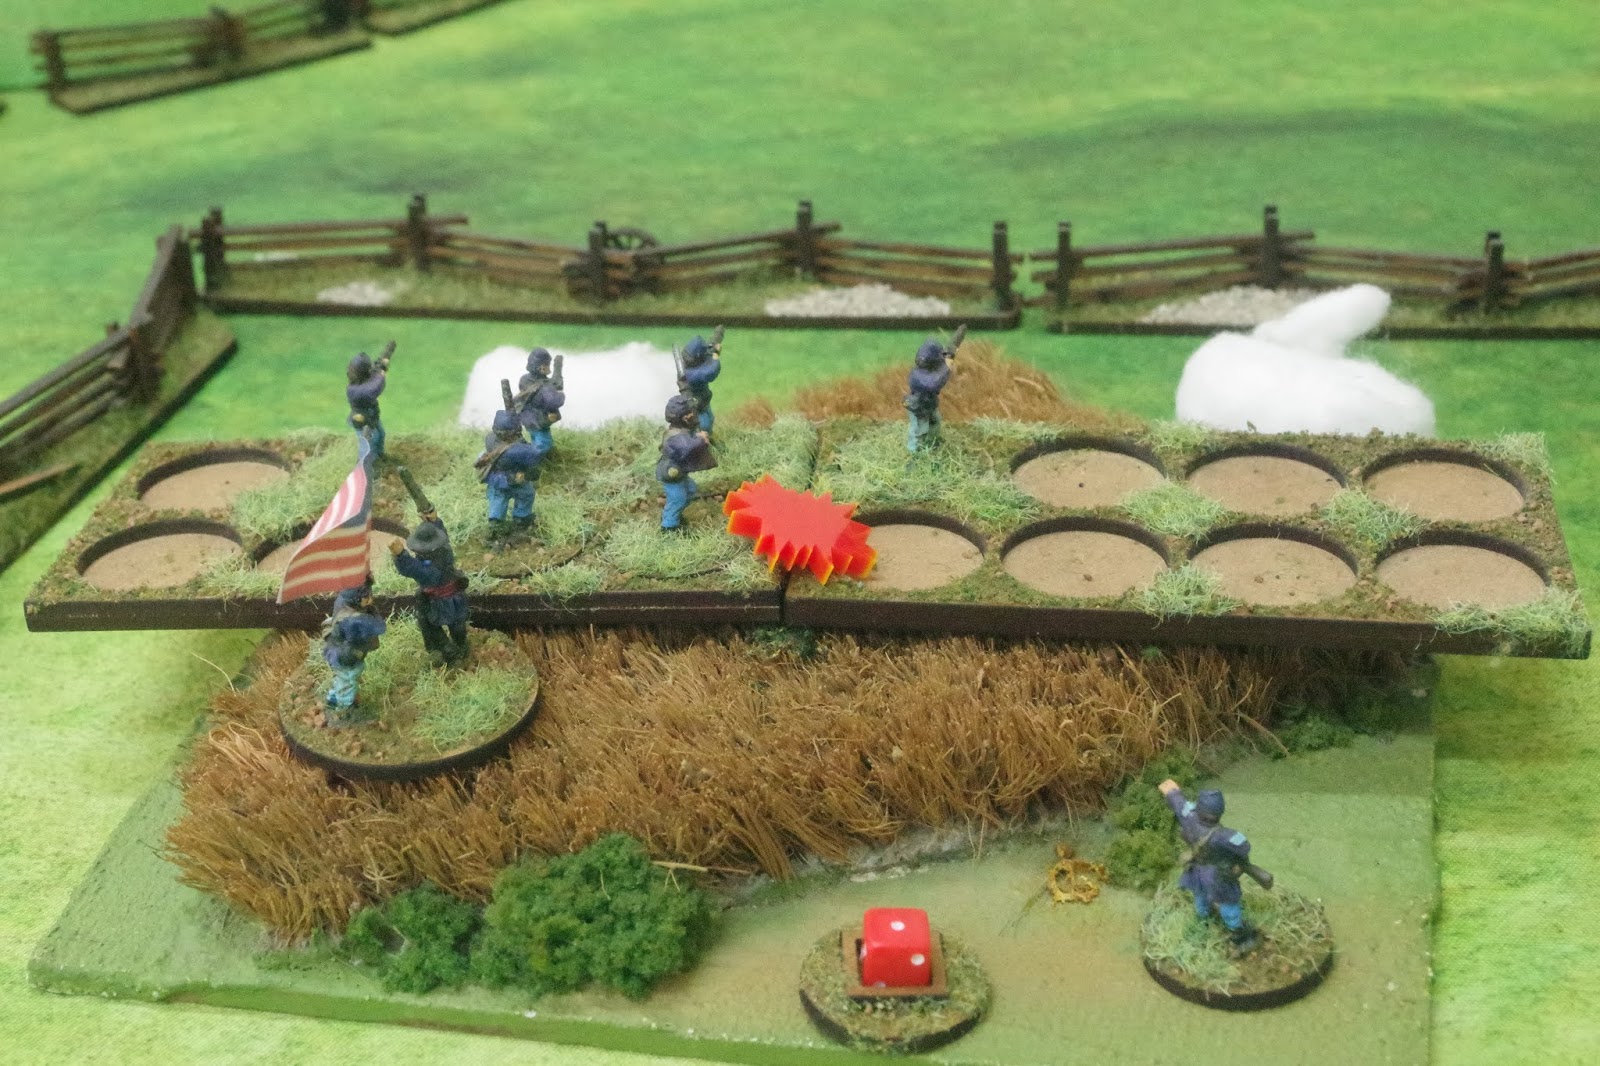
The Hazzard County Militia, a poorly-trained bunch, came under sustained fire from the well-drilled Union troops, who were firing controlled volleys to good effect. The Confederate skirmishers on the left also took casualties, limiting their usefulness.


Although Rebel fire was causing some damage to the Union infantry, the superior musket drill of the Union side took a heavy toll on the hapless militia, forcing them to withdraw with many casualties and a lot of shock. Before long their formation would break and the group led by Sgt. Coltrane would flee the field. This cause a rapid fall in Rebel morale.


Maj. Hogg managed to get the main body of Hazzard County Volunteers into a firing line and musketry was exchanged with the Union troops. The local civilian population was by now fleeing in panic from the battle (they were activated whenever a blank chip was drawn from the bag, moving in the direction indicated by a scatter dice, with distance being decided by rolling 1D6)


With depleted ranks, it was only a matter of time before the Confederate defenders were defeated. The only question of whether they would be forced to flee or their morale would drop to nothing.

In the end, the battle was decided by morale. Maj. Hogg was struck by a Union ball and on the roll of 1, he was killed. 

So, a pretty comfortable victory for Kev's Union Infantry, a clearly superior force, which even though it was outnumbered by the Rebels was better drilled and capable of sustained accurate musketry. The Militia were unable to make any impact, being subjected to volley after volley before they were even able to fire a shot. It was their loss which really decided the outcome. 


Monday, 2 September 2019

Encounter at Maggie's Farm - Sharp Practice in the ACW

Yesterday at the club was another opportunity to Spread The Lard again. This time it was the turn of a different player called John and the rules were Sharp Practice. The setting was the early period in the American Civil War, when most troops were rated as Conscripts and Volunteers and some on the Confederate side were still equipped with smooth bore muskets. All the figures and buildings are mine, from Peter Pig. The snake fencing is also mine, from 4Ground and the mat and scenery belong to the club.

The scenario was two small forces who were both aiming to capture the small community known as Maggie's Farm. The table looked like this, with Maggie's actual farm on the left, the community chapel on the hill and a smaller farm further away behind a wooded hill;


The Rebels, commanded by John would enter from the middle of the right-hand side of the table and my Union troops would deploy from directly opposite.

The Rebel troops consisted of;

3 groups of 8 Georgia State Volunteer infantry (rifled muskets), led by Captain Roscoe P. Coltrane (status III), with a musician, a mule train and a status I sergeant.
2 groups of 10 Hazzard County militia (muskets), led by Maj J.D. Hogg (status II) and a status I sergeant
1 Group of 6 Davenport's Zouaves skirmishers (rifled muskets), led by Sgt Enos Strate (status I)

The Union forces were;

3 groups of 8 infantry from the 3rd Miskatonic Volunteers (rifled muskets), led by Captain Randolph Carter (status III), with a musician, a mule train and a status I sergeant.
2 groups of 8 infantry from the 3rd Miskatonic Volunteers (rifled muskets), led by Lt. Charles Dexter Ward (status II) and a status I sergeant
1 Group of 6 Innsmouth Sharpshooters skirmishers (rifled muskets), led by Sgt Upton Pickman (status I)


Capt. Coltrane's troops were soon in action, firing a Controlled Volley with First Fire at long range, with devastating effect on the two group formation led by Lt. Ward.


Major Hogg's militia were soon deployed up against the fencing, firing uncontrolled at Ward's Miskatonic infantry. You can see the Rebel skirmishers just behind them, with a point of shock from some inconclusive fire from the green-coated Innsmouth Zouaves.


The main body of Georgia Volunteers maintained position on the hill overlooking Maggie's Farm, waiting for the appearance of more Union troops, while also firing at the target in front of them.


Repeated volleys of musketry from both the Georgia Volunteers and the Hazzard County Militia wreaked further havoc on the Miskatonic Volunteers, who were now much reduced, with their firing further hampered by damp powder (signified by the red marker).


The delayed arrival of the rest of the Miskatonic Volunteers saw them advancing in open column towards the small community chapel on the hill. Capt. Carter was attempting to outflank the main body of Rebels on the hill.


On the Confederate left, the militia and Davenport's Zouaves had pretty much eliminated the generally ineffective Innsmouth Sharpshooters.


Capt. Coltrane managed to bring his command under control and began to manoeuvre his troops to defend their position against the advancing Union column in the distance.


Looking across the fields towards Maggie's Farm, the weakness of the Union position is apparent. Would Major Hogg (an honorary rank only, he is actually the local Mayor)  advance his militia or let them continue to fire uncontrolled? Well, probably showing his lack of military experience, he chose to let them carry on firing. They would eventually force Lt. Ward to withdraw after suffering more losses. 


Meanwhile, the Union column had deployed into formation along the fence line around the farm on the Rebel right flank. However, Davenport's Zouaves had moved from their earlier position acroos the field towards the main Union force by the chapel, firing into its flank, causing casualties and double shock. Even more unfortunately, accurate musketry from the Rebels on the hill was whittling the Miskatonic Volunteers down even more, forcing one group to break from the formation, all of this before the Union troops had even delivered their first volley.


Capt. Coltrane dispatched a group of troops under his sergeant to move around the far side of the farmhouse.


By this point, the Confederates clearly had the upper hand. Even though the Miskatonic Volunteers had managed to get off a Controlled Volley, mainly hitting the smaller group of Confederates and wounding the sergeant, Union morale was falling and the number of casualties meant that Maggie's Farm would remain a Confederate stronghold for the foreseeable future.

Thursday, 5 July 2018

Another ACW Sharp Practice AAR

This game was a few weeks ago now at the club, between Brian, commanding the Union side and my force of Confederates. Both sets of troops were my Peter Pig 15mm ACW ones. The buildings and fences were also mine. The rest of the terrain was the club's.

We used forces for 1864 from the Sharp Practice rulebook, plus a couple of basic supports (medics, extra Status I leaders);

CONFEDERATES, 1862‐1865
Leader, Status III
Three Groups of 8 Infantry, Rifled Muskets
Leader, Status II
Two Group of 8 Infantry, Rifled Muskets
Leader, Status I
One Group of 6 Skirmishers, Rifled Muskets
Leader, Status I
One Group of 6 Skirmishers, Rifled Muskets

UNION FORCE, 1863‐1865
Leader, Status III
Leader, Status I
Three Groups of 8 Infantry, Rifled Muskets
Leader, Status II
Two Group of 8 Infantry, Rifled Muskets
Leader, Status I
One Group of 6 Skirmishers, Rifled Muskets

The mission selected was Scenario Two; Sweep The Table, and the table was laid out as seen below. The Confederate deployment was from the bottom left in the first photo;


The Union force would deploy from the road at the bottom right;


We modified the objective so that the sweeping force's objective would be capturing the opposition's deployment zone. The Confederates were the sweeping force due to their higher Force Morale. I began by deploying skirmishers. I had a plan, and that involved tying the Union troops down as early as possible.


The Union troops began to arrive; skirmishers to the fore and a column marching behind.


My sharpshooters were soon in action, sniping away from the edge of the cornfield and causing casualties on their opposite numbers.


I quickly brought on my second group of skirmishers who moved up to add their fire.


Meanwhile the Union main force slowly began to deploy behind the skirmish screen.


My main force began to arrive, two groups advancing in line to take up a position on my right flank, while the rest moved to my left.


The main Union firing line advanced towards the central farmstead.


My left-hand skirmishing group moved up to threaten them.


My main force began its march along my left flank. So far, things were working pretty smoothly.


My right-hard skirmishers came under sustained fire, taking shock and a casualty. Their leader was able to rally off some shock and they advanced to fire again.


Hiding in the long corn, they began to pepper the Union troops with accurate musketry, causing casualties on the two groups advancing along the road.


My troops advanced slowly.


Eventually ending up as a three group formation behind a line of snake fencing.


However, this was a feint, and the formation moved off on a flanking march, behind the dense forest on the Union right.


Back in the centre, my advanced group of skirmishers, much reduced, were skulking in a patch of green corn.


I needed to keep the Union force engaged along the road.


The fighting was keeping the main Union body in a defensive line on a hill and the other two infantry groups were holding the chapel and the road junction.


My marching column on the left carried on moving through the woods.


I began to advance in the centre through the cornfields.


My flanking force finally deployed into line formation, ready to threaten the deployment point.


My left-hand skirmishers kept up their fire on the main Union body. So far, so good.


Finally, the Union realised the threat on their right. Groups of infantry began to move across to counter my advance.


This led them to a strong position in the corn and trees, where they were able to engage the Confederates.


This developed into a firefight, with both sides suffering casualties and shock.


Time was running out, but Union Force Morale was plummeting and casualties and shock were mounting. Having all but surrendering their left and centre, the Union was struggling to defend its deployment point.

At this point, we called a halt, agreeing that the outcome was a victory for Johnny Reb.