Showing posts with label panzergrenadiers. Show all posts

Monday, 2 March 2020

More from Winter Wonder Lard - Blowing the Bridge

I've already blogged an overview of the day, but I wanted to write a bit more about the game I put on at BIG Winter Wonder Lard. I'd played this scenario a few times in the past at the club, and it seemed to provide a challenging game, but I wanted to give it an extra dimension. Big Chain of Command seemed a good idea for how to do that. I set up a long table, designed to give both sides the chance to get forward during the patrol phase and try and grab the advantage.


In the day's programme, my comments about the game were;

"D-Day was nearly three weeks ago, but the British have still not managed to capture the city of Caen. Now, Operation Epsom is about to begin. 

It is essential that armoured troops get moving into position before the operation commences. However, a vital bridge over the River Lardienne is still in enemy hands. Divisional intelligence believes that the Germans will destroy the bridge over the river before 7th Armoured can seize the objective. The RAF has mounted several sorties using Mosquitoes and Typhoons to try and drive any defenders away and now a mixed force of infantry and tanks is being sent to drive off any Germans who are still around and secure the bridge itself."

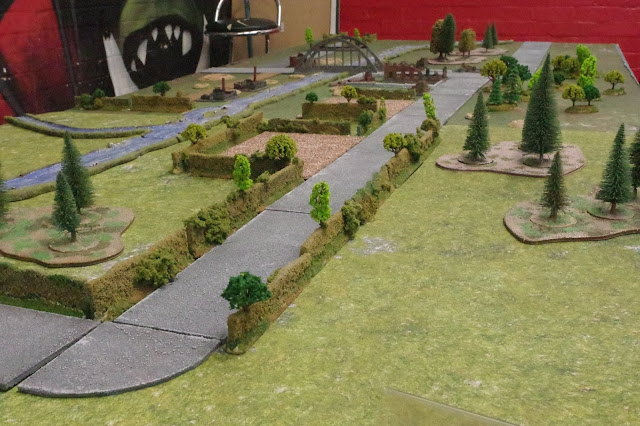
The game was played along the length of the table. The River Lardienne ran along most of the length of the table, beginning near the British edge of the table and exiting at the German end, with a bridge placed in the final third of the table. The river could only be crossed by using the bridge. There was a road from the British end of the table, exiting at the German end. A junction took the road across the bridge.

The British have advanced across relatively flat countryside, lightly wooded away from the river, and with fields and hedges closer to the water. Craters crossing the table diagonally show where RAF ground attacks have been targeted.


All British  troops are classed as Regulars. The forces available are;
  
Command 1
1 rifle platoon (HQ (1 x SL (force commander, ranking SL – 4 CIs), 1 x SL (ptn sgt), Bren and 2” mortar teams) plus three sections). 

1 recce section (3 Universal carriers, 1 x JL, 1 x Bren team, 1 x PIAT team, 1 x 2” mortar team)

Note that the force commander has taken a Bren team from the recce section and given it the platoon PIAT in exchange.

 Command 2
1 tank troop (3 x Cromwell Mk IV tank, 1 x Sherman Vc, each tank has 1 x JL apart from one of the Cromwells, which has a SL)

Having suffered heavy losses since landing in Normandy, 7th Armoured has become somewhat risk averse and is classed as being Hesitant, and the tank commander will only roll 4 Command Dice.

The German force available is a small ad hoc Panzergrenadier group;
                                                                                                                                              
Command 1                                                                
1 standard Panzergrenadier Zug; HQ 1 x SL (force commander, ranking SL - 4 CIs), 1 x 2-man Panzerschreck team, plus three sections, (each section JL has 2 x Panzerfaust 30s which can be used by any member of the section). 

These troops are classed as Regular and Aggressive, rolling 5 command dice. 

1 x MG42 tripod-mounted MMG with 5 crew                                                                                                                             
Command 2
1 x SdKfz 251/9 with 7.5 cm KwK37 low velocity gun
2 x SdKfz 251/22 with 7.5 cm PaK40 anti-tank gun
1 x SdKfz 250/9 with 2 cm KwK 38 and co-axial MG42 and 1 x JL
1 x SdKfz 250/10 with 3.7 cm PaK37 and 1 x SL
                                                     
1 x 5-man demolition engineering team (without a leader), carried in a halftrack without weapons (but with a driver who stays in the vehicle). Their role is to plant charges, not fight. 

The Germans also have two lengths of barbed wire and one small prepared defensive barricade. These will be placed after the Patrol Phase.

I was expecting two players per side but one didn't show up, leaving a gap on the British side, which I filled as the player in charge of the tank troop.

Following the patrol phase, both sides took up a fairly aggressive stance with at least one JoP in a forward position.


The game began slowly, with both sides keen to gain a positional advantage before any actual fighting took place. The Panzergrenadiers began to push down the table on their left flank.


Meanwhile the German vehicles pushed towards the bridge on the far bank of the river, with a single SP PaK 40 on the road on the other bank.


The British infantry came under fire and preferred to wait for the arrival of the tanks before attempting any aggressive moves, although eventually both the platoon sergeant and the platoon commander were deployed into the ploughed field furthest away from the German positions. This was to prove crucial later on.


Unsurprisingly, the British used both 2" mortars to get as much smoke laid down as possible, but not before the German Panzerschreck knocked out the 7th Armoured's lead Cromwell. Having four command dice really hampered the tanks. Quite often only one vehicle could be activated, but later on the troop commander became more active.

A fierce shooting match between the Panzergrenadiers and the British Rifles took place along the road, with both sides seeing the butcher's bill mount slowly. It looked as though the defenders might prevent the British from taking the bridge. However, that was soon going to change.


As the British tanks moved along the river bank (the 'Schreck team having been dealt with by a couple of applications of H.E.), their guns were able to neutralise the SdKfz 251/9 with the short 7.5 cm howitzer and a shot from the 17pdr Sherman immobilised the engineers' halftrack, forcing them to bail out at one end of the bridge.


Once the hapless engineers were on the bridge, the British used directed Bren fire and the machine guns of the tanks to hose the bridge down, whittling down the number of engineers and inflicting shock on the survivors.


Finally, the last engineer succumbed to a hail of MG fire, leaving none left to demolish the all-important river crossing. 

With the loss of the demolition team, I called a halt to proceedings awarding the victory to the British.

I think that we all agreed that it had been an entertaining game and I thank Simon, Mike and Stephen who took part in the game.

This is definitely a scenario that is worth playing again.

All figures are my Peter Pig 15mm Late War British and Germans, and the vehicles are all Plastic Soldier Company.

Monday, 15 October 2018

Back to the Russian Front - a Chain of Command AAR

Yesterday at the club, Brian and I continued our occasional series of 15mm games of Chain of Command with another game between my Germans and his Soviets somewhere on the Eastern Front. The scenario chosen was Flank Attack (Scenario Five in the rulebook).

I was the attacker and Brian was therefore the defender. This scenario gave me 2D6 of support points and I was pleased when I rolled 9. This gave me a lot of options but I really liked the idea of an extra squad of infantry, and for five points I could have a squad of regular Panzergrenadiers with a Junior Leader, which meant two teams with MG42s. Impossible to resist! That left we with four points, which meant that I'd be taking along a FOO for an off-table 8cm mortar battery.

I wouldn't know what Brian had as support, but his -3 force rating did give him seven points.

Anyway, on with the battle. Brian's deployment zone was inside this village clustered around a road junction.


I was able to move my Patrol Markers from the opposite table edge to the village, and also from my left-hand side edge.


Brian clustered his Jump-Off Points in the centre of the village. I realised that to win I'd have to get his troops out of the buildings. Hopefully the 8cm mortars would help with that.


My JoPs were in the rolling wooded country. This, I hoped would allow my troops to get close without being shot at, assuming they could actually deploy, because the Soviet "Wrath of the gods" was remarkably efficient at stopping me get anything on the table. I fixed that as soon as I had a CoC dice, which I used to end the turn. After that, I quickly got my squads moving.


It didn't take long to find out what Brian's support choices were; a minefield, which was placed to his right-hard end of the village and a KV-1 tank. Luckily, I had a Panzerschreck team in my platoon HQ, plus a Panzerfaust in each of my three regular squads. I hoped that would be enough to take on the beast, if required.


I had a squad on my left moving tactically through the rough ground, which offered light cover.


I had the Panzergrenadier squad on my right. I wanted to get them into a position where they were threatening the Soviet right flank. Unhappily, the were spotted by the KV-1 on overwatch and a round of HE caused some shock.


I'd have to do something about that tank. Luckily, my FOO managed to call down some mortar fire, which only shocked the Soviets in the church, but it did cause the tank commander to pull back from his position in the village. Unhappily, Brian played a CoC dice, which ended the turn and canceled the barrage.


Elsewhere , I moved my left-hand squad quickly through the rough, but they took fire from a Soviet squad in one of the houses, which cause casualties and shock. Not good. However, they had already inflicted some shock and casualties on the squad firing at them, so it wasn't a disaster.


Rashly perhaps, I sent another squad running across the open ground towards the house full of Bolsheviks, which also contained the Senior Leader and once they were within 4" engaged them in some hand-to-hand combat. This proved to be extremely bloody, virtually wiping out my squad and sending them back whence they had come. However, despite winning the combat in terms of kills, the Russians were wiped out, apart from one man and the Junior and Senior leaders, who were both wounded and had more shock that figures, forcing them to flee the field. Russian Force Morale absolutely plummeted from this one combat.


You can see the decimated squad on the left of this picture, with the red Pinned marker. My FOO was able to eventually call in more mortar fire, this time calling in a ranging shot, the puffs of smoke showing where the barrage would fall on the battery's next activation. In the meanwhile, Brian sent the squad in the church out across the road and into hand-to-hand combat with my central squad, hiding behind the house opposite.


This was another nasty combat, but worse for Brian, who lost the fight and ended up with a wounded JL. His force morale was now down to a precarious One. Unluckily for him, the FOO called in the barrage and as a result the JL was killed and his morale was down to Zero. 


So, a pretty convincing victory for the Germans, without the Panzergrenadiers ever getting to pour MG42 fire into the Soviets (they spent most of the game lurking in a coppice on my right flank) and the battle being decided predominantly by mortar fire and two bouts of hand-to-hand combat, rather than shooting.

I think that it was helpful to have four squads available, because it allowed me to threat both of the Russian flanks while also being able to push forward in the centre, which is where the decisive action took place.

Thursday, 5 April 2018

Getting back to my Chain of Command project

Last year, I began a 15mm Chain of Command project using Peter Pig figures. I got as far as completing a British Rifle platoon, a British Airborne platoon and a German Infantry Zug, plus a few Germans with Panzerfausts and a Panzerknacker team. Then, when I got distracted by other things, I had a Panzergrenadier Zug undercoated, but that was as far as I'd got.

Anyway, I have got a game of CoC in the pipeline, so I thought that I should get back to this and  start finishing off what I'd had planned last year. Therefore I ordered a few odds and ends from Peter Pig and got round to assembling five PSC Universal Carriers that were still on their sprues.

My immediate concern was to complete the following;
  • A Carrier Recce section of two vehicles, each with a three man Bren team plus a Junior Leader
  • A German tripod-mounted MG42 with a five man team

However, while I was working on these, I also decided to finish off the Panzergrenadiers and the three spare carriers, which I made up as one Wasp carrier with a flamethrower, one basic carrier and one with a 2" mortar team. These extra carriers will  also be useful as CoC support options.

I've got enough spare Peter Pig figures to make up a complete British Rifle section and their German equivalent, which are both also support options, plus a few other options, such as a German Pioneer section, comprising a Demolition team, a Flamethrower team and a Junior Leader. Both of those teams can also be taken as separate support options.

The pictures for all of these are below. First the Recce Section;


The other carriers;


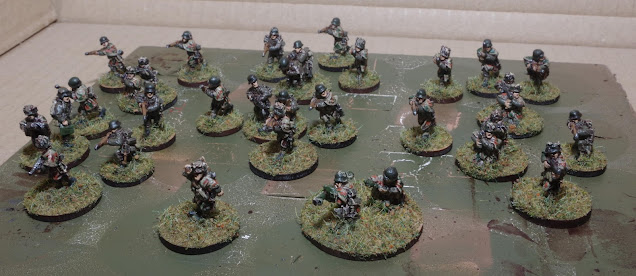
The Panzergrenadier Zug;


The fearsome tripod-mounted MG42 and its team;


I've also been thinking about putting a Volkssturm Zug together, which would be classed as Green Troops, allowing them a lot of potential support options. The Peter Pig range has some Volkssturm, which I reckon would blend in nicely with some Peter Pig DAK riflemen (they are in caps and long trousers) and a few other infantry thrown in to create an ad hoc look. I quite like the idea of greatcoat troops for the MG42 teams, because these might not necessarily be Feldgrau uniform greatcoats. The thing I am wondering about is whether they should have a Panzerschreck team, as in the German Army List in the rulebook or whether perhaps a couple of guys with Panzerfausts might be more appropriate instead? I mean, we are looking at desperate straits here, not a nice neat by-the-book regulation Zug. I'll have to think about this a bit.

Monday, 8 January 2018

Post Christmas big IABSM AAR

The club normally meets on Sunday afternoons, but over the Festive Season, we didn't meet up on either Christmas Eve or New Year's Eve. However, we did have a Thursday afternoon session on the 28th. I offered to put on and umpire a big game of I Ain't Been Shot Mum for two players a side. This would be a 1944 game, with the British forces pushing forwards into the Low Countries after the Liberation of France as part of the advance towards the Rhine.

What I wanted to do was put on a game with a lot of tanks but also have plenty of obstacles to aid the weaker side (in this case weak was relative). The field was laid out on four tables, creating a long battlefield with plenty of cover and dead ground. Here it is, seen from behind the German position.


The scenario was as follows;
After the end of the Battle of Normandy, Allied forces are pushing eastwards into the Low Countries. German resistance is stronger than expected but patchy in places. Defence in many cases depends on ad hoc formations made up from whatever troops are available to counter the advance of the Allied armour.

This scenario is one such encounter.

A British tank squadron and a company of motorised infantry have been tasked with taking a river crossing.

An ad hoc German Kampfgruppe is opposing the British advance.

 
The German force was:

1 weakened Kompanie of Panzergrenadiers (veterans)
Co HQ (with 3 Panzerschrecks) L3 BM (2 x SdKfz 251)
2 x Zugs each with L2 BM
1 section of 4 x MG42
1 improvised Rifle Kompanie (poor regulars)
HQ – 2 x tripod MG42, 2 x Panzerschrecks L2 BM L1 BM
1 rifle Zug L1 BM
1 Zug of Panzerknackers (2 x MG42 teams, 4 riflemen, 8 x Panzerfaust shooters) L2 BM

1 ad hoc Panzer Kompanie
HQ – 1 x Tiger I L3 BM (veteran crew)
1 x Panzer IVH (average crew)
Zug 1 – 3 x Panther G L2 BM (average crews)
Zug 2 – 4 x Panzer IVH L2 BM (green crews)

Anti-tank Zug
3 x Stug III (average crews)

The British force was:

1 squadron of Cromwell IV and Sherman Vc tanks (all average crews)
HQ – 3 Cromwells (1 with 95mm CS howitzer) and 1 Sherman Vc L3 BM
4 troops, each with 3 Cromwells and 1 Sherman Vc each with L2 BM

1 company of motorised infantry (the infantry are dismounted from their vehicles) all good regulars

Co HQ – 1 x 8 man rifle section L3 BM L1 BM (in a halftrack)
3 x rifle platoons each with L2 BM
1 carrier section – 4 x carriers with Vickers MMGs (can be mounted or dismounted)
1 flamethrower section (4 teams in a halftrack)

For this scenario, the following conditions were applied;
The Germans may defend in depth on both sides of the road. The Germans must defend a river crossing at their end of the table.

Some of their tanks have been recycled from battle-damaged vehicles and the German deck includes the Vehicle Breakdown chip. When this is drawn, roll 1D6 for each tank that has already been deployed (don’t roll for tanks under Blinds). Only roll once for each tank.

Any tank that rolls a 1 is broken down and will be immobilised for the rest of the game, but can continue to fire. Any shock against an immobilised vehicle will be doubled.

Any tank that rolls a 2 will suffer a failure of the turret traverse and will only be able to fire in a 90 degree forward arc.

The Panzerknacker Zug is split into two sections, each with 1 x MG42, 2 riflemen and 4 men with Panzerfausts. Once the Fausts have been fired, these troops revert to being ordinary riflemen.

The Germans have four pieces of field earthworks and one small pillbox.

The Germans can deploy hidden or under blinds, They have no dummy blinds.

The British will deploy under blinds and have two dummy blinds.

The 95mm CS howitzer fires smoke shells only, as do the 2” mortars in the British platoons.

The British are to advance along the road, which is hemmed in by trees on both sides to take the two bridges over a river defended by a German force. Only the larger bridge can support the weight of tanks, but smaller vehicles can cross both bridges. The terrain is undulating and visibility is broken up by the trees and hedges. The ground suits the defenders and is not prime tank country.

Intelligence reports that the bridges are well-defended.

I allowed the Germans to deploy up to halfway  along the length of the table, with the British being limited to a deployment zone that was one quarter of the table deep.


The Germans chose to deploy with everything hidden in their deployment zone. I didn't know where they had placed their units, but I assumed that the pillbox would play a role. The British deployed under blinds on both sides of the road but pretty soon they had had a number of elements spotted.


The 2" mortar of this platoon quickly started to lay down smoke to prevent the defenders from firing on them. On the British right, more tanks and infantry advanced towards a hill, spotting some German defenders, Panzerknackers and MG42 teams from the weak Landser Kompanie. These were quickly eliminated by mass machine gun fire from the tanks (well, the Cromwells actually, the Sherman Vc tanks not having hull MGs) and the Vickers-armed Carriers. The power of the machine guns was pretty much devastating.


The Germans were unwilling to show their hand at all and most of their troops remained unspotted and hidden, holding their fire and pretty much inviting the British to advance. The British managed to discover a Zug of Stug III tank destroyers behind a hedge.


Despite massed fire from the two British left flank tank troops, these Stug IIIs remained unharmed and soon caused havoc on the single Cromwell troop in front of them. The infantry platoon was also suffering from accurate fire from a tripod-mounted MG42 in an earthwork. The British advance appeared to be stalled on the right.


On the British left, the tanks were pretty much stuck in a traffic down in the unsuitable ground on this side of the road.


The platoon supporting these tanks, cleared away the German infantry screen  opposing them and started spotting more Germans. These were a tougher prospect than the Landsers - hull-down PZKfw IVs and the Tiger.


On the German left, the remaining tanks were revealed (a poor photo, unfortunately);


And the Germans also revealed a previously unseen Zug of Panzergrenadiers covering the central lake and road junction.


A different view of the German Panzerfront, a daunting sight for the British tanks.


At this point, the  clock was ticking and there was little time left to reach a conclusion. However, it didn't look too healthy from the point of view of a British tanker. Regretfully perhaps, the British commanders decided that discretion was the better part of valour. One tank troop was a set of burning wrecks and one infantry platoon had taken a lot of casualties from machine gun fire. The Germans remained in a solid defensive posture, with the only casualties being from the screen of Panzerknackers and MG42 teams.
   
So, an interesting game, the Germans playing a canny waiting game and the British being unwilling to advance too far into the unknown, even declining to use the Allied Armour Bonus chip whenever it emerged from the bag. Discussing this afterwards, the consensus was that after the attritional horrors of the Normandy campaign, the British regulars tended towards self-preservation rather than Tally Ho-style heroics. We agreed that once the location of the German tanks was known, the appeal of advancing towards those long 75mm guns (not forgetting the 88mm on the Tiger) was limited, to put it mildly, especially as they were adequately protected by those unharmed and fresh veteran Panzergrenadiers.


Monday, 25 September 2017

Breakthrough in Normandy - an IABM AAR

I played a game of IABSM at the club yesterday against a potential new member, Steve who contacted me via the IABSM Facebook group. I created a scenario based upon Scenario No. 5,  Breakthrough in the IABSM rulebook.

The British need to advance along the only road towards the village of Ste Madeleine-sur-Fleuve. To do this, the main force has sent a relatively strong mobile scouting group down the road to probe the German defences and hopefully force a breakthrough. This forces consists of two troops of tanks (each with 3 x Cromwells and 1 x Sherman Vc and L2 BM), one section of carriers equipped with Vickers MMGs (L3 BM) and two rifle platoons (one in 4 half-tracks and one carried as tank riders, L2 BM). The HQ (L3 BM, L2 BM) for this force has an attached platoon of 4 x 3” mortars carried in 4 Loyd carriers and is carried in a half-track. Each rifle platoon has one member designated as a sniper.

Chips

British Armour 1
British Armour 2
British Platoon 1
British Platoon 2
British Support 1 (MG carriers)
British Support 2 (mortars)
British Sniper
British Big Men 1-7
Armoured Bonus

There is a German defence screen ahead of the village which has been ordered to stop the British advance, to allow time for the Germans to complete their  withdrawal towards the major town of Falaise to the south.

The German force consists of two Zugs of Panzergrenadiers (each with L2 BM), supported by 2 SdKfz 251 Stummel half-tracks with short 75mm howitzers (L2 BM) and two Marder III Ausf. M with 75mm Pak 40 a/t guns (L2BM) and a Zug of 3 x Panther tanks (L2 BM). The HQ  (L3 BM) for this force has a section of 3 x Panzerschrecks and 2 x MG42 teams. The Germans are dug-in behind some hastily-built field defences.

Chips

German Armour 1
German Platoon 1
German Platoon 2
German Anti-tank 1 (Marder IIIs)
German Support 1 (short 75mm halftracks)
German Support 2 (Panzerschrecks)
German Support 3 (separate MG42s)
German Big Men 1-6

Note that neither side has a chip for the HQ. This is because any HQ-attached elements have their own chips. In addition to the Tea Break chip, the bag contains two blank chips which act as a countdown. Once the blank has been drawn 12 times, the game ends.

We rolled a D6 to see who would be the British and who would be the Germans. I rolled higher and chose to play as the German commander.

The terrain is relatively flat with some hedges breaking up the ground, a couple of lines of bocage (marking the German deployment area) and a small wooded area from which the British troops will emerge. There is a small reservoir by the road and a walled potager at the German end of the table. The ploughed fields on the side of the road are designated as soft going (-1" on each movement dice). The temporary German field defences can be seen to the left of the reservoir and the right of the road.


The British advanced under blinds but two units were soon spotted by the defenders. These were one of the tank troops and the carriers armed with Vickers MMGs. These could fire on the move.


Most of the German defenders were hidden in the deployment area but there were a few units under blinds. One was spotted by the carriers and was exposed as a pair of Marders.


The British tanks opened fire, and one Marder was immediately knocked out by the troop Sherman Vc with the 17-pdr gun.


The second Marder would soon follow, leaving the road almost open for the British to drive hell-for-leather towards Ste Madeleine-sur-Fleuve


The Germans began to emerge from under their blinds, with the main threat being the weakened Zug of three Panthers.


The Panthers were soon in action and two Cromwells were hit, causing them to brew up. One was the tank with the troop commander.


One Panther was knocked out by the Sherman Vc in the tank troop as the 2" mortar with the platoon which had been riding on the tanks laying down smoke to obscure the British advance.


Realising the the British intended to use speed to get past the German defences, which had been across the table in the bocage, the first Panzergrenadier Zug began to advance across the open ground, secure in the knowledge that the British infantry in the ploughed field were pinned by 75mm howitzer fire from the Stummels. Elsewhere, the Panzerschrecks had destroyed two of the carriers, and damaged a third as the British continued their thrust along the road. There were two British units still under blinds. The Armour Bonus chip was helping the British move quickly.


The  rear tank troop engaged with the Panthers at short range, but without any luck. The Germans were more accurate and the remaining two British tanks were soon taken out by the long 75mm guns on the Panthers.


The Panzergrenadiers advanced on the British platoon pinned in the field and wiped them out. A Panzerfaust managed to damage one of the Cromwells in the other troop but couldn't prevent the Rifle platoon in the half-tracks (under a blind), the remaining two carriers and the tank troop from getting off the table, with the Panzerfaust and MG42 teams being wiped out by Vickers fire. However, the victory conditions were that four units with at least 50% of their original strength remaining should exit the table and this was no longer possible, so this game ended up as a victory for the German defenders.

This was an interesting game, not least because I had expected the British to advance on a wide front and deployed my two infantry Zugs in a line across the table. Steve, however had other ideas and went for a mad dash along the road. The only unit held back was the mortar platoon, who stayed unused under a blind at the back of the table. Steve was never able to use the firepower of the 3" mortars to suppress the German defence. 

What really mattered here was whose firepower was best and it turned out that the three Panthers were more than a match for the British tanks, excepting the destructive power of the 17-pdrs on the Shermans.

A couple of notes about the way I planned the scenario. 

First, I rolled a dice to see who would be attacking and who would defend. 1,2 or 3 was a German defence and 4,5 or 6 was a British defence. I rolled a 2, so the Germans were the defenders.

Then, I used a dice to select which tanks would be available for the Germans.

1-3 Panzer IV
4-5 Panther
6 Tiger I

Then I rolled again to see how strong the Zug would be. A full-strength Zug is five vehicles. The roll would be as follows;

1 or 2 - full strength
3 or 4 - one vehicle under strength
5 or 6 - two vehicles under strength

I then rolled a D6 to see if the anti-tank unit would be Stug IIIs, Marders or Pak 40-equipped SdKfz 251 half-tracks. I'd already decided that only two would be available. Clearly, Stugs would be the best choice here, but it wasn't to be.