Wednesday, 16 January 2019

The final items for my FIW French

Here are the final pieces in my French and Indian War jigsaw puzzle. The wagon has been sitting around, half-finished for ages, mainly because I hadn't got round to undercoating the horses.

The wagon and horses are from Warbases, and the wagon is really a Gribeauval wagon limber, at least, that is what it said on the MDF sheet. However, I think it will be fine as a support option in lots of different guises, because I am not going to get all nitpicky about whether it is the right sort of wagon or not. Life is too short ..............


The figure with the barrel is a from a pack of Perry AWI metal civilians, so he fits in pretty well. I've painted him so that he looks like he might be a member of the French infantry without his uniform coat. The wagon and horses are from Warbases, who have some rather nice carts specifically for Sharp Practice that I will probably buy at some point. I've got another one of these wagons still not made up. I will probably modify it in some way and not use the cover.

Finally, here is the last part of my Régiment de Guyenne, a Colour Party. These are from the Warlord box set, including the flags, which are on the leaflet in the box. I've got a few figures left over, so I'll hang on to them in case I suddenly have a need for some more 18th century French characters.


So, I am now all ready for the monumental clash of French and British in the great North American wilderness at the end of january. 

Now, on to my next project, which I shall get started on next week, probably.

Tuesday, 15 January 2019

My Nine Years' War Sharp Practice mods get a further revision

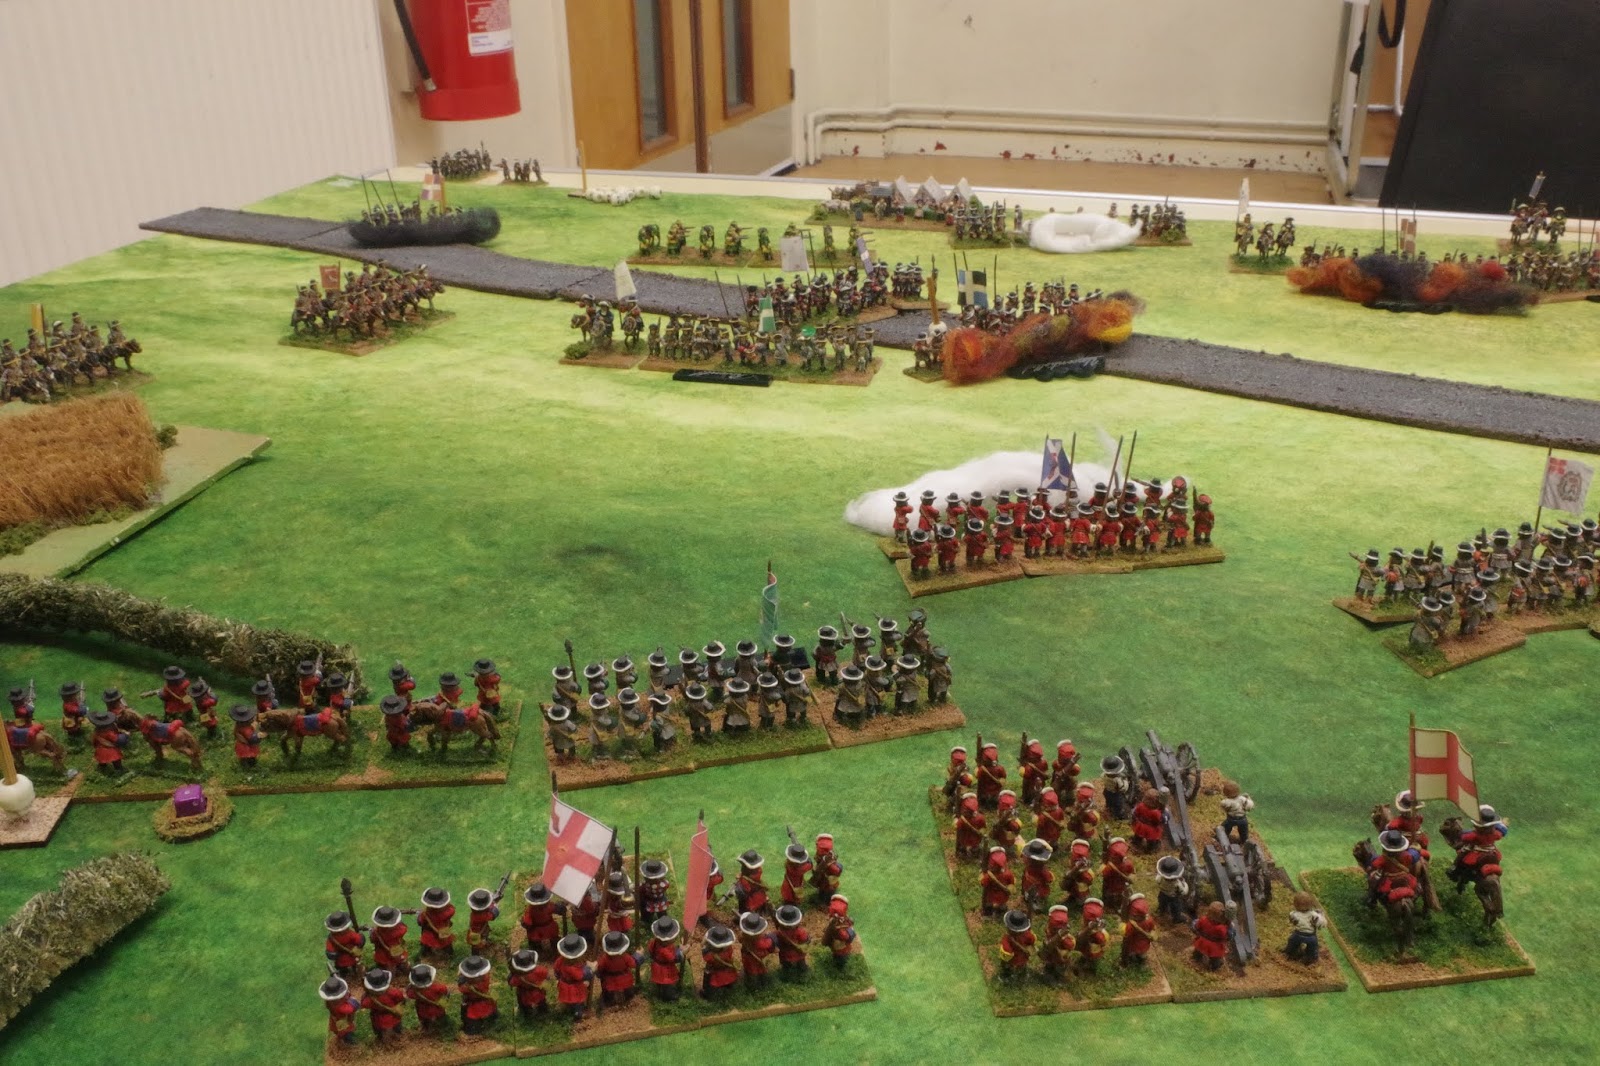
It's been a while since I've had a chance to use my nice Lurkio late-17th century French and Anglo-Dutch armies, which were the inspiration for my Sharp Practice mods, which were published in the TooFatLardies 2017 Summer Special.

Since first seeing these mods in print, they have undergone a revision and some resulting changes. This was a chance to playtest those revisions again and see how things could be tightened up and clarified.

I must say, in passing that I am really pleased to see that Lurkio is continuing to operate under the aegis of Simon Hall's The Wargames Zone. It did look at one point like the company would cease to exist, but happily these terrific 15mm figures are still going to be produced.

In this game at the club last Sunday, I took command of the Anglo-Dutch army while Brian commanded the French.

The battle was an encounter between the two armies on the outskirts of the (fictional) Dutch town of Grolschbeek. The Anglo-Dutch were first on the field, with a cavalry brigade moving sharlpy towards the Grolschbeek junction. The aim was to secure the right flank before the French could deploy.


Elsewhere, a regiment of Dragoons took up a position in the gardens of a manor house on the Anglo-Dutch left flank. The !st Regiment of Foot (the Royal Scots) advanced, flanked by two Danish regiments of Foot. The Nassau Horse protected their right flank as they formed a defensive line.


The French began to advance across the main road into Grolschbeek, with the Rohan and Villeroy Horse supporting the Languedoc and Champagne regiments of Foot.


The Dragoons waited, relatively secure behind some hedges with a cornfield forming something of an obstacle to the French.


The English Horse began to deploy on the outskirts of Grolschbeek, behind the advance of the Nassau Horse.


Things began to get crowded as regiments in column and the artillery began to emerge from the Anglo-Dutch camp. The Anglo-Dutch Captain General Lord Lymeswold was finding it hard to get his Elite troops into position before the French advanced.


And here come the legions of Le Roi Soleil, under the command of Maréchal de France, le Duc de Cabecou.


The Dragoons began to fire on the advancing Régiment de Languedoc, supported by the Danish Fynske regiment. Lacking pikes, I hoped that these troops would be able to keep the French at arms length and avoid any Fisticuffs.


The Nassau Horse, perhaps being uncharacteristically impetuous charged into the Régiment du Lyonnais, sustaining casualties and shock.


They were repulsed with losses after a couple of rounds of combat. Elsewhere, the Danes were firing on the French Foot, with the Royal Scots waiting until they had an opponent within close range.


The Régiment de Languedoc took a lot of fire, suffering mounting shock and losses, compelling them to retire due to excess shock. Realising that they couldn't outflank the manor house, the French Horse moved to advance across the Anglo-Dutch left.


Having seen the Nassau Horse fail, both Woods' and Lumley's Horse moved to within charge distance of the French Horse. Woods' regiment came under musket fire, picking up Shock.


The Royal Scots poured musketry into the French Régiment de Champagne.


Finally, the English Foot Guards and Artillery move up towards the fighting. Lord Lymeswold directing the advance.


From the French side, the Anglo-Dutch centre begins to look menacing.


Maréchal de Cabecou sent the Régiment de Fimarcon Dragoons towards the French right, as the Gardes Françaises marched in line to fill a gap in the French line caused by the forced withdrawal of the Lyonnais Foot.


On the French left, the formidable Horse awaited the English charge. On the left of this brigade was the elite Régiment du Roi, in blue uniforms.


The two combats were bloody, with both English regiments coming off worse. Lumley's Horse suffered 50% losses and were compelled to retire back to the edge of Grolschbeek and were soon joined by Woods' Horse. However, they still protected the town, together with the remnants of the Nassau Horse.


The Anglo-Dutch centre was looking strong, with the French unable to make any headway against the effective musketry of the Danes and Scots.


At this point we decided to call a halt, because we were out of time.

What had I learnt from this game? 

Well, firstly the rule mods definitely do work for these large-scale encounters, especially with the amendments made since I first wrote and tested them. Secondly, the game does seem to give a reasonable brigade level simulation as opposed to the standard SP skirmish games. One might say that it is "Sharp Practice, Jim, but not as we know it".

I am a huge fan of Sharp Practice and the Shooting and Combat mechanisms are simple and effective and do translate well to use with larger units.

One thing that I think needs to happen is giving each brigade its own Deployment Point rather than having a single one for the entire army, because that leads to massive bottlenecks early on which prevent troops from deploying. The Dutch Garde Te Voet never really got anywhere near the battle.

I have rewritten my rule modifications, adding some clarifications, so I hope very soon to play through them again.

Friday, 11 January 2019

More from my French and Indian War project for Sharp Practice

I began this project towards the end of 2018, and I wrote about it here. Since then, with a few distractions onto other things, I've finally finished off the rest of my forces for the Sharp Practice day at Bristol Independent Gaming at the end of January.

Here are three groups of fusiliers from the Régiment de Guyenne, accompanied by a Senior Leader, Capitaine Philippe Au Brion (drawing his sword)a Junior Leader , Lieutenant Pierre Lardon (armed with a musket and a sword) and a Musician (drummer).

First, here they are in line, ready to fire;


And here they are in a marching column;


These are all Warlord 28mm metal figures, based on 25mm circular bases and mounted on Warbases movement trays. I chose to paint them in pale grey rather than pure white, because there was considerable variation in the actual colour of the cloth used for French uniforms in this period, and a pale grey-white seems entirely appropriate to me. Indeed, in many paintings you will see that the uniform coats were not actually pure white, and the terms "off-white" and "white-grey" are often used to describe the actual colour. I think that the cloth used was actually made from undyed wool, and you never see pure white sheep.

I am reasonably happy with how they have turned out, eventually, and I will explain why. Now, I don't like to say bad things about manufacturers generally, and this is really a rare gripe from me. However, I bought two boxes of these French infantry at Colours last year and while I have no issues at all with the sculpts, which are great, one box was considerably worse than the other one from a castings perspective. It wasn't just flash, the issue was quite large blobs of superfluous metal on a number of the figures, requiring a lot of work with a knife and a file to get the figures in a fit state to paint. In a couple of cases, the cleaning up was pretty extensive, requiring the use of metal snips to cut off the worst of the extra "growths".

Anyway, moan over. I still have a couple of odds and ends to finish off, including a Colour Party, which I hope to get finished next week.

Wednesday, 9 January 2019

Lincombe Barn 2019 Hordes of the Things tournament


January is here again, and with it comes the annual LBWS Hordes of the Things tournament, to be held at the usual location, Lincombe Barn, Overndale Road, Downend, Bristol BS16 2RW

This year the event will be held on Sunday Jan 20th.

Armies in 15mm scale (or 40mm frontage if you prefer), no theme, so just be inventive.

There will be the usual informal Bring & Buy sale (i.e. bring along unwanted wargames-related Christmas presents, rare figures, armies you no longer love and whatever else you have lurking around and see if you can find a gullible mug willing buyer).

HOTT pies, tea/coffee (and  hopefully some biscuits) will be available to keep mind and body in peak condition. 

Doors open at 10.00 and tournament will start at 10.30.

Cost £8 (payable on day).

Please let the organiser Nick Pope know, either via the Yahoo HoTT group or the club website (www.bristolwargaming.co.uk) if you wish to attend and if you are a carnivore or herbivore pie-wise.


Frostgrave club league - Week Six

Following on from our last game of Frostgrave, last Sunday saw the next installment of Andy's scenario. People may remember that Owen, Richard and myself all found keys and parts of a map. This time around Andy revealed that the map, once pieced together revealed the location and basic layout of the buried former lair of the deceased Necromancer whose burial place we had investigated previously. The keys gave us access to the entrance of the lair.

The setting we used was a custom piece of terrain, built some time ago by Chris, comprising two levels of a dungeon/castle-type location, with linked rooms, staircases and an underground chamber. The first few pictures show this terrific setting, including a subterranean "garden" filled with statues, well we all hoped that they were just statues.


In the lower level was a workshop with a rather worrying cell, containing a Big Green Thing (BGT), hopefully a statue.


This lower level also contained what appeared to be some kind of abandoned mine.


As we entered the lower level, via the mining chamber, the first thing we discovered was that the mine was not abandoned. It was being worked by Zombie slaves.


I was the first player in the mine. My Wizard, Ermengarde was accompanied by a Zombie of her own, her out-of-game Raise Zombie spell having been successful. The Zombie was charged with securing a chest discovered by Richard's Reveal Secret spell. Luckily, the Zombie wouldn't have too far to shamble to get away with the loot. Ermengarde cast an Elemental Bolt, destroying one of the Zombie miners. I decided that we needed to clear a path to the upper levels quickly.


Before long, both Owen and Richard's bands were in the mine, with Zombiecide uppermost in their minds. Unfortunately, but hardly surprising, seeing as we were in a Necromancer's domain, Armoured Skeletons were also appearing. Even more unfortunately, the Big Green Thing in the cell turned out to be a Major Demon, and the cell wasn't there as a prison, it was just where the BGT lived. Soon it was in combat with our adventurers. My Apprentice, Gunilla was unable to to cast Enchant Weapon on my Man-at-Arms but he managed to survive a bout of combat with the BGT, even pushing it back.


Richard's crossbows peppered the BGT with bolts. Slowly, it was weakening.


Ermengarde managed to case Wall, shutting the Zombie miners away.


Unhappily, a bunch of Big Angry Fungus Beasts (BAFB) turned up. These were dangerous in melee but vulnerable to distance attacks.


Eventually, my Man-at-Arms killed the BGT and we all started to move troops into the underground workshop. The idea was to get missile troops in a position to shoot the BAFBs


Before long, we were clear of the lower levels, with the unpleasant creatures eliminated. We left most of our troops behind to guard the exit and the treasures we had found. Each of us took four explorers to the upper level.Richard had managed to cast Crumble on the ceiling of the lower level, creating a hole through which it was possible to access the lair itself. I decided to take the stairs, as did Richard (who might not have trusted his own magic enough to just climb up). (see below)


The upper level was a series of rooms joined together by a large central chamber. Owen had emerged directly into this chamber from the hole Richard had created.


In each of the rooms we found treasures, but there were also greater rewards for the brave (or foolhardy).


We found various scrolls and grimoires, defeating a number of vampire librarians on the way, including a Chief Librarian, in part thanks to one of my Treasure Hunters who had had her hand weapon temporarily enchanted by Gunilla. Richard, who actually destroyed the Vampire, generously gave my Treasure Hunter his +1 Enchanted Blade, because the dead Vampire dropped the +2 Enchanted Blade he was using when he crumbled away.


In the final chamber, an Armoury, we all came away with an Enchanted Weapon or piece of Enchanted Armour.


So, another interesting game of Frostgrave. We still haven't found the Necromancer, but the third part of the scenario will take place in early February, so I expect the foul dark wizard will turn up at some point.

In terms of treasures acquired, I came away with;

3 x Scrolls (Heal, Push, Fast Act)
2 x Grimoires (Fool's Gold, Invisibility)
1 x Spell learnt (Curse - 12 to cast) This was a bonus from passing a test in one of the rooms.
1 x Magic Shield
1 x Magic Weapon (thanks to Richard)
395 Gold Coins
320 Experience Points


Saturday, 29 December 2018

Ho Ho Ho! What was under my tree this Christmas?

Well, this is only the wargaming stuff. There were some CDs too, but you aren't interested in those, are you?

First, there were some sets of rules. I am interested in playing Lion Rampant next year, but I also see a lot of fun to be had from its fantasy derivative, Dragon Rampant. I also think that The Pikeman's Lament would be a good way to get into something that I've long wanted to do, 17th century Pike and Shot gaming. I really want some 3/4 armoured cuirassiers and reiters at some point.


Anyway, my first plan is to create an Italian City State or Condottieri force for Lion Rampant, so the two Perry Plastic boxes I got will be incredibly useful, and will obviously fit in with the plastic Light Horse I bought a while ago for the project. I've also got another box of the Mercenaries and one of the Foot Knights too, so I have lots of options here for different units and a variety of different armies. 


I also got some Crooked Dice figure sets for my, as yet unstarted 7TV project. Still, I won't lack things to paint in 2019, so roll on the Too Fat Lardies Painting Challenge 2019.

I got a set of Aliens. Definitely going to be featuring these guys in a game once they are painted.


And a set of Weird Science figures. I really love the blobby monsters.