Wednesday, 8 May 2019

More Daemons .....................

............... for my Otherworld Saga AoM band.

These are going to be my Creatures, clearly bipedal ones. I've had these figures hanging around for absolutely ages. They are from Alternative Armies, I think, and I bought them because I had an idea for a possible Alien Squad Leader army in which I thought they would work. In the end, I changed my mind about the army and they've sat around waiting to be useful. Now, their moment has arrived.

I decided to keep to my red colour scheme for my daemonic entities with these guys, but vary it slightly by adding orange to the palette.


As you can see in this shot, they are basically just giant mouths on legs, which seems pretty daemonic to me and are the kind of thing that are best left in a different dimension, not being summoned by accidentally reading a spell in a hoary old tome found in a dusty and forgotten corner of a library in an old house with a bad reputation.


Here you can see them from above, showing how I brought out the scaly plates on their backs in orange.


I am going to use this gravelly base concept for the whole army and I decided to use this yellow. orange and red foam stuff to suggest some weird alien fungus thing.

The next part of this army project depends on me glueing North Star Snakemen and Cultists together, so I'll have to get on with that next week, as I have some other odds and ends to finish off first.


Monday, 6 May 2019

Demons .........................

...........or maybe Daemons.


I suppose it all depends on how you prefer to spell it. Personally, I prefer the latter spelling. Anyway, with the arrival of Saga: Age of Magic, I suddenly have a need for daemonic entities from a parallel universe, because the faction that I want to play is the Otherworld one. I really like the idea of entities from another dimension emerging from a portal into the world of mortals (which includes goblins, orcs, dwarves, elves and whatever else takes your fancy, including the no-longer living, recently-buried and not-exactly dead) to wreak death, destruction and evil designs upon the locals.

It took me a while to work out exactly what I wanted the force to look like, but I liked the idea of there being a human component, obviously members of a Cult dedicated to the worship of dark deities who need willing acolytes to open portals through which they can gain access to entry no normal space and time. Yes, I've been a huge fan of the works of H.P Lovecraft since my teens.

So, I need cult members to act as footsoldiers, lesser daemons, dread creatures, a monster, a sorcerer and a daemonic warlord.

I looked at a lot of possibilities, but kept on coming back to the Frostgrave plastic cultists box set, mainly on the grounds of cost, but also because they look really good. I love the hooded figures in their tattered robes, just the thing for arcane summoning rituals on a blasted heath somewhere, no doubt accompanied by the eerie cries of whippoorwills.

I've also decided that the Frostgrave: Ghost Archipelago plastic Snakemen would work really well as lesser daemon troops, especially as I want to take a unit of Warriors upgraded to Hunters. Snakemen with shields or with heavy weapons would also make good Hearthguard.

While looking through the available monsters in the Frostgrave Bestiary on the North Star website I found a couple of figures I really liked and I bought them, together with the already-mentioned plastic box sets.

While working on my Bad Squiddo Dwarf Warrior, I also got working on a couple of major figures for my Daemonic Otherword warband.

First, the Warlord.


I did consider using him as a Behemoth (one of the Monster classes) but he isn't really big enough for that, but I reckon that he looks like a pretty good Warlord, and that sword definitely qualifies as a Heavy Weapon. He's clearly got the muscles to wave it about in a menacing manner, as his back shows. He's absolutely ripped;


The other creature that took my fancy was the Ghost Archipelago Hemata, a kind of Snakeman with four arms and a snake body instead of legs.


Now, he (or maybe she, it isn't easy to tell, really) could quite easily be the Warlord, but I also need a Sorcerer and I've decided that a snake daemon sorcerer would fit in well with the Snakemen component of the army, so this is going to be my warband's Magic user. Here is the rear view.


I am going to stick with a red-based colour palette for the daemonic part of the force, with the cultists in grey robes with some red bits to tie it all together. 

My warband is going to have a fairly standard composition;

Warlord
Sorcerer
6 Hearthguard
1 Behemoth
3 Creatures
2 groups of 8 Warriors
1 group of Hunters

It is the same line-up as the Black Dwarves of Neggaruth warband in the rulebook in terms of groups and individuals.

I have ideas for the creatures and the behemoth, which will be revealed in due course.

I'll also be able to use both of these in games of Frostgrave too, so it is a win-win for me.

What a surprise - a sneak preview of the next Bad Squiddo Kickstarter

Well, actually I am sure that people who follow Annie on Facebook and elsewhere know that there is a new Bad Squiddo Kickstarter in the offing, and that it will feature Dwarves (a.k.a "Dorfs" in Annie-speak), so saying that it is going to happen isn't really a huge surprise.

However, I did get a proper surprise when a small parcel from Bad Squiddo arrived at my house on Friday, mainly because I wasn't expecting anything. Mystified, I opened the box and found the usual fruit teabag, a small figure in a ziplock baggie and a note.


To be honest, I felt honoured. I don't think I am a bad painter, but I am certainly not a Matt Slade, Kevin Dallimore, Paul Sanderson or John Morris in the paintbrush stakes, so being given the chance to paint up an advance figure from the Kickstarter made me really happy.

Anyway, I soon found out that I had a small grumpy woman with a big axe to paint. I got to work as soon as I could and finished her this morning.

There was something about her that spoke to me, saying "I am a grizzled veteran of many fights in the deep places of the world", so I wanted to give her grey hair, and well-worn clothes, but also the richly-embellished accoutrements of a fighter of great repute, hence the jewels set in her belt.

I didn't think she would be wearing bright colours, so I settled on a muted colour palette.


I must say that she was an incredibly crisp and clean casting, with absolutely no flash or moulding lines and she painted up a treat. 

Once again, Annie has really hit the bull'e eye with this figure, and also with a very timely female Dwarves Kickstarter, which will surely be featuring in more than a few Masters (Mistresses?) of the Underearth warbands for Saga Age Of Magic in due course. Equally, there are possibilities with other rulesets. Me? Well I am going to be revamping my Frostgrave band in the near future and I am sure I can find a place for a grudge-bearing Dwarf with a huge axe.

So, an absolutely terrific figure. Just don't mention the Hi-Ho song.

Wednesday, 1 May 2019

Swiss halberdiers join my Condottiere's band

I've had these halberdier figures half-painted for a while now, but got back working on them and finished them off yesterday. Once again they are Perry European Mercenaries 1450-1500 plastic 28mm models.

I wanted these to form part of the Swiss contingent of my Papal band, and I wanted to paint them in the same yellow/black scheme I used for the pikemen, representing the Canton of Uri.

There are 11 halberdiers plus a leader figure in heavier armour with a mace and a buckler. First, here they are as a block of troops;


And here they are in a line of two ranks;


I shall be using these as Fierce Foot for Lion Rampant, as suggested in the rulebook. Of course, they could also be deployed as Averland troops in an Empire army for Dragon Rampant or some other ruleset. 

The polearms (a mixture of halberds, glaives and voulges) were made by cutting down arms with pikes from the box and glueing polearm heads onto the shortened pike shafts, a rather tricky business. I've deliberately made the weapons differ in shaft length and also used a number of different heads for variety.

I like the way that they have turned out. I added in a few touches of red to provide a subtle colour lift to the overall group. The red codpiece on a couple of figures is a nod to 80s funk group Cameo.


Tuesday, 30 April 2019

The club Frostgrave League - continuing the scenario

Well, the Frostgrave League was much delayed by an unfortunate accident involving a staircase, an ankle and Andy, who has been running our "Find The Necromancer" series of linked scenarios. Anyway, Any is now back on both feet and the latest round of the adventure will be on 13th May. That, of course reminded me that I never wrote up the previous round, which we played back at the beginning of April.

Anyway, the scenario took our bands of treasure hunters and ne'er do wells out of the Frozen City to a location strewn with ancient ruins on the edge of some woods of bad repute. Woods in fantasy games are always of bad repute and will usually contain denizens who are unlikely to be a bunch of happy Teddy Bears having a jolly picnic and, when it comes to ancient ruins, well, the less said, the better.

This scenario had an unusual starting position. Each band was only allowed to field four of its members, each group to be led by either a Wizard, an Apprentice or a Captain. Richard, Owen and I all diced for who would do what, and I was tasked with providing my newly recruited Captain, with Richard sending the Wizard and Owen his Apprentice.


We were soon moving forwards into the unknown and the first unpleasntness to emerge was a Werewolf (here portrayed by my Werewolf from the My Last Sunrise set from Bad Squiddo). Owen's bunch of adventurers were able to see him off and things proceeded.


My group's job was to proceed to the building we could glimpse in the woods in the distance. However, on the way we were beset by a Giant Spider, but this proved to be vastly inferior to Shelob and was easily dealt with.


Advancing towards the woods, more creatures emerged, throwing javelins and disappearing, leaving me with a deceased Treasure Hunter.


I was unable to get them into combat, which was annoying, but hardly unexpected.


Finally, my Thug did manage to engage one of the things.


Elsewhere, more of them emerged and proved to be tough opponents.


Tough enough to kill my Thug, requiring the attentions of my Captain, Richard's War Hound and, eventually my Archer too.


It was clearly upset by my calling it a "horrible goblin thingy" but I did eventually kill it, but my Captain took a lot of wounds in the process.


Elsewhere, in what one can only call an Accursed Burying Ground a seriously Big Bad Thing emerged. My weakened Captain was in no shape to confront it, but Richard kindly healed some of my wounds with a spell.


It was a tough opponent, and appeared to be immune to normal weapons, but it was eventually killed, leaving Richard to discover an Enchanted Vorpal Sword among the graves.


Elsewhere, a twin Big Bad Thing was causing havoc with Owen's adventurers.


This one appeared to be immune to Magic, so I sent in my Captain, and she proceeded to go into battle against the vile beast. Eventually, the BBT fell to a combined attack from myself and Owen. 


Unhappily, my Captain was then set upon by evil Hounds, but by now the game was over, because we had the Enchanted Vorpal Sword, so we called it a day.


In the next round, I will be supplying the Wizard, so I am hoping that Ermengarde the Elementalist will prove to be a success and not get herself killed.

In the post-game accounting, my Treasure Hunter emerged unscathed, but my Thug was permanently dead. 

Monday, 29 April 2019

The raid on the trading post, part two - the AAR

Well, after yesterday's scene setting, time to move on to the actual game. We rolled to choose sides. Owen won the roll and elected to defend. The table was laid out like this. First, the view from the Bordurian end of the table.


And now, two views of the Syldavian trading post of Schlopp, a small town with a large market square.


In this second picture, you can see the Syldavian Primary Deployment Point (represented by a colour party) wandering aimless around. It would actually be placed in the market square.


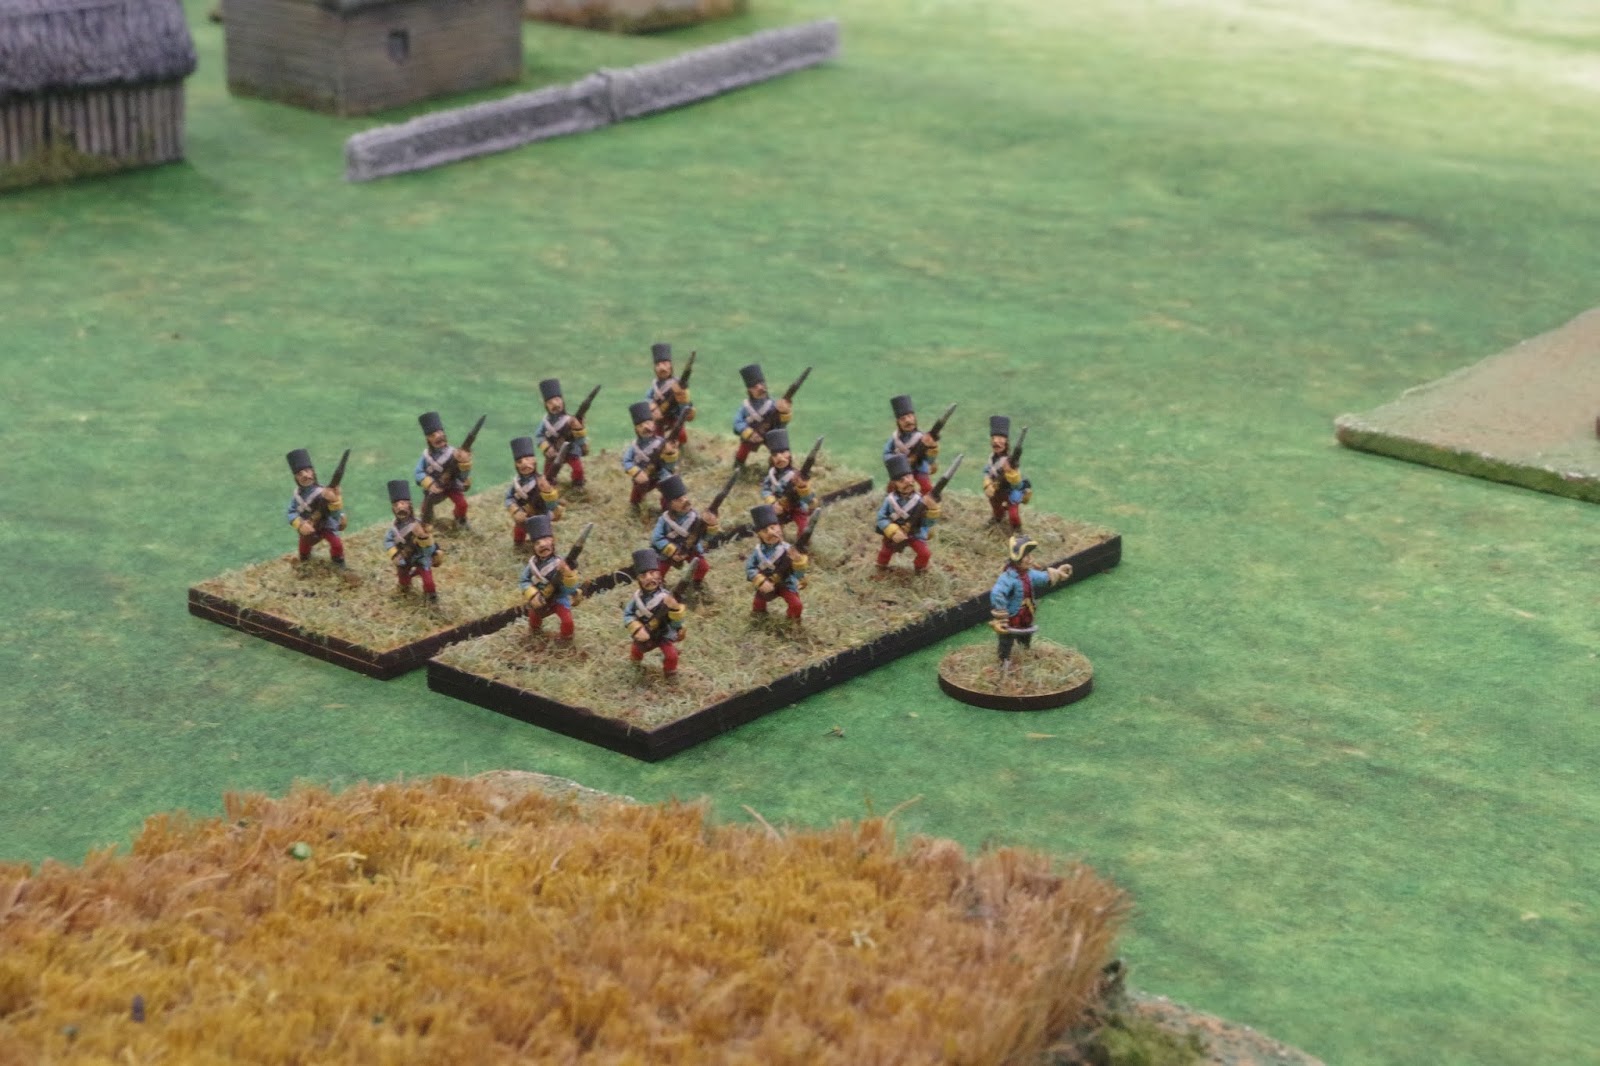
The Bordurians, in the shape of the Freikorps Schtroumpf Fusiliers, were first on the table, led by Kapetan Dimitar Cantacuzene, a very distant relative of the Bordurian Autokrat Constantine II.


Before long, the Syldavian light troops began to appear, no doubt alerted by woodsmen and shepherds fleeing the advancing enemy. First, Pandurs from the Douma regiment.


More Syldavian troops began to deploy; Pandur skirmishers and light infantry Schützen (rated as Good Shots) from the Strelec Jäger regiment taking up firing positions in the cornfields. These were soon in action, firing at long range on the Freikorps. The Bordurians were slower to arrive, but some Hajduk skirmishers took up a position in the woods and caused some shock on the main body of the Pandurs.


The Freikorps Schtroumpf Hussars arrived, resplendent in their blue and white uniforms and led by the dashing and impetuous Kapetan Alexios Doukas. 


Holding a strong line across the cornfields and animal pens of the town, the Syldavian light troops were doing a good job of holding up the Bordurian advance. Even more worrying was the non-appearance of the Kashkaval Lancers. As things were turning out, their deployment wasn't going to be in an advantageous place. I had hoped to deploy all my cavalry early on from the Hajduk skirmishers Moveable Deployment Point in the small copse in the middle of the picture above, but the speedy arrival of the Douma Pandurs had made this impossible.


Throwing caution to the winds, Kapetan Doukas charged his Hussars into the Pandurs at the gallop. These light cavalry have the Blood-curdling characteristic ("Tomahawks" in the rulebook), which means that they cause shock when attacking for each 6 rolled on a D6, using 1D6 for each figure in the group. As always seems to happen, the resulting Fisticuffs was bloody, but the gallant Hussars came off worst and were forced to withdraw. However, the amount of shock accumulated by the Pandurs meant that the group in combat were also forced to pull back, breaking the formation.


Using four Command Flags, I reactivated the Hussars and they galloped in again, this time wiping out the now unloaded Pandurs for no further losses. Unfortunately, the main body of Syldavian infantry, from the Istow Fusiliers had now arrived. Before long, an uncontrolled volley from the front group of the column drove the Hussars back, making a swift charge into the town unlikely. Winning was beginning to look impossible for the Bordurians. Oberst Maximilian von Taschentuch, the commander of the Syldavian Fusiliers was content to stay in the town, protecting it from assault.


Elsewhere, the Bordurian advance had stalled. The lancers had still not arrived, and Kapetan Cantacuzene had taken a wound from skirmishing fire which had left him knocked out.  


Finally, the Kashkaval Lancers turned up, and were soon looking around for something to charge into. Their leader, Porucnik (i.e. Lieutenant) Mihail Xinomavro decided that the battered Strelec Jägers would be easy meat and set about charging in.


This didn't seem a bad idea, seeing as the Syldavians had broken their formation into two groups and the Bordurian Hajduks, although the worst troops on the table, were managing to cause shock and casualties.


Recklessly, the Kashkaval Lancers advanced into a storm of musketry, losing half their number dead. Tiffin intervened, but their chip was amazingly the first one drawn in the next turn and they ploughed onwards. The picture shows the outcome of the combat before I removed the Bordurian casualties (The Syldavian dead were already gone). Yes, the Lancers had lost, and even worse were wiped out, with only the hapless leader, Mihail Xinomavro left on the table. So much for my cavalry threat.


That was pretty much it for the Bordurians. I had too few troops left to have any hope of getting into the town of Schlopp, despite the now-revitalised Kapetan Cantacuzene controlling the centre and wiping out the annoying Pandurs who had held things up for so long.

Over on the Bordurian right flank, the Smederevka Hajduks, after a few volleys of musketry which led to a huge pall of smoke obscuring the valley between the two small hills, charged into combat against the much weakened Strelec Jägers, predictably pushing the Syldavian light infantry back, but it was a Pyrrhic victory and the Bordurians were compelled to withdraw.


Well, it was a frustrating game from the Bordurian perspective. Although I managed to get Syldavian morale dropping steadily by weakening the forward defensive screen of Pandurs, Jägers and  associated skirmishers, the cost to me was too high. In effect, my force was defeated by these dogged defenders, with the Istow Fusiliers staying well back and acting as a reserve only.

My plan had depended on getting my cavalry on the table early, ideally before the Syldavians were properly deployed, and making a dash for the town, but the chips didn't come out as I wanted. Owen played his hand perfectly, using his skirmishers to weaken my troops and his Pandur and Jäger line groups to stop any real breakthrough from happening. Yes, they were massively weakened in the end, with loads of dead, but they did their job perfectly.

The Fisticuffs really exposed the weakness of Scouting Cavalry against infantry, but without any Impact Cavalry they were the only chance I had to get through the defensive line, especially once my main group of infantry were stalled by the incapacity of their leader.

Anyway, it was a good game and it was nice to see my imagi-nations on the table again.

Sunday, 28 April 2019

The raid on the trading post, part one - Sharp Practice in Syldavia and Borduria

This game in set in the mid-18th century and is a clash between the two well-known (to readers of Tintin) imagi-nations of Syldavia and Borduria. The forces used will be some of my Essex Miniatures 15mm Syldavians and Bordurians, details of which can be found elsewhere on this blog.

I'll be playing this scenario this afternoon at the club, but I thought that I'd set the scene before the game. The scenario represents a typical raid by Bordurian Freikorps and regional forces against a Syldavian garrison protecting a trading outpost. Such raids were common along the borders between the two countries, even when they were not formally at war. It is a variation of Scenario Three “Defence in Depth” on p. 74 in the rulebook.

The image comes from the book and is copyright of the TooFatLardies

The book sets the scenario out thus;

INTRODUCTION

This game is a Battle. One side is attacking a position, which is held in depth.

DEPLOYMENT POINTS

Red has two Deployment Points for this game. His Primary Deployment Point may be placed anywhere in the red shaded Zone 1, a secondary Fixed Deployment Point in Zone 2.

Blue may place a Primary and Secondary Deployment Point within 6” of points 1 and 2.

Both sides may add other Fixed or Moveable Deployment Point if available.

OBJECTIVE

To win a victory Blue must capture Red’s Primary Deployment Point. If that is achieved, the game will end immediately.

TERRAIN & MINOR CHARACTERS

There are no specific terrain requirements for this scenario. Before the game begins, roll a D6 to see if any Minor Characters are present. On a 1 to 3 none are present, on a 4 to 6 two civilian Minor Characters is present. They have no objective but are simply conducting their everyday business.

I have made some changes to this basic scenario, which are outlined below.

Red are the defending Syldavians and Blue are the attacking Bordurians. Zone 1 represents the Trading Post itself and Zone 2 consists of a number of fields. The rest of the terrain is lightly wooded.

The Syldavian forces consist of;

3 groups of 8 Line Fusiliers (Status III leader and Status I leader, musician) from the Istow Regiment

2 groups of Jägers in Line (Status II leader) and 1 group of Jäger skirmishing light infantry (Status I leader) from the Strelec Regiment

2 groups of Pandurs in Line (Status II leader)
1 group of Pandur skirmishers (Status I leader), both from the Douma Pandur Regiment

1 ammunition wagon
1 water cart
Moveable Deployment Point

The Bordurian forces consist of;

3 groups of 8 Freikorps Schtroumpf Fusiliers (1 Status III leader and 1 Status I leader)

2 groups of Hajduks in Line (Status II leader)
1 group of Hajduk skirmishers (Status I leader) both from the Smederevka Regiment

1 group of Freikorps Schtroumpf Hussars (Status II leader, Musician, Colours)

1 group of Lancers (Status I leader) from the Kashkaval Regiment

1 ammunition wagon
1 mule train
Moveable Deployment Point

Minor characters

There are four groups of livestock animals in two pens behind Zone 2. These may be captured by the Bordurians. Each captured group must be accompanied by 1 Bordurian who can no longer fight in fisticuffs or shoot.

There are civilians in the trading post. These can also be captured by the Bordurians in the same way as the livestock. All of these are Peter Pig figures.

Until the two Tiffin chips have been drawn, the chips for the Syldavian Fusilier leaders will not be in the bag. This represents delays in the troops leaving their barracks and arriving on the field of battle.

Chips are allocated thus;

Syldavian forces (red)

Istow Regiment: 1 = Status III leader 2 = Status I leader

Strelec Regiment: 3 = Status II leader 4 = Status 1 leader

Douma Pandur Regiment: 5 = Status II leader 6 = Status I leader

Bordurian forces (blue);
Freikorps Schtroumpf Fusiliers: 1 = Status III leader 2 = Status I leader

Smederevka Regiment: 3 = Status II leader 4 = Status 1 leader

Freikorps Schtroumpf Hussars 5 =Status II leader
Kashkaval Lancers 6 = Status I leader

As I like to give my leaders names (in true Sharp Practice fashion), the leaders are;

Syldavia;

1) Oberst Maximilian von Taschentuch
2) Leutnant Antun Rizvanac
3) Hauptmann Adrijan Zrezek
4) Feldwebel Marko Krompir
5) Oberleutnant Stanislav Pokalca
6) Feldwebel Mitja Repa

Borduria:

1) Kapetan Dimitar Cantacuzene
2) Narednik Risto Morkov
3) Porucnik Petrov Gaba
4) Narednik Lazar Kopriva
5) Kapetan Alexios Doukas
6) Porucnik Mihail Xinomavro