Showing posts with label 61st foot. Show all posts

Friday, 10 April 2026

61st Foot - my final few things

Some people may remember my 28mm Sharp Practice British Peninsular War force using the 61st Foot, the South Gloucestershires. These are the final 15 figures I planned to complete and a mere 4 years late, they are done.

Above are my final six skirmishers from the Light company, with a sergeant on the right. As previously, I have tried to make them look somewhat bedraggled and battle-worn, mainly by varying the colour of their trousers.

Below are an Ensign for the force and a drummer for the Light Bobs, I already have a drummer for the Centre Company chaps and finally, two Deployment Point markers, one for the centre company troops and another for the Light Bobs.


I like to give my Leader figures names, so the Light Company sergeant is Sgt. John Redcliffe and the Ensign is Thomas Barton-Hill. Anyway, I have now finally completed my force for Sharp Practice and hope to get a chance to deploy it at some point in the future. It now consists of four groups of 8 line foot and another four of six skirmishing light infantry, plus a fair number of leaders and support choices.

The backdrop is from a Jon Hodgson book, as per normal and the figures are from the Victrix Flank Company set.


Monday, 7 June 2021

Some new recruits for the 61st Foot

 I've been meaning  to paint another group of 61st Foot to use up the last few Victrix 28mm plastics for ages, and finally, here they are.

This gives my 61st Foot Sharp Practice force four groups of Centre Company line troops, which with the three groups of Light Company skirmishing Light Bobs means that I have a fair amount of firepower to deploy on  the table.

The main reason for getting them done now is for a weekend of Peninsular War Sharp Practice at BIG in a couple of week's time. It'll be great to catch up with the regular crew for two whole days of Lardy fun and games.

Now they are complete, I might even knock up a little vignette of something as a deployment point, and maybe even finish off my water and ammunition carts which have been languishing half finished since before the Plague struck back in early 2020.


Monday, 14 September 2020

Face to face in the village - a Sharp Practice AAR

Yesterday was my first chance to play Sharp Practice for months, for obvious reasons.  It was also my first opportunity to get my recently painted 61st Foot Flank Company skirmishers on the table. 

The game would be an encounter between an Anglo-Portuguese force and a small column of French Infanterie Légère, supported by a medium gun.

Both sides would be trying to secure the village of San Jorge con Pantalones.


The British were first to arrive, with Lt Barnaby Thorne and a single group of the famous 95th Foot. They took up position behind a low wall surrounding a small plantation of fruit trees. Unfortunately, I then pushed them up across the road into danger and they were heavily defeated in Fistucuffs, forcing them back into the fruit trees. Luckily, the gallant Barnaby Thorne lived to fight another day.

They were soon joined by some skirmishing flank company troops from the 61st Foot, led by veteran sergeant Harry Stottle, who was soon wounded by accurate fire from a group of Légère Voltigeurs, leaving him in a dazed state and unable to exercise any command for the rest of the game.

The French were also beginning to arrive, as two groups, led by Lt Poulidor managed to seize control of a cottage on the main road through the village.

The Portuguese component of my force soon put in an appearance; three groups of Fuzilieiros from the 20th Regiment, led by Capt. Horacio Cataplana. You can see them here, flanked by the rest of the 61st' Light Bobs, led by Lt. Archibald Leach.

Volley fire from the Portuguese, supported by the 61st, soon took their toll on the French, who were forced back to hide behind one of the village houses.

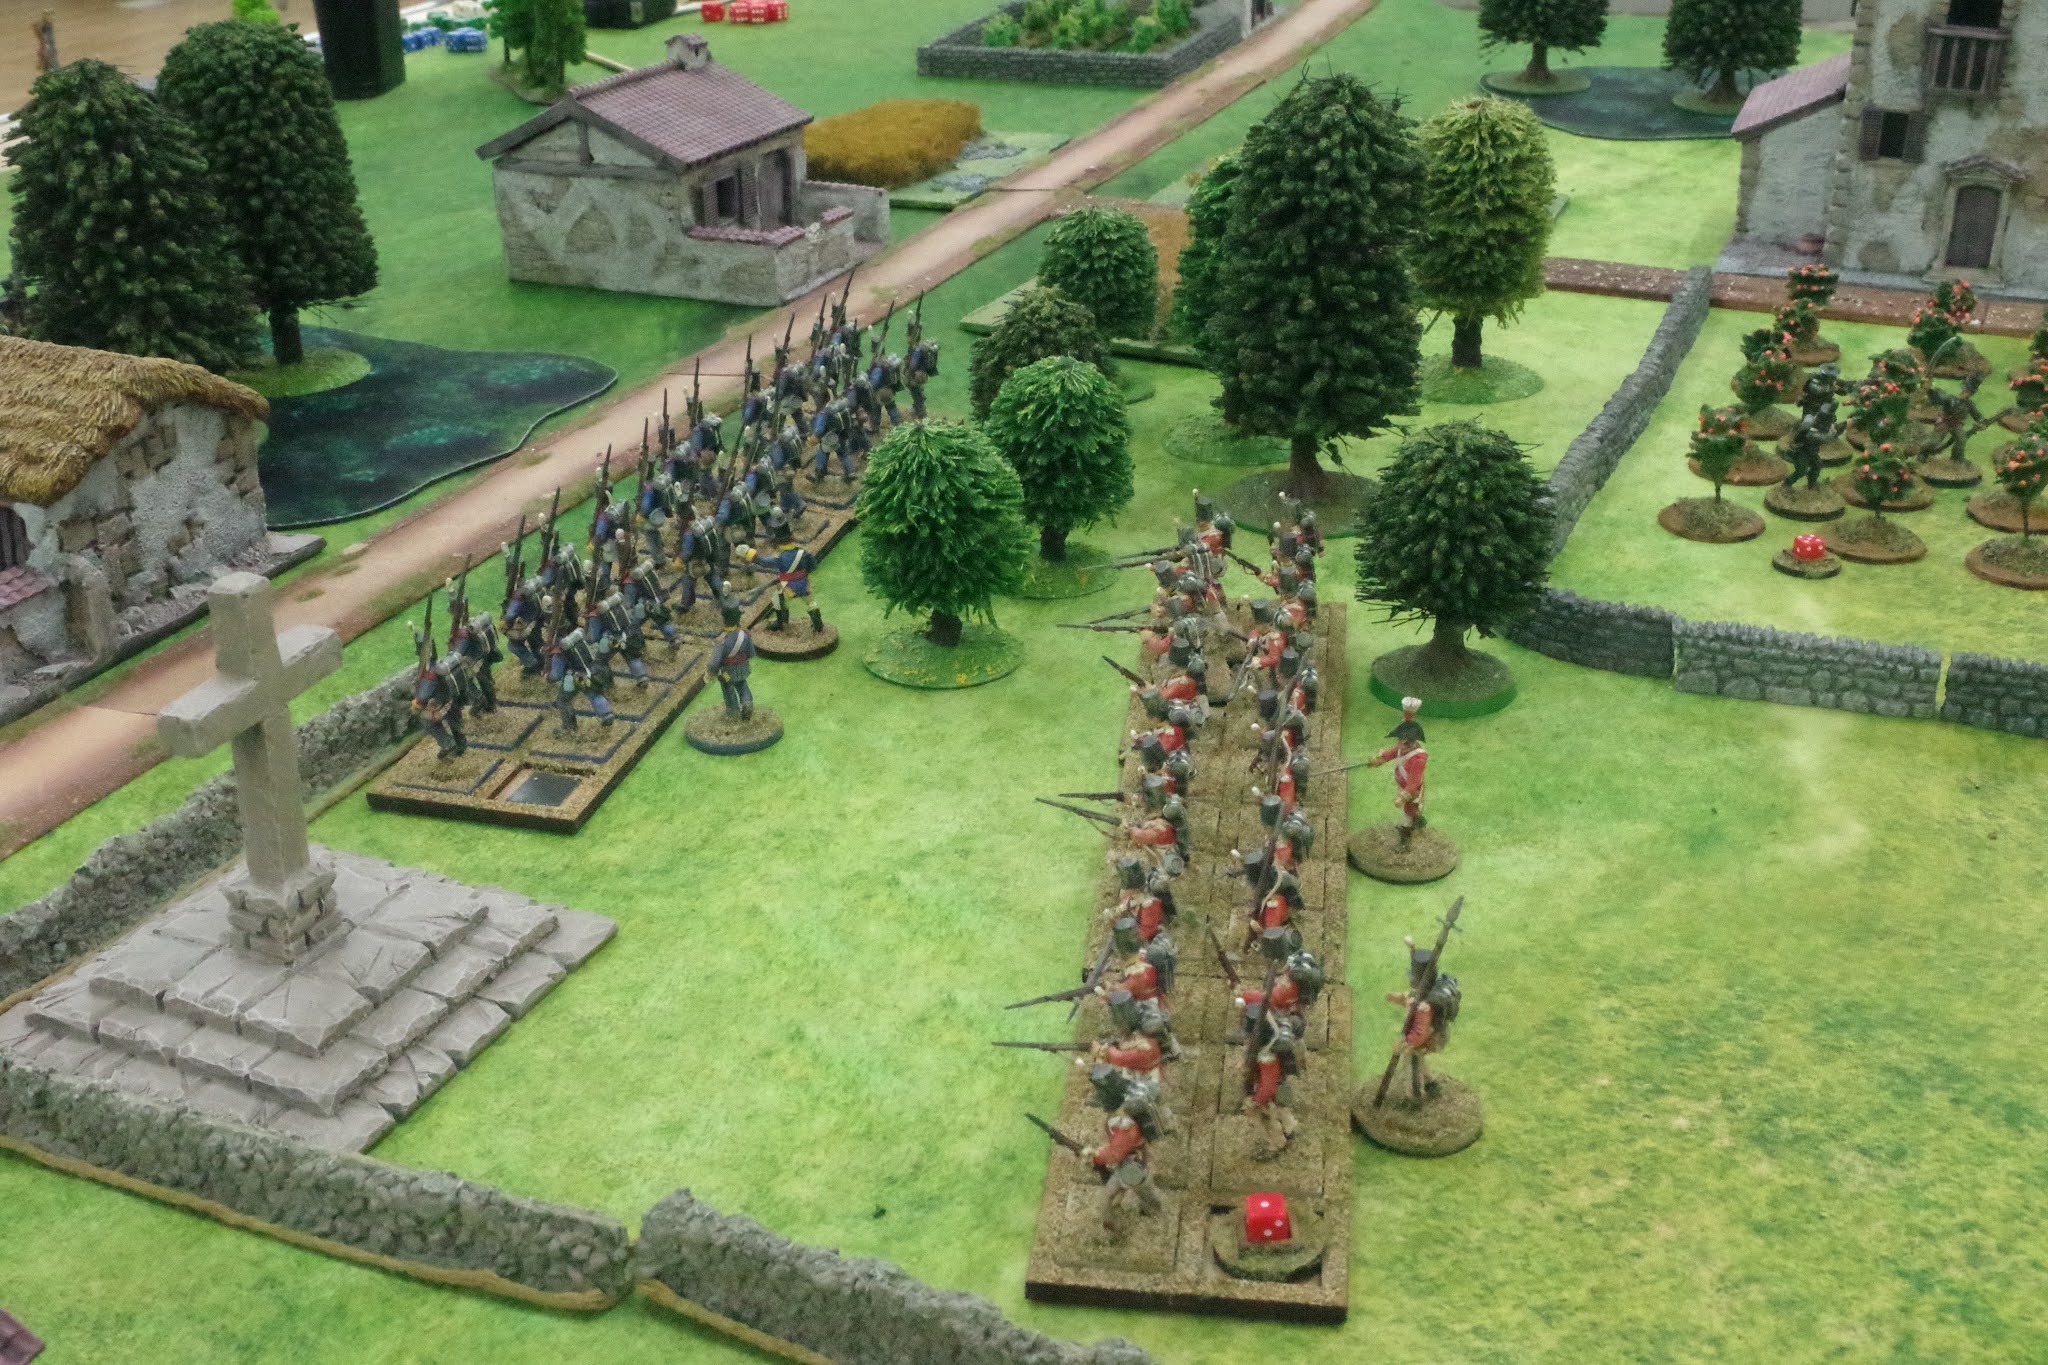
The rest of the 61st Foot arrived, led by the estimable Maj. Molesworth, forming a second line behind the 20th. Slowly, the British began to advance into San Jorge. My plan had originally been to bring both formations up to the main road and use the skirmishing light infantry to protect their flanks, but the mauling given to the 95th, meant that the Portuguese would have to move obliquely into the trees by the road.

Elsewhere, the French began to advance around the far side of the village.

The French cannon was soon deployed. I knew that I had to eliminate this threat to my line troops, and I pushed the flank company skirmishers around the house on my left flank, even though it was occupied by French skirmishers. I judged it a risk worth taking.


Taking up position near a boggy patch of ground, I was able to use four command flags to give the Light Bobs an extra free round of firing before also activating Lt Leach. This proved devastating and wiped out the crew of the French gun, and also giving its supporting infantry a hard beating. The tide was turning my way.

The Portuguese moved up to take up position along the road, while the 61st moved up on their left.

The French charged through the small coppice into my line, but only one group made contact. Even so, they fought well, killing the Portuguese leader, Capt. Cataplana and three of his men. However, I killed six of them and inflicted considerable shock on them too, forcing them to flee.


So, the village ended the day in Anglo-Portuguese hands, with very few casualties on the winning side, apart from the unfortunate Portuguese officer, whose demise will have to be revenged at at future date.

Thursday, 20 August 2020

At last! The sun is shining, Pt. Two - Napoleonic Light Bobs

Actually, there are twenty-one Light Bobs in total, so scroll down to see them all.

These are all Victrix 28mm plastics from the British Peninsular War flank company box set.

First, three groups of six skirmishing light infantry with muskets.


In keeping with my preference for battleworn-looking troops, these are stained, dusty and a bit battered.


Note that I have varied the colours of their trousers. I wanted to give the impression that these chaps have been in the field for long enough for their uniforms to get tatty and their trousers to wear out.


Finally, three leaders for the troops; two NCOs and an officer.


These troops are intended to be Light Company skirmishers for my 61st Foot, hence their green shako plumes.

I decided a while ago that the Baker Rifle-equipped 95th and Portuguese Atiradores were not always ideal in all situations, being expensive in points and also slow to reload. Therefore, I wanted to bolster my British Sharp Practice force with some ordinary flank company Light Bobs with muskets. Yes, they lack the range of the Rifles, but they only require one reload action and are cheaper in points costs. My troops have already suffered a lot from attacks by French voltigeurs in numerous games, enough to make me realise that the British also needed some musket-equipped light troops of their own.

That isn't to say that I am retiring my 95th Rifles, far from it. I am just increasing my options, after reviewing the situation.

Anyway, I really have to give the leaders some names, so; from left to right we have;

Sergeant Harry Stottle, a grizzled veteran of the 1st Battalion who first served in the Caribbean campaign of the 1790s and also served in the Egyptian Campaign of 1801-2. He was promoted to sergeant after Talavera.

Lieutenant Archibald Leach, inexplicably known as "Cary" to his fellow subalterns. He joined the 1st Battalion in Malta as an ensign in 1803, serving in Italy where he fought at the Battle of Maida, before receiving a battlefield promotion to Lieutenant after the Battle of Talavera in 1809.

Corporal Ashley Down, Bristol born and bred and a former crew member on a Bristol Channel trow, Cpl. Down enlisted in in the 61st in 1804 to avoid being press-ganged into the Navy. He also fought at Maida and Talavera.

Tuesday, 23 April 2019

Escort Duty - a Napoleonic Sharp Practice AAR

Last Sunday at the club was a chance to get my 28mm Anglo-Portuguese forces on the table for a big game of Sharp Practice against Brian's French. The scenario was the fourth one in the rulebook; "Escort Duty". The aim was for one side to enter at one end of the table, escorting an important person and exit at the opposite end. The Anglo-Portuguese would be the escorting force.

The table was laid out with a river running along the length, with fields and wooded areas on both banks. The river was fordable along its entire length, counting as a minor obstacle, but also had two shallow fords, where movement was not affected. There was a water mill at one end of the table, with a patch of marshy ground close by. This offered light cover, being a tangle of tall reeds, aquatic plants etc. First, here is the table from the Anglo-Portuguese end. their entry point was to the right of the river.

The Anglo-Portuguese forces were;

Captain Nigel Molesworth (Status III) of the 61st Foot with 3 groups of 8 from a Centre Company, accompanied by Sgt Timothy Peason (Status I) and the Important Person, Coronel Vincente Salvador da Silva, a Portuguese Exploring Officer from Wellington's Staff. Cpt Molesworth is accompanied by a Drummer (musician).

Lieutenant Barnaby Thorne (Status II) and Sergeant "Waspy" Jasper Hyde (Status I), each with 1 group of 6 95th Rifles.

Tenente Alfonso Bacalhau with 2 groups of 6 Atiradores from the 3rd Battalion of Caçadores. 

Sargento Tiago Cataplana with 1 group of 6 Atiradores from the 3rd Battalion of Caçadores.

Like the 95th, the Atiradores are equipped with Baker rifles and operate as skirmishing light infantry.


This is the water mill, close to the exit point for the Anglo-Portuguese.


The rules for this scenario state that "Blue enters the table at either Point 1 or 2, rolling to see which with an equal chance of either. They place a secondary Fixed Deployment point there, as they have no Primary Deployment Point for this scenario. Roll a further D6 and half that total, rounding up. The Blue player now takes that many moves with his entire force."

So, the Anglo-Portuguese (being Blue) then got to move along the length of the river for three uninterrupted moves. I deployed all my light troops as far along the river as possible, with the Atiradores crossing over to try and seize good firing positions. Thorne pushed on to secure a position in a field of wheat. Sargento Cataplana's group of Atiradores moved to occupy a wooded hill overlooking the area from where the French were to deploy. This group would keep up long range fire on the French throughout the battle.


Meanwhile the 61st advanced along the river valley in open column. Coronel da Silva was with this body of troops.


Tenente Bacalhau got his two groups of Atiradores into a wood where they could easily prevent the French from safely venturing across the open ground towards the river.


Once my three free moves were over, we began to draw chips from the bag, as normal. The French quickly began to deploy from the opposite bank of the river to Molesworth's 61st, but close to where the Anglo-Portuguese would have to exit. I wasn't too happy to see artillery arrive.


However, the French were in range of both Tenente Bacalhau's Atiradores and Sgt Hyde's 95th, so both groups began to fire, causing a couple of casualties and some shock.


More French soon arrived, no doubt hurrying towards the sounds of battle.


Before long the French line fusiliers were firing at Hyde's Light Bobs on the edge of the marshy ground.


The 95th acted as a skirmish screen protecting the main column of the 61st, but the French fire wasn't particularly accurate at what was extreme range for muskets. Even so, the French did manage to inflict one casualty on the British Foot.


Thorne had also joined the fighting by now, adding his men to the skirmishing screen protecting the 61st and Coronel da Silva.


Undeterred, Molesworth urged his men on towards safety, unaware that a small group of French Légère Voltigeurs had crossed the river and were waiting hidden behind the water mill.


Accurate fire from the 95th and the Atiradores was pretty much pinning the French down at long range, preventing them from getting close enough to make their musket fire more effective. However, the could easily change.


And change it did. the Voltigeurs opened fire, forcing Molesworth to deploy into line, as the 61st took casualties. Lt. Thorne's 95th joined in the fire fight, as Sgt. Peason was charged with escorting Coronel da Silva to safety. Other French troops were also pushing to cross the river. Things were getting a bit tricky for the Anglo-Portuguese.


However, the French Légère skirmishers were driven off by a mixture of controlled volley fire from the 61st and accurate rifle sniping from the 95th.


A heavy pall of smoke descended on the battlefield, as the French were forced to withdraw back across the river. Peason and his group of fusiliers took Coronel da Silva across the wheat field, shielded by Molesworth's defensive line.


Elsewhere, the battle continued, with the French finally getting their gun into action, firing canister at Tenente Bacalhau's Atiradores, but Sgt, Peason and his group of 61st were able to get Coronel da Silva to safety.


So, a victory for the Anglo-Portuguese, helped very much by two factors. Firstly, the terrain favoured the Escorting side once the dice roll to see where I would enter from allowed me to get onto the opposite side to the French. Secondly, my Light Infantry were able to function exactly as intended, skirmishing and harrying the French deployment, providing a screen for the main column and then adding extra fire to drive off the French threat by the water mill.

Monday, 1 April 2019

To See Again Such Loss - a full weekend of Sharp Practice.

So, once again down to BIG for a fun-packed weekend of 28mm Sharp Practice action, this time set in the Peninsular War. As with many other BIG Sharp Practice weekends, this was organised and orchestrated by David Hunter, whose enthusiasm is enormous and who really keeps the narrative thrust of these gaming sessions alive.

We were limited to 55pts (or thereabouts) per player per game, with two players on each side. We were allowed to vary the composition of our forces from game to game, with the proviso that we kept the same force commander throughout.

I took all of my available Anglo-Portuguese troops, thinking that I might need to vary things around a bit, depending on the table being played over. As it panned out, this was a good idea.

My initial force was as follows;

A formation of 3 groups of 8 British centre company infantry from the 61st Foot, led by Captain Nigel Molesworth (Status III), who was accompanied by a drummer (a musician in Sharp Practice terms) and two Status I leaders, Sergeants Timothy Peason and "Scrumpy" Jack Spratt. (34pts)

One group of 6 men from the 95th Rifles led by Lt Barnaby Thorne (status II)  and Sgt Jasper Hyde (Status I)  (21pts)

For subsequent games, I switched out the Rifles and one British  line sergeant, freeing up 24 points. 

My first replacement was two groups of 6 Portuguese Rifles (as a formation) from the Atiradores company of the 3rd Caçadores, led by Lt Horacio Bacalhau (Status II), costing 24pts.

I amended this for the two Sunday games by reducing Lt Bacalhau to Status I and adding another Status I leader in the shape of Sgt Manoel Cataplana, allowing me to field the Atiradores as two separate groups, giving me extra flexibility.

This last version was a far better balanced force.

The theme of the weekend was the French pursuing Wellington's retreating forces (mainly British, but featuring some Spanish and Portuguese troops, plus some Royal Navy sailors and Marines), with the Anglo-Portuguese conducting a fighting retreat, centred on the town of Puenta des Pantalones. 

The French had the best of the first day, leaving the Allies a lot to do on the Sunday, but, when the last musket was fired and the smoke cleared (a.k.a. when the last dice were rolled and the cotton wool removed), the weekend ended up with a victory for the Allies. As Sir Arthur himself almost certainly never actually said, it was a damn close-run thing.

My personal favourite thing was defeating a worryingly determined and quite large French attack column (which never managed to activate Pas de Charge) with my Portuguese light troops and my thin red line of the 61st for no losses whatsoever, in the final game, but it was also good to see off a galloping charge by two groups of French lancers in an earlier game, even though it did cause me a fair bit of damage. Still, I did capture the Lancers' commanding officer.

Anyway, lots of photos, so feast your eyes on some great terrain and lovely-looking armies.