Showing posts with label 15mm vehicles. Show all posts

Sunday, 20 April 2025

More 15mm vehicles - a British recce troop

More models I've had for a while and finally got round to finishing off.

This is a British recce troop, part of a Reconnaissance Regiment in a British Armoured Division in the later war period.

The Troop consists of two Daimler armoured cars and two Daimler Dingo scout cars. The Troop commander is in one of the armoured cars. The troop would probably have operated in pairs, each pair being an armoured car and a scout car. 

These models are from Flames of War and are nice and simple to put together and paint. The box contains options for 2 pdr guns with Littlejohn squeeze bore adaptors, but I left them off, because it appears that the squeeze bore shells provided extra punch even when fired from a standard 2-pdr gun.

These are a nice addition to my 15mm Late War British and I've already put them on the table in a recce force scenario, where the armoured cars suffered heavily from Panzerfausts fired by their Volkssturm opponents.
 

Monday, 27 May 2024

Finally got the camera and lightbox out.....

 ....so that I could photograph some completed things. Here are some tanks. First a really silly Soviet monster;

The T-35 couldn't be called a success in any meaningful way, but it has a certain WTF? quality about it. This is a 15mm Zvezda kit and I'm not sure how or when I might get it onto the table, except maybe as a broken down vehicle that could be an objective. I think I've painted it up a bit pale, the green really ought to be darker, but my excuse is that the factory that produced it only had a lighter batch of green paint available.

Now, three more sensible German AFVs;

From left to right there are: the Czech CKD LT vz. 38 which, as the Pz 38(t)  was a useful (and much needed) addition to the early war Panzer forces, the workhorse Pz Kfw III Ausf. G with the 5cm Kwk 38 L/42 and the Sd Kfz 222 with the 2cm KwK 30 autocannon.  These are also Zvezda kits and will work nicely for the invasion of the Low Countries and the Battle of France and also for Barbarossa.

Sunday, 27 February 2022

I have a new project about to start

It is in 15mm again and it is WW2. Here are a few teaser pics;


As you can see there are British and Indian infantry in Tropical KD uniforms, enough for two platoons and a variety of support options and there are also three vehicles, undercoated in Russian Uniform green. 

Can you guess what theatre I am going to do? The colour of the vehicles and the large one in front should be clues.

The figures are all Peter Pig 8th Army and the vehicles are 3D prints from Butlers Printed Models. These are my first venture into the world of 3D printed and I have mixed feelings. The striations from the printing are pretty noticeable which is annoying, and the models needed a lot of cleaning up when they arrived, but I think that they'll do on the tabletop. I added in the Carrier drivers from some leftover figures from my spares box.

You can just see the armoured car's turret behind the body of the vehicle.

These are for Chain of Command. Hopefully, I'll have them pained up pretty quickly.


Saturday, 22 January 2022

My Soviets have a tank!

A T-34/76 to be precise.


The paintwork could be a lot neater on the turret above, but perhaps the painting on the actual vehicles was pretty slapdash?


The model is a 1/100 scale (i.e. 15mm) Zvezda one, and I bought it ages ago from the shop at the Bovington tank museum. I had assembled it and put it away in a drawer for safekeeping and pretty much forgot all about it. I was only because of a comment on a previous post that I remembered it, so I found it, gave it an undercoat and finished it off late yesterday afternoon. I varnished it with Humbrol Matt Spray this morning and I think it has come out OK.

It is a nice simple kit and has enough detail for a wargames table. My only criticism is the absence of external fuel tanks.

I undercoated it in PSC Russian uniform and gave it a bit of a dry-brushing in Vallejo Brown Violet, followed by another dry-brush with German Camouflage Beige to bring out the angles and curves. I did the tracks with Vallejo Panzer Aces track primer and then touched up the edges of the tracks with Oiled Steel while the primer was still wet. Then I did the stars and white stripe on the turret and did the steel cables with oiled steel mixed with track primer. There is also a small amount of rust effect paint around the exhausts and on the cables.

Then the whole vehicle got a dry-brushing with Vallejo Tan Earth, followed by a wash of Citadel Nuln Oil.

I am so pleased with this that I've ordered a couple more Zvezda tanks online; a T-34/85 and a KV-1. 


Monday, 23 September 2019

Alien Squad Leader - a new AAR

OK, hands up, this ASQL game was a few weeks ago, but I decided against photographing yesterday's game at the club, because it was S&SF  with my Hyborian barbarians (again) and I thought it would be a bit samey. 

I would be defending the base in the distance with my GZG Corporate Mercenaries against Richard's multi-legged Alien Imperial army made up from GZG Xar, plus various other figures.

The Galactic Seafood Corporation had set up a luxury food processing plant on this remote planet, having discovered that the immature version of the locals (a.k.a. the Crabbies) tasted like a superior version of the best crab or lobster ever previously tasted. This exciting new product was being marketed across space as "The Sunday Roast Where Everyone Gets A Leg".

The locals were, understandably, outraged and had called in a punitive expedition from their relatives on the nearest Crabby Imperial homeworld.


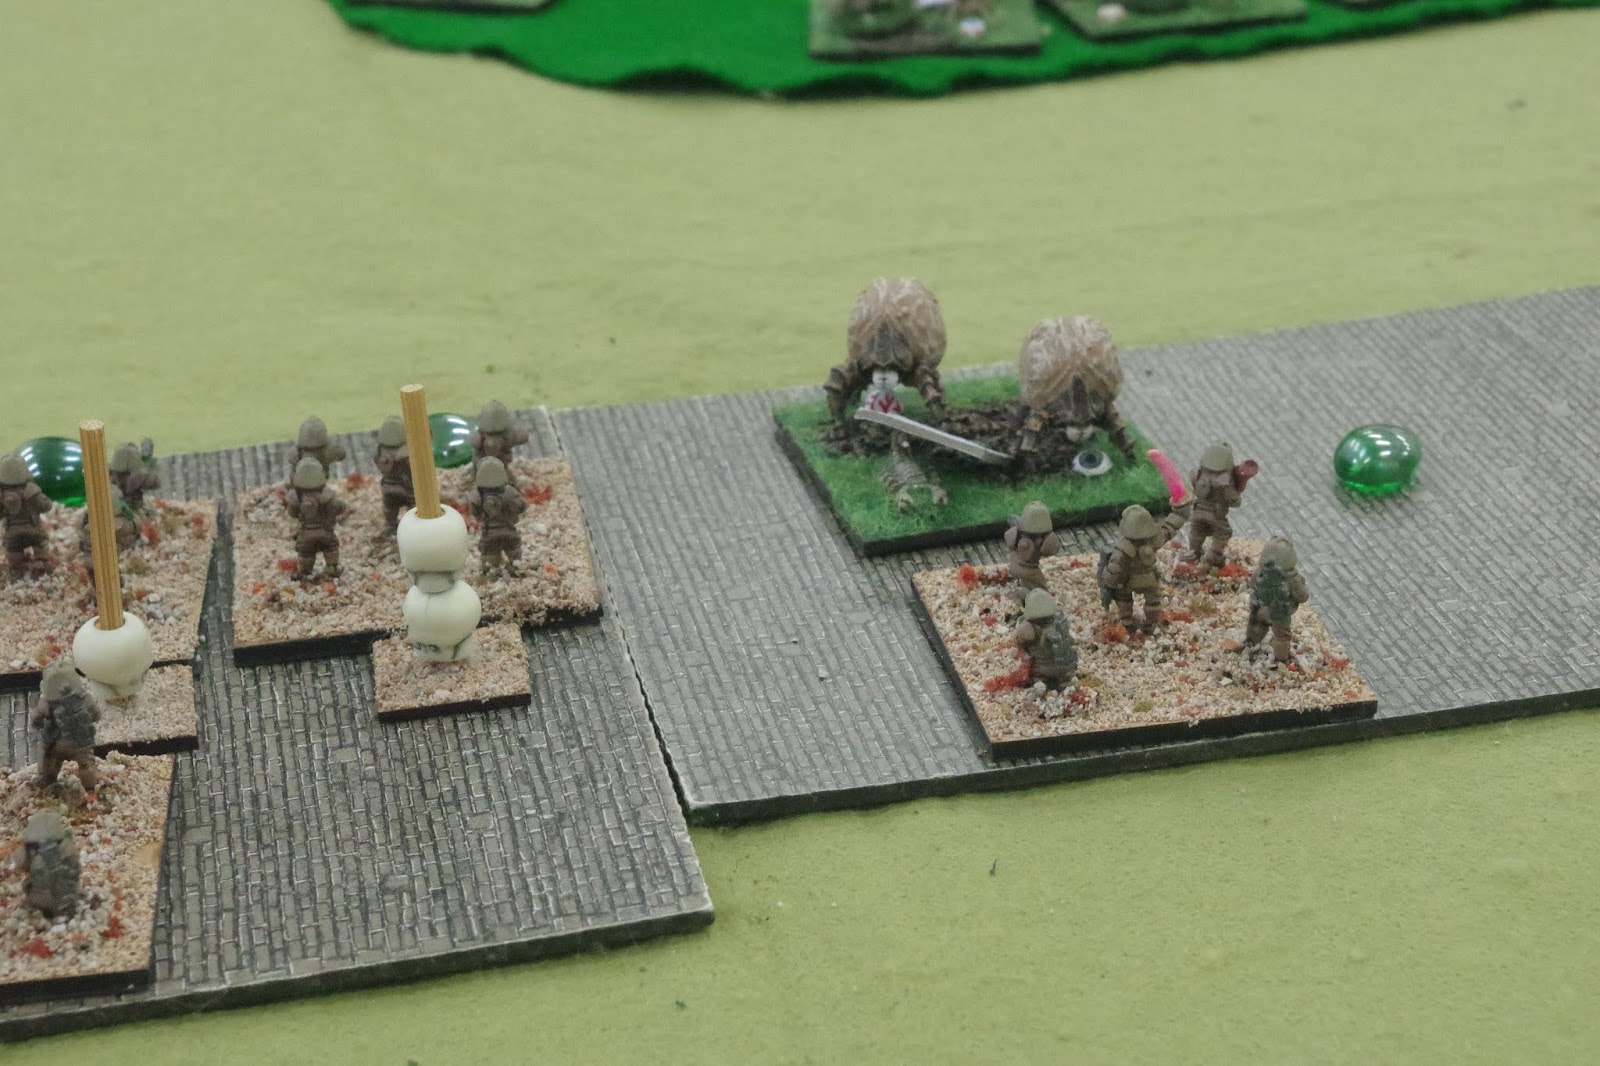
Here are my opponents, looking suitable Crabby and Outraged.


There were some anti-grav vehicles too.


My Mercenaries were equipped with two new additions, combat mechs with laser katanas, not that I was planning to use them in close combat if I could avoid it. The yellow beads indicate that the units thus marked are on Overwatch.


My Force Commander was close to the objective, but not actually in that forward position, preferring to stay in the less advanced built-up area.


I deployed a variety of troops on Overwatch defending the Objective, included power-armoured Samurai. There was a question over these, as the rules state that they are equipped with Heavy Weapons, but a discussion with the author, Alex Self later revealed that this was in actual fact a typo, and they should properly be given Small Arms. However, having played a few moves before Alex turned up, we agreed to keep the HWs for this game only.


The Crabbies began to swarm forward, both from the central forest and also on their left flank. I was worried about those light armoured vehicles with their Superior Energy Heavy Weapons.


We exchanged fire, with both sides taking hits. The green bead markers show Pinned status. Corporate Mercenaries never Fall Back, neither do they suffer an activation penalty when Pinned.


The LAVs advanced. I knew that I'd have to try and take them out.


I got my own AFVs moving to counter the threat. These were equipped with longer-ranged Primary Weapons Systems. Unhappily, my commander soon took a hit.


In the centre my battered Ashigaru were holding their own, and were dishing out a lot of hits on the Crabbies. The GSC production lines were soon gearing up for a mass canning session of its new BBQ Crab speciality.


Things were looking OK, but I was worried about the amount of damage my small army was taking. The Corporate Mercenaries are an expensive force, and my break point was a measly eight stands.


My fears were soon exacerbated when the AFV containing my Force Commander (who had stupidly hopped aboard for protection) was on the receiving end of a double six from HW fire, causing two damaging hits and I failed my saving throw, so Bye Bye Big Boss.


Despite previously being stealth-shielded, my Ninjas were soon exposed to the unwelcome attention of the Crabby Light Vehicles and Beasts. No good could come from this.


Gradually, my defenders began to fall. The loss of my Inspirational Force Commander left me low on command options and I began to fail activation tests with annoying frequency.


The amount of fire I was receiving from the Crabbies was leaving my troops Pinned and vulnerable to hand-to-hand assault. There could only be one outcome.


The Aliens were damaged, but had greater numbers. The coup de grace couldn't be too far away .....


................ and it soon arrived with the demise of the Ninjas.


With eight stands lost and an enemy stand inside the Objective area, my battle was over. The Crabbies had their revenge upon the unscrupulous and exploitative Galactic Seafood Corporation's latest evil business venture.

Well, this was a hugely fun game. My mechs performed pretty well in their first outing and I couldn't really complain about getting Broken, seeing as the army is so small. In hindsight, the Ninjas weren't a good choice, but I love the figures so much I hate to leave them behind. To be honest, I'd love an all-Ninja army, but they would just get shot to bits the moment they revealed themselves, even if the rules allowed such a thing (which they don't!).

Tuesday, 28 August 2018

A small part of Operation Bagration - a Chain of Command AAR

Operation Bagration was the USSR's 1944 Belorussian Strategic Offensive Operation, launched in June, with the aim of destroying the German Army Group Centre. Obviously, something that big is a bit ambitious for a game of CoC, but it provides a rationale for the game that Brian and I played out last Sunday at the club. The game was played in our preferred 15mm scale.

The Eastern Front was new ground for both of us but Brian had his Russians ready and I had another opportunity to field my late war Heer Zug.

The scenario we were playing was No. 6 - Attack On An Objective. Under the circumstances, it seemed appropriate that the Germans would be the defenders. The attackers, Brian's Soviets get 2D6 support points, with the Germans getting half, rounded down. Brian rolled a 7, which, applying the force ratings gave him a whopping 10 points. I had a measly 3 points. I just knew that Brian would be bringing some armour, so I chose a minefield, to block out one line of attack and a Panzerknacker team, possibly to counter his armour, but also because it would give me an extra MG42 to play with.

Here is the table after the patrol phase. I would be defending the fuel dump just behind the church in the village. I placed the minefield roughly in the centre of the table, which I hoped would prevent any frontal assaults.


Here is the table from the German viewpoint.


My plan was to deploy one squad in a fairly advanced position on my left, with the aim of occupying the farm near the minefield. This took longer than planned as the Soviet Wrath Of The Gods delayed my deployment.


I also had a squad on overwatch in the village church.


The arrival of the Beast From The East, a.k.a Brian's armoured support, a very large, nasty and worrying ISU-152. His infantry were deploying on his left, threatening in outflank my right. 


I had a squad deployed on my right and I used the MG42 team to good effect on a Russian squad which had occupied a cornfield in an advanced position on Brian's left flank. I really wanted to keep that squad out of the game, allowing me to move troops to enfilade the Russians from my left.


My right flank squad seemed to have things under control.


Unhappily, the ISU-152 was able to cause considerable damage to the church, forcing me to evacuate (no photos). Foolishly, I pushed the squad in the church forward into the area with the craters, in an attempt to outflank the Soviet advance. These suffered further casualties from the 152mm gun.


After first trying a long-range Ambush, which failed, I had to deploy my Panzerschreck team, pushing it forward until it was within a more effective range of the Beast From The East. The results were spectacular, with four net hits on the ISU's side armour, the Beast exploded. One thing less to worry about.


With the armour gone, I deployed my Panzerknacker team as an extra (and much needed) MG42 team. Its fire would be directed by my Zug's senior leader.


My plan to outflank the Soviets from the right continued, despite the weakness of one squad, reduced by the ISU-152 to a junior leader and a MG42 team.


My MG42s were causing the Soviets a lot of problems, mounting losses and plenty of shock, however, my own force was looking pretty threadbare too. Brian had a run of five game phases in a row, due to rolling a succession of four double sixes on his Command dice. This enabled him to push his troops right down my right flank, threatening to get around behind me and taking the objective, which was only lightly defended by this point.


However, as I much as I was losing troops and gaining shock. the Soviets were losing them faster, this was a race to see who would run out of men first.


I stopped taking photos, but I had the Squad which was reduced to an MG42 rout, later followed by both the Panzerknacker team and the right flank Squad being wiped out. My Force Morale was plummeting, but not as fast as Brian's. My 'Schreck team occupied one of Brian's JoPs and he also saw a Squad rout and have his last effective troops pinned. By that point, he was only rolling two Command dice, and was unable to remove any shock or end the turn (amazingly, we were still on Turn One, right to the end of the game). Finally, the game ended. With all his troops pinned and unable to do anything, the Soviet assault just petered out, but the cost to my defenders was huge. I'd won, but the price was so high that the Zug was no longer an effective force. 

So, perhaps this game illustrated the reality of Bagration rather well. Despite astronomiocal losses, the Red Army did manage to destroy Army Group Centre in Byelorussia. By the end of June 1944, the German 4th Army no longer existed and the 3rd Panzer Army was no longer an effective fighting force. Operation Bagration maked the beginning of the end for the Germans in the East. losing around 400,000 men and tanks and other vehicles that they were unable to replace. When you consider that, at the same time, in Western Europe the Germans were being expelled from France with huge losses. there was only really one end to the War possible.


Tuesday, 31 July 2018

Back from holiday - time for another Alien Squad Leader AAR

Sunday was my first wargaming activity since the beginning of July and it was a 200pt game of Alien Squad Leader with Owen at the club. Owen has recently brought his Human Imperial Strikeforce army up to 200pts, so I knew that I'd be facing that particular enemy. I decided to take my Alien Imperial army, but with a few modifications since its last outing, back in December last year. I decided to drop the power-armoured Elites and replace them with a Phase tank with an aiming device and a homing missile. I thought that the extra long-range firepower might come in handy.

The battle scenario we fought was Scenario 4 - Envelopment. This meant that Owen could reserve up to four stands to deploy from a flank and I had to defend an objective. As the defender, I set up the table. Most of the cover was on my side, understandably. I was unsure where the Human reinforcements would arrive, so I thought it might be useful to station some robotic forces on the left, where they could operate without any need for a command stand.


In the centre I had two urban areas. In the left-hand one I had my phase tank and some troops and a heavy weapon stand. The right-hand one was the objective I was defending.


I put my other Heavy Droid in the objective area, supported by another H/W stand, the Force Commander (Inspirational Leader) and some more infantry (behind the buildings).


I deployed more infantry on my right flank and had all my Trained Beasts and Tribal Auxiliaries, including a sub-commander behind the main lines.


Before long, Owen's Strikeforce advanced, taking advantage of its Sudden Strike rule.


I began to move troops up to counter, hoping that my infantry on the right flank hill could defend against the deployment point there.


Things began to go well for me. My Superior Energy Weapons were scoring plenty of hits on the power-armoured Humans. I was worried about the light vehicles emerging on my right flank, though.


I brought the phase tank into play, scoring a few hits, destroying a Human APC and pinning the Human heavy weapons team in the ruins across the table. My Heavy Droids were in play, but the Robotic infantry had nothing to do. I tried to being them closer to the action. 


My Trained Beasts despite a few stands getting shot up, crashed into hand-to-hand combat with an APC, ripping the vehicle to pieces with their claws and generally going on a rampage. This, for me was the turning point in the battle. The Beasts made mincemeat of stand after stand of Humans (who had already taken a few hits). I did lose the most successful set of Beasts in the end, but the rest of the Beasts went into a mad fury, ripping the light vehicles to pieces and forcing the Humans to breaking point.


Eventually I only needed to knock out one more Human stand to force Owen's troops to break. I managed to do this with some accurate fire from a H/W stand. Game over.

This was a tricky battle really, a lot less one-sided than it appears from the pictures. If Owen had succeeded in his plan of unloading his troopers and having them storm into the objective, I am sure that he could have won, but my Beasts really were on top form. In the end I only lost two stands of Beasts and one of Imperial Infantry.