Tuesday, 27 June 2017

Guess the next project

Here are a few photos of the start of my next project. Any guesses what it might be?


The terrain is made from blue dense polystyrene foam, mounted on 2mm MDF and the removable resin statue (from Copplestone Castings) is approximately 4.5cm tall. The statue is clearly of some kind of Lovecraftian Elder God.

The stone alignments are also made from blue foam. I cut into the foam to get the effect of stratified layers and cave entrances and also cut out the rough steps up to the main plateau. This was given a sparse layer of fine railway ballast and spray-painted in varying shades. The grey spray actually began to eat into the foam, but the effect of this looked pretty good, creating a weathered and aged effect. I then painted everything with washes of Vallejo acrylics, drybrushing to bring up the details and then flocked the rocky outcrop in a number of places.

I think that this looks pretty cool.

Monday, 26 June 2017

A return to Alien Squad Leader

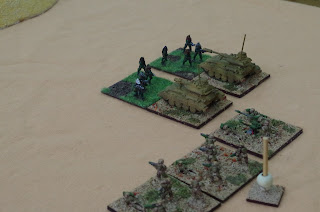
Having not played Alien Squad Leader for a while, yesterday was a chance to get the Human Imperial Army out again for a 200pt game against Richard's Alien Predatory Warhost.

The scenario was a Pitched Battle. Here is some background.

The Third Human Condominium has been fighting against the Canid Predators who had appeared in the sparsely populated but mineral rich Bowza system for several months, and the conflict had recently arrived on Bowza IV, a dry and inhospitable mining world. 

Following the fighting on Themis III, Brigadier Natasha Franklin and her strikeforce had been augmented by the addition of a number of units of Class C Line Droids. These robotic infantry units would better able to withstand the parched heat of Bowza IV, which is where Brig. Franklin's troops had been posted. Their role was to act as an advance force on the left flank of the main 3HC army on the planet. Elsewhere, combat had been heavy and both sides were currently regrouping, but Marshal Otto von Bizmüth, the 3HC planetary grand commander saw the broken territory to the north west of his lines as a possible line of advance. Franklin's troops were sent to explore. Before long, her scouts brought back reports of an advancing Canid battle host. The 3HC commander halted her force and constructed a hasty defensive line.


She had a weak right flank. This was a deliberate ploy, the idea being that the hated Xenos would concentrate their attacks here.


In the centre was a heavy Vanquisher Class Battle Mech. Before long, this would be reinforced by a couple of units of Line Droids.


The 3HC left wing contained the armoured threat of the fearsome Goliath MBTs. A stealth-equipped sniper was also deployed on this flank.


The lighter droids would act as a screen for the heavier giant Mech.


Stormtrooper infantry soon deployed along a low hill to protect Brig. Franklin's ACV.


The hated Canid barbarians began to swarm around the low hills in front of the 3HC right flank.


An artillery bombardment from orbital gun platforms soon caused the Canid centre to take casualties, pinning them in the cover of a rocky outcrop.


Unfortunately, the Canid tanks soon began to find their range and targeted the smaller droids, causing casualties. The giant Battle Mech was immune to their puny fire.


With no enemies visible on the 3HC left, the troops there remained on Overwatch, while the Xeno beasts advanced across the plateau in front of the 3HC right.


Their troops charged into combat with the 3HC light AFVs, and massed fire took out the Stormtrooper commander on this flank. This could have been a major blow, but Brig. Franklin's command range was still able to control her forces here.


The giant Vanquisher poured bolts of fire onto the Canid tanks, stopping them from advancing.


Aware that there was something in front of the 3HC left, but unable to see it, the Goliath MBT's swept around from the left, one advancing behind the Canid lines and destroying a tank, and the other swinging around behind the 3HC defensive positions to bring its guns to bear on the Canid foot troops.


It was clear that hand to hand assaults were the most successful Xeno tactic and the weak 3HC right was finally eliminated, with the emphasis switching to the central area dominated by the combat droids.


This area would soon become the make or break part of the battlefield.


Realising that the rocks on her left had been infiltrated by stealth Canids,  Brig. Franklin left sufficient troops on overwatch to counter any threat from this quarter. More and more indirect fire was called down from above, destroying the Canid centre and causing a mounting casualty list.


Eventually the aliens tried to break out from their hiding place but Stormtrooper fire, supported by the stealth Sniper soon defeated this threat, while the central battle raged on, with the giant Battle Mech finally being overwhelmed by the feral Xeno hordes.


However, this was still not enough to tilt the balance against the gallant Human troops, whose core forces remained relatively intact. Things looked hopeless for the aliens, who were forced to concede the day.


OK, so I won. Terrific, except that it was only after the battle that we realised that according to strict tournament rules. Rich had actually eliminated half of my elements in the final round, just before I eliminated 50% of his. However, it was obvious that with no armour he was unlikely to actually defeat my army, particularly as he had few stands of troops who were not carrying hits. So, therefore a moral victory to me. This was an excellent game, with my overwatch tactics effectively neutralising his infiltrated units, and vice versa. The thing that really swung the balance was the power of the Human indirect artillery barrages, coupled with the long range threat from my MBTs and the Battle Mech.


Monday, 19 June 2017

A HOTT afternoon at the club

Yesterday was hot in more than one way. The temperature was up around the 30C mark and the major thing at the club was a series of games of HOTT (Hordes Of The Things).

This was a chance for me to roll out my Averland-inspired army against some actual opponents. "How did things turn out?" you ask. "Not very well!" I reply.

I played four games, two against Nick's Orcs and two against John's Dwarves and Elvish chaps. In every case, I lost. Now, that could be down to inexperience, but bad dice rolls and impetuosity both played a part too. In the first game, I defended on a table that really didn't offer me much help. Neither did a truly bad initial deployment, which pretty much left my Knights in an endless series of rounds of combat with Nick's Orc Knights.


It didn't help much that I soon lost my Behemoth (the Da Vinci turtle tank), for no gains.


Eventually, I lost because I had taken too many casualties.

In the second game, I defended again, and once more deployed my forces in a formation that pretty much isolated my Knights. This time, though, I deployed Riders on the right flank and these at least had a useful role to play.


I lost my left flank Shooters and Blades early on and this really didn't help me at all, even though my Spears managed to push back Nick's scorpion Behemoth.
 
The real problem was that I'd got my general into a bad position defeating Nick's Knights, which led inevitably to his demise, and my defeat.


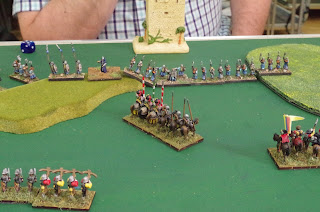
My next two games were against John's Elf/Dwarf alliance. Both times I tried to ensure that my deployment was more coherent and I decided to occupy the hills on my half of the table. John deployed in a solid line.


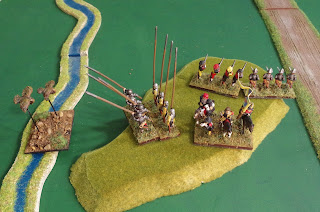
My Knights advanced along the road.


At this point, things seemed OK. I didn't expect that his Flyers, including an Aerial Hero would be such a problem. I soon lost one unit of Knights to John's Hero General, which showed up the flaw in my plans.


My Spears saw off an attack by Flyers


But the Aerial Hero (identified by the red counter) caused a realignment of my line.

With my Blades standing firm, the Shooters rejoined the battle line.


The Hero Flyer refused combat and left my Blades exposed as John's line advanced.


I threw caution to the winds and charged. Bad mistake. Although I won combats, all I was doing was forcing his troops to recoil. I couldn't destroy any troops. Eventually, I lost my remaining Knights, inevitably followed by my Hero General.


Game over.

We managed to squeeze in a final battle. We both deployed Magicians, and I brought in some Riders, dropping my Spears.


John was defending, and I was pretty much forced to advance, because he just sat still in front of his Stronghold.


My Riders managed to tie up his right flank for a long time, including his Magician.


I advanced and got into combat. This is where it all went wrong. I felt sure that I had an advantage but my dice rolls were truly appalling and my line got twisted out of shape and I was destroyed piecemeal. Happily, there are no pictures of this shameful collapse by the army of Averland.

So, I reckon that I have a lot to learn about how to win at HOTT.

Monday, 12 June 2017

HOTT - My Averland army's Stronghold

Having completed my Averland-themed Renaissance army, my remaining task was to build and paint a Stronghold. I knew the sort of thing I wanted, which was a nice vignette of a Late Mediaeval/Renaissance camp, with camp followers, tents and various odds and ends of stuff.

After the obligatory googling, I decided that the best option was to head over to the Magister Militum website and peruse the Baueda resin models. This was a good idea because I was able to buy two nice tents and a couple of sets of campfire pieces. Together with a few odds and ends I already had, I quickly put together what I think looks like a pretty decent Stronghold.


The Baueda campfire cooking sets came with four figures who, although they are actually mediaeval chaps look fine when painted up in Averland livery colours. I added a Magister Militum carter and horse that I had leftover from my SYW Sharp Practice imagi-nations project and four Peter Pig figures from their Pirate range, again surplus figures originally bought for my SYW imagi-nations project. These are also out of period, but with the right livery paint job, they look fine too. 

It had been pointed out to me that my Leonardo Da Vinci turtle tank would have problems being ranked next to other figures because of the overhang, so I've created a plinth to put the thing on when I need to brigade it with other elements. Here is how it looks;


It is just a standard 4cm square MDF base with a layer of foam glued on top, sealed and flocked. The tank just sits on it whenever necessary. Problem solved.

Another outing for my Nine Years' War armies

Following the last playtest of my modifications to the standard SP rules, I was keen to have another game with the revisions I'd made since the last battle. Luckily, young James at the club was happy to take the field commanding the Anglo-Dutch army while I, once again took control of the legions of Louis XIV. Both armies are made up from the excellent NYW 15mm figures from Lurkio.

James wasn't at all familiar with the Sharp Practice rules, but turned out to be a quick learner, as well as a pretty keen opponent, as he demonstrated as the battle unfolded. The table was laid out with few obstacles, because the main aim was to get large numbers of regiments into combat with the minimum of delay. The French were on the left and the Anglo-Dutch the right in this photo.


Both armies took advantage of the Moveable Deployment Point available to Dragoons (in my mods), which allowed one wing of the army to deploy 24" away from the main DP. James, especially, took advantage of my column march rule to get his Foot across the table as quickly as possible. Something else that we agreed should be allowed was for the senior general to be able to activate units assigned to his two subordinate commanders. This is a change that I'll certainly keep in my modifications for future use, because it gave the feel of a large-scale battle being commanded by a senior general or even a Marshal of France. However, on reflection, I think that this feature should be restricted to the senior leader only being able to use a maximum of half his activations for this purpose. After all, he still has to command his own troops.


The Anglo-Dutch deployed first, with Artillery, Dragoons and the Earl of Oxford's Horse taking a dominant position in the centre. The French were next, with the senior French general deploying his elite Gardes Françaises Foot and Régiment Du Roi Horse, plus two other foot regiments directly in front of the French camp (a.k.a the primary DP).


These foot regiments would take the brunt of the Anglo-Dutch assaults. The next deployment was the second Anglo-Dutch command, mainly Horse, supported by the Scottish First Regiment of Foot.


This was soon matched by a deployment on the French left, with Dragoons, Foot and Horse all emerging to counter the Anglo-Dutch Horse.


However, in the centre, the Anglo-Dutch began to advance against the French, with several regiments in column.


The French centre soon began to suffer casualties from the Anglo-Dutch artillery


The battle began to hot up pretty quickly as the two armies joined battle. Remember that in Sharp Practice, muskets are pretty ineffectual except at close range.

Note the complete absence of the French right wing. This was beginning to become a major worry.


Hurrah! The final French troops finally began to arrive, just as the battle in the centre started to become serious.


French musketry caused havoc with the advancing Allied columns, as the Earl of Oxford's Horse charged the Gardes Françaises.


However, the Horse came off worse in this fisticuffs and were effectively destroyed as a useful force. Over on the French left, a colossal cavalry battle was about to begin. This carried on for several rounds of combat with both sides becoming depleted, but eventually leaving the French with the advantage.


With both sides becoming fully-engaged shock and casualties mounted on both sides.


Finally, the French artillery took up position on a hill and began to fire upon the Danish foot on the Allied left.


Although they had taken fire, the Allied regiments in the centre looked strong.


On the left, the Régiment Du Roi rode to reinforce the weakened French Horse.


On the French right, musketry and artillery caused many casualties on the English First Foot Guards.


At this point, we ran out of time. The battle was pretty evenly balanced, with two lines of infantry, supported by artillery on hills, giving them a good line of sight across the battlefield. We discussed the way things had gone, noting that the Force Morale of the French was higher. In fact, the Allies were a fair bit closer to entering the Red Zone, but the French centre had been weakened to such an extent that it seemed unlikely that they could break through against the strong Allied defensive line, so we called it a draw.

My reflections on the revised modifications are that I think I have a workable way of using my NYW armies within the SP Lardie universe, which I think is a good thing. If nothing else, it means that I can sell my FOG:R rules at next year's club Tabletop Sale.

The mods I've written give a decent playable game, but you definitely need plenty of time to conclude a battle, which seems fair enough with so many units on the table. I'm happy with the result, which, at the end of the day, is all that really matters. I think that I'd never have been able to get this project resolved without the excellent SP rules, written by Richard Clarke. His simple to grasp and clever mechanisms have been easy to adjust for my larger armies. It really says exactly how good these rules are.