Monday, 15 April 2019

A big Sword and Spear AAR

This was something that Clive and I had been discussing for ages, and now it actually took place.  The scene was somewhere in the Roman East, probably in the province of Palaestina Secunda, around the time of the emperor Heraclius. 

Arabic forces, newly united under the banners of Islam are pushing north, and are opposed by a mostly infantry force of Romans, near a ruined temple complex from classical times.


The ground is dominated by the temple ruins, which are overlooked by a hill on one side and some rough ground on the other. The Romans have information that an Arab flank attack can be expected on their right.


The massed ranks of Arab foot make a daunting impression on the thinner Roman lines. The Roman troops are mainly medium foot and local skirmishers, with some armoured infantry and cavalry.


Before long, both sides are advancing towards the temple complex, with the Arab foot troops getting there faster. Medium foot and skirmishers don't suffer movement penalties in these ruins, but gain the benefit of being in cover for melee purposes.


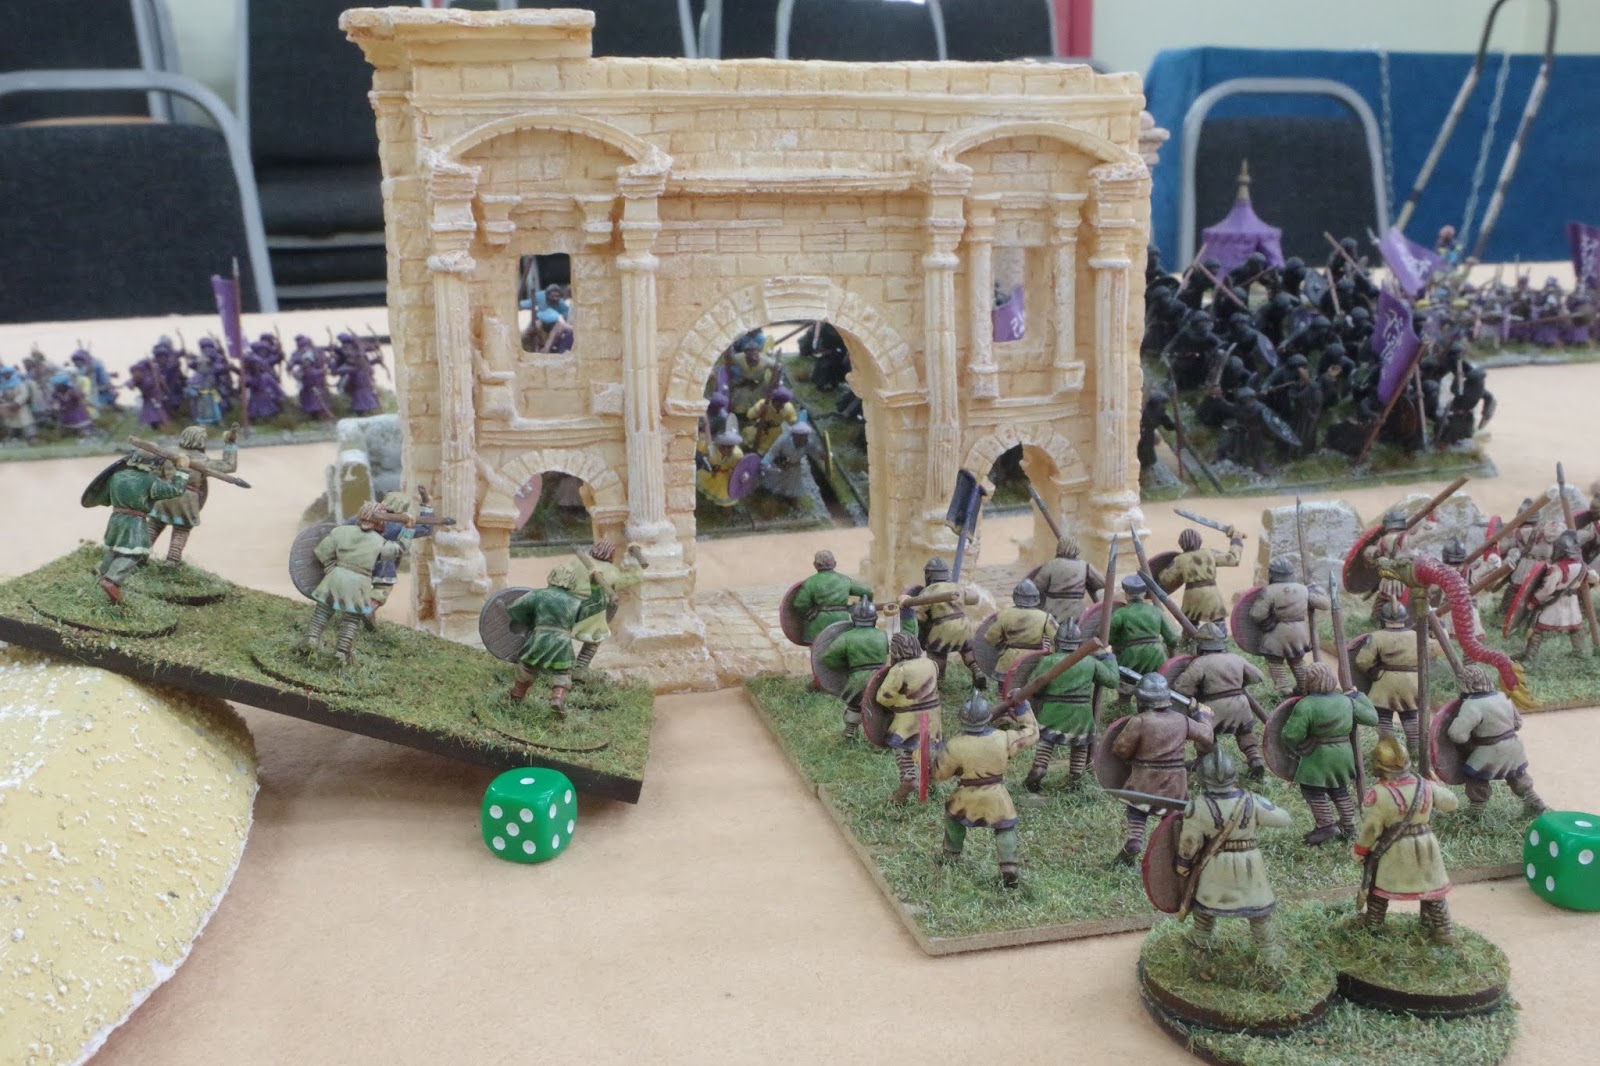

Arab cavalry emerge on the Roman right and a unit of armoured cavalry charge into combat.


To the left of the temple ruins, Arab cavalry charge the Roman medium archers on the hills.


An early success for the Romans as a unit of Arab foot breaks and routs. The Romans must capitalise on this to have any hope of throwing the Arab forces back.


On the Roman right, the armoured cavalry fail to destroy the Arab horse, but are in turn wiped out.


The disorganised Roman foot need to get into a defensive line to have any hope of surviving.


Disaster on the Roman left as a unit of skirmishing slingers is simply ridden over by the cream of the Arab cavalry, who are now able to exploit the gap made. More Roman armoured cavalry sweep round to engage the Arab horse archers who are firing on some Roman medium foot.


Things could go either way in the centre where the Arabs and Romans exchange archery fire.


The Romans manage to get a unit in position to take the Arab foot in the flank.


The elite Arab cavalry sweep round behind the Roman lines.


Two Roman units break and rout in the centre. Things are looking bleak. Surely that unit of javelin skirmishers cannot survive for much longer?


The Arab cavalry charge the archers on the hills, who manage to survive the onslaught.


On the right, the Romans have stabilised and formed a defensive line, which is being attacked by skirmishing mounted archers.


The skirmishing javelin troops are inevitably wiped out, causing a unit of Roman medium foot to flee. It looks all over for the Romans.


The Roman and Arab foot on the Roman centre-right clash, with one unit being wiped out in a single round of combat.


The remaining heavy foot take a lot of damage. It is obvious that the Romans have lost  the battle.


In the end, the result had a lot of historical resonance. The Arab armies that swept up into the Roman Levant were more than a match for their Roman opponents, leading to the loss of what had formerly been the Diocese of the East (until abolished by the administrative reforms of Justinian the Great), followed by the loss of Egypt. 

With the loss of these regions, the empire went into a decline. The process of Hellenisation, which had been formalised under Heraclius gathered pace, leading to the end of the Roman Empire of Late Antiquity. The smaller empire that survived was weakened, but still wealthy and survived to expand again in later centuries. This is the empire that we know today as the Byzantine, although its inhabitants always considered themselves to be Romans and the emperor was referred to as Basileus and Autokrator, rather than Augustus Imperator.

The empire survived and prospered, being the most powerful state in Early Mediaeval Europe, but declined in the 11th century and suffered the ignominy of being sacked by Latin Crusaders in 1204, a blow from which it never recovered, although the capital Constantinople, the seat of the Basileus until the end was not finally lost to the Ottomans until 1453.

Thursday, 11 April 2019

And I was supposed to be painting more Condottieri troops ..............

Well, that was the plan, but then I decided to finally use my Late Romans for a game of Sword and Spear, but realised that I had 40 foot figures half-finished and that I'd need them to bulk out my army.


Anyway, I've spent three days finishing off a load of Gripping Beast plastic figures that were basically either undercoated or half-painted. Not as bad as if I was starting from scratch, but still a fairly big task. The first eight are above. To be honest, I am not that sure about the green/lilac colour scheme I chose, but it was too late to go back and change it, so it will have to do. It came from a picture of a mosaic I saw somewhere so it does have the merit of being based in reality.

In total, what I finished were 24 unarmoured Romans, all with either spears or swords, plus a couple of standard bearers and a bucinator for variety, and 16  Dark Ages warriors, some with head swaps to represent some poorly-equipped limitanei or perhaps just foederati. I know that there is a mistaken belief that the limitanei were low-quality troops, but this is not actually the case. However, I wanted to have at least one unit that could represent a lower standard of troops, so that my army wouldn't just be powerful units of comitatenses

For Sword and Spear, I will be deploying a standard unit on a 12 x 6 cm base, with two such bases stacked to represent a Large Unit.

I have also decided to deploy some of my existing unarmoured units with a rank of spearmen in front and archers behind, to represent melee troops with a educed shooting capability.

Anyway, here are the rest of the 40 figures that I have just finished. I think that I like these more than the first lot. Note that these are all glued as groups of 8 to a 12 x 6 base., whereas my original Roman troops (for Saga) are on individual bases but placed on movement trays. This allows me to treat those ones as multiple purpose figures.

First the limitanei, both separately and as a single unit;


And here are the rest. I wanted these to have a more uniform appearance, although there are differences in the shades of red used for the trim on the tunics. I see these as maybe being troops from the auxilia palatina, first recruited by Constantine I and the oldest of which were recruited from Gallic and Germanic tribes. The names of many of these units were listed in the 5th century Notitia Dignitatum, which is an excellent source for Later Roman shield designs.


Friday, 5 April 2019

The Condotta is recruiting Swiss troops now

I have always wanted an army with Swiss pikes in it, so now I have the chance. There is something about the Swiss that appealed to me when reading about the Italian Wars. Not as flashy as their Landsknecht imitators but brutal and efficient, possibly the most feared opponents of all on the battlefields of Renaissance Italy.

I was going to work on some crossbowmen next, but the allure of the Swiss Pikes, plus the fact that I could get away from the red and white major theme of my mercenary army won out when push came to shove.

Once again, these are all Perry plastics from the European Mercenaries 1450-1500 set.

I chose to paint my Swiss in the yellow and black of the Canton of Uri, because I love the colour scheme, and it also echoes the Warhammer Averland army that I used to own a long time ago. Here are the 10 pikemen and a musician that I completed this week;


The musician is a horn blower, and the horn was taken from the Gripping Beast Dark Ages Infantry set. It fits perfectly.

The reason I only painted 11 figures is because I already had a standard bearer/leader figure. Here is the finished 12-man unit;


Here they are as a 4 x 3 block of figures, which seems a reasonable way of fielding them in a Lion Rampant force.


I am really very happy with the way that these have come out. They are quite well-armoured and to my eye represent the tough and uncompromising Swiss mercenaries who dominated the early period of the Italian Wars and earlier conflicts. Of course, I can also use them as an Averland contingent in an Empire army for Dragon Rampant against the foul Orcish green hordes or other enemies.

Monday, 1 April 2019

To See Again Such Loss - a full weekend of Sharp Practice.

So, once again down to BIG for a fun-packed weekend of 28mm Sharp Practice action, this time set in the Peninsular War. As with many other BIG Sharp Practice weekends, this was organised and orchestrated by David Hunter, whose enthusiasm is enormous and who really keeps the narrative thrust of these gaming sessions alive.

We were limited to 55pts (or thereabouts) per player per game, with two players on each side. We were allowed to vary the composition of our forces from game to game, with the proviso that we kept the same force commander throughout.

I took all of my available Anglo-Portuguese troops, thinking that I might need to vary things around a bit, depending on the table being played over. As it panned out, this was a good idea.

My initial force was as follows;

A formation of 3 groups of 8 British centre company infantry from the 61st Foot, led by Captain Nigel Molesworth (Status III), who was accompanied by a drummer (a musician in Sharp Practice terms) and two Status I leaders, Sergeants Timothy Peason and "Scrumpy" Jack Spratt. (34pts)

One group of 6 men from the 95th Rifles led by Lt Barnaby Thorne (status II)  and Sgt Jasper Hyde (Status I)  (21pts)

For subsequent games, I switched out the Rifles and one British  line sergeant, freeing up 24 points. 

My first replacement was two groups of 6 Portuguese Rifles (as a formation) from the Atiradores company of the 3rd Caçadores, led by Lt Horacio Bacalhau (Status II), costing 24pts.

I amended this for the two Sunday games by reducing Lt Bacalhau to Status I and adding another Status I leader in the shape of Sgt Manoel Cataplana, allowing me to field the Atiradores as two separate groups, giving me extra flexibility.

This last version was a far better balanced force.

The theme of the weekend was the French pursuing Wellington's retreating forces (mainly British, but featuring some Spanish and Portuguese troops, plus some Royal Navy sailors and Marines), with the Anglo-Portuguese conducting a fighting retreat, centred on the town of Puenta des Pantalones. 

The French had the best of the first day, leaving the Allies a lot to do on the Sunday, but, when the last musket was fired and the smoke cleared (a.k.a. when the last dice were rolled and the cotton wool removed), the weekend ended up with a victory for the Allies. As Sir Arthur himself almost certainly never actually said, it was a damn close-run thing.

My personal favourite thing was defeating a worryingly determined and quite large French attack column (which never managed to activate Pas de Charge) with my Portuguese light troops and my thin red line of the 61st for no losses whatsoever, in the final game, but it was also good to see off a galloping charge by two groups of French lancers in an earlier game, even though it did cause me a fair bit of damage. Still, I did capture the Lancers' commanding officer.

Anyway, lots of photos, so feast your eyes on some great terrain and lovely-looking armies.